Authentication via your own OAuth 2.0 provider
How it works
You can add user authorization through your social network using the OAuth 2.0 protocol. To enable a button for your social network on the authorization widget, specify the provider details in Publisher Account.
You can add user authorization through your social network using the OAuth 2.0 protocol. To enable a button for your social network on the authorization widget, specify the provider details in your account.
Authentication flow
  %%{init: {'themeVariables': { 'noteBkgColor': 'transparent', 'noteBorderColor': 'transparent', 'labelBoxBkgColor': 'transparent', 'labelBoxBorderColor': '#8ADCEC', 'altSectionBkgColor': 'transparent' }}}%%
sequenceDiagram
  participant U as User
  participant A as Application
  participant XL as Xsolla Login server
  participant P as Your OAuth2 server
  U->>A: Clicks login button
  A->>XL: Sends request to authenticate via social network
  XL->>P: Requests user authorization
  alt Authorization code received
    P-->>XL: Sends authorization code to https://login.xsolla.com/api/social/callback
  else Authorization URL unavailable
    P-->>XL: Sends “Dependency service unavailable” error (010-035)
  end
  XL->>P: Exchanges authorization code for access token
  alt Access token received
    P-->>XL: Sends access token
  else Token exchange failure
    P-->>XL: Sends “Error occurred while getting OAuth 2.0 Access token” error (010-015)
  end
  XL->>P: Requests user data
  alt User data received
    P-->>XL: Sends user data
  else User data retrieval failure
    P-->>XL: Sends “Failed to get social profile” error (010-036)
  end
  XL-->>A: Returns user’s JWT
  A-->>U: Completes authentication
First-time login flow
The user clicks the Log in with [Your Platform] button on the authorization widget.
The user is redirected to your login or consent page (the address is specified in the Authorization URL field in the settings).
The user enters credentials and approves access on your system.
Your system redirects the user back to Xsolla with an authorization code.
Xsolla contacts your system to exchange the code for an access token (the address is specified in the Token URL field in the settings).
Xsolla retrieves the user’s profile data (ID, email, etc.) from your system using the access token (the address is specified in the Your info URL field in the settings).
The user is logged in and returned to the application as an authenticated Xsolla user.
Returning user flow
The user clicks the Log in with [Your Platform] button on the authorization widget.
The user is redirected to your login or consent page (the address is specified in the Authorization URL field in the settings).
Your system recognizes the active session and skips the credentials screen. If your system requires re-authentication on every visit, the user will see the login form again.
Your system checks whether the user has previously granted the requested scopes. If consent was already given and hasn’t been revoked, the consent screen is skipped.
Your system redirects the user back to Xsolla with an authorization code.
Xsolla contacts your system to exchange the code for an access token (the address is specified in the Token URL field in the settings).
Xsolla retrieves the user’s current profile data from your system using the access token (the address is specified in the Your info URL field in the settings).
The user is logged in and returned to the application. The full flow typically completes in a few seconds without any visible interaction required from the user.
Failed authentication
Authorization URL unavailable (error 010-035)
The user clicks the Log in with [Your Platform] button on the authorization widget.
The user is redirected to your login or consent page (the address is specified in the Authorization URL field in the settings).
The partner OAuth2 server is unavailable and returns an error.
Xsolla Login receives a “Dependency service unavailable” error (010-035) and does not proceed.
Token exchange failure (error 010-015)
The user clicks the Log in with [Your Platform] button on the authorization widget.
The user is redirected to your login or consent page (the address is specified in the Authorization URL field in the settings).
The user enters credentials and approves access on your system.
Your system redirects the user back to Xsolla with an authorization code.
Xsolla contacts your system to exchange the code for an access token (the address is specified in the Token URL field in the settings).
The partner OAuth2 server fails to issue a token and returns an error.
Xsolla Login receives an “Error occurred while getting OAuth 2.0 Access token” error (010-015) and does not proceed.
User data retrieval failure (error 010-036)
The user clicks the Log in with [Your Platform] button on the authorization widget.
The user is redirected to your login or consent page (the address is specified in the Authorization URL field in the settings).
The user enters credentials and approves access on your system.
Your system redirects the user back to Xsolla with an authorization code.
Xsolla contacts your system to exchange the code for an access token (the address is specified in the Token URL field in the settings).
Xsolla retrieves the user’s profile data (ID, email, etc.) from your system using the access token (the address is specified in the Your info URL field in the settings).
The partner OAuth2 server fails to return user data.
Xsolla Login receives a “Failed to get social profile” error (010-036) and does not proceed.
How to get it
To enable authorization via OAuth 2.0:
- Add
https://login.xsolla.com/api/social/oauth2/callbackas the allowed redirect URI in your own OAuth 2.0 provider’s settings to prevent authorization failures.
- Open your project in Publisher Account and go to the Players > Login section.
- Open the project in your account and go to the Other tools > Login section.
- Open the project in your account and go to the Players > Login section.
- Open the project in your account and go to the Players > Login section.
- Open the project in your account and go to the Players > Login section.
Click Configure in the panel of a classic login option.
Go to the Authentication block and select the OAuth 2.0 login connection.
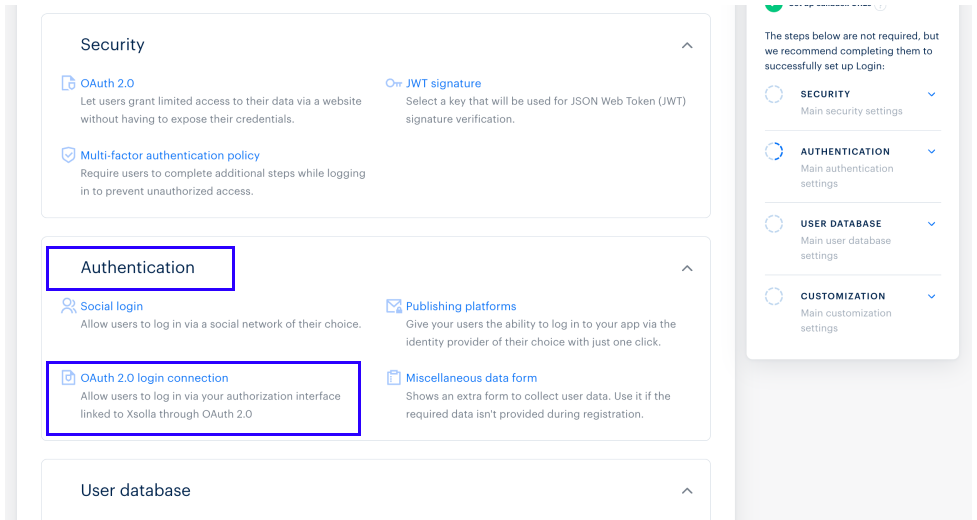
- Fill in the following fields:
- Authorization name — integration name. Used for identification in Publisher Account. It can contain digits, Latin letters, hyphens, and underscores without spaces, with a maximum length of 100 characters.
- Authorization name — integration name. Used for identification in your account. It can contain digits, Latin letters, hyphens, and underscores without spaces, with a maximum length of 100 characters.
Authorization URL — URL of the method used for user authentication.
Token URL — URL of the method used for obtaining an access token.
Your info URL — URL of the method used for obtaining the user’s profile data (such as ID and email) using the access token.
Client ID — unique identifier of the client on the authorization server. It can contain digits, Latin letters, hyphens, and underscores without spaces, with a maximum length of 255 characters.
Client secret key — a unique ID generated by your authorization system. It can contain digits, Latin letters, hyphens, and underscores without spaces, with a length of 8-255.
Permission scope — the list of access rights that your system requests from the user during authorization (e.g.,
openid,profile,email).
Set up the Key name map:
Provide the key name for the email address in your system (optional).
Provide the key name for the user identifier in your system.
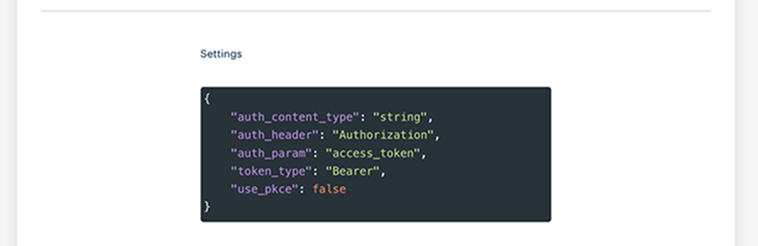
In the Settings section, In the Settings section, specify additional authentication settings. (optional):
auth_content_type— the value of theContent-Typeheader.auth_header— the header that passes the authorization token when requesting user data (authorization in the header).auth_param— the name of the query parameter that passes the authorization token when requesting user data (authorization in the parameter).token_type— token type. Possible values:Bearer,OAuth.use_pkce— a flag indicating the use of the PKCE (Proof Key for Code Exchange) technology during authorization. It is highly recommended to activate this to ensure the highest security standard.
NoteKey names should start with$., for example,$.response[0].emailand$.response[0].id.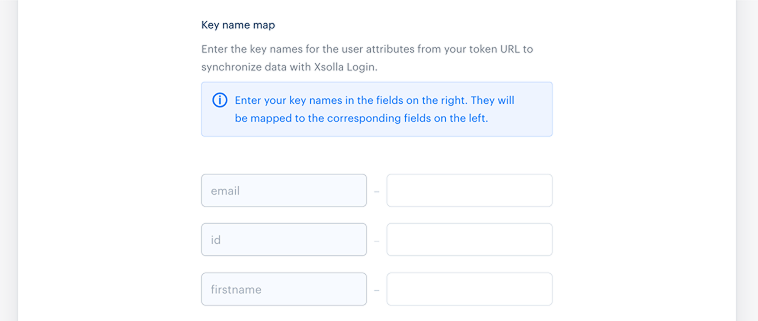
If you use the integration via the authorization widget, set up сustomization:
Specify the Authorization button name. Maximum length — 30 characters.
Upload your logo. Recommended size: 24 × 24px. Supported formats: JPG, PNG and SVG.
Set the authorization button color.
Click Save changes.
- If you are using integration through the Login API methods, configure the transmission of your provider ID in the
provider_namein the following format:"<authorization_name>-<publisher_id>", where<authorization_name>— is the integration name you specified in the provider settings, аnd<publisher_id>— is the ID of your project in Publisher Account. Depending on the chosen authorization protocol, use the following methods to pass theprovider_nameparameter:
- If you are using integration through the Login API methods, configure the transmission of your provider ID in the
provider_namein the following format:"<authorization_name>-<publisher_id>", where<authorization_name>— is the integration name you specified in the provider settings, аnd<publisher_id>— is the ID of the project in your account. Depending on the chosen authorization protocol, use the following methods to pass theprovider_nameparameter:
Found a typo or other text error? Select the text and press Ctrl+Enter.
