Integration with Zendesk Chat
How it works
external_id parameter that is used on Zendesk’s side corresponds with the user ID in your Login project. If you identified a visitor as an Xsolla Login user, you will have the ability to manage their account via Publisher Account.external_id parameter that is used on Zendesk’s side corresponds with the user ID in your Login project. If you identified a visitor as an Xsolla Login user, you will have the ability to manage their account via your account.external_id parameter that is used on Zendesk’s side corresponds with the user ID in your Login project. If you identified a visitor as an Xsolla Login user, you will have the ability to manage their account via your account.external_id parameter that is used on Zendesk’s side corresponds with the user ID in your Login project. If you identified a visitor as an Xsolla Login user, you will have the ability to manage their account via your account.external_id parameter that is used on Zendesk’s side corresponds with the user ID in your Login project. If you identified a visitor as an Xsolla Login user, you will have the ability to manage their account via your account.Who can use it
Partners who have already integrated Login and have a Zendesk Chat account.
How to get it
To link a visitor:
- Authenticate a user in your Login project by one of the following requests:
- Generate a Zendesk JWT.
- Authenticate a visitor into Zendesk Chat.
Generating Zendesk JWT
The Zendesk JWT is based on a token received from the Xsolla Login server when authenticating a user in your Login project. You can store a token in cookie files on a required domain and add it to a HTTP request when generating a Zendesk JWT.
You can also set your own format of a response when implementing the call.
Below is a simplified version of a Zendesk JWT getting flow based on Go. The full Zendesk JWT generation code is found on GitHub.
Install the following packages before generating a JWT:
- curl
1go get github.com/dgrijalva/jwt-go
2go get github.com/rs/cors
To get a Zendesk JWT:
Validating JWT
- go
 1cookie, err := r.Cookie("token")
 2
 3token, err := jwt.Parse(cookie.Value, func(token *jwt.Token) (interface{}, error) {
 4  if _, ok := token.Method.(*jwt.SigningMethodHMAC); !ok {
 5    return nil, errors.New("unexpected signing method")
 6  }
 7  return []byte(loginSecret), nil
 8})
 9
10var loginClaims jwt.MapClaims
11var ok bool
12if loginClaims, ok = token.Claims.(jwt.MapClaims); !ok || !token.Valid {
13  writeErrorResponse(w, "00-01", "Token is invalid", http.StatusUnauthorized)
14  return
15}
Decoding JWT
Decode a JWT and extract values of the following claims from it:email— an email addresssub— user ID
- go
1var sub, email string
2sub, _ = loginClaims["sub"].(string)
3email, _ = loginClaims["email"].(string)
Forming list of JWT claims
Form a list of claims for a JWT. You can find descriptions of every claim in- go
1zendeskClaims := jwt.MapClaims{}
2zendeskClaims["name"] = email
3zendeskClaims["email"] = email
4zendeskClaims["external_id"] = sub
5zendeskClaims["iat"] = time.Now().UTC().Unix()
Signing JWT
Sign a token with a secret key of your Zendesk Chat account. You can find it in- go
1zendeskToken := jwt.NewWithClaims(jwt.SigningMethodHS256, zendeskClaims)
2zendeskTokenString, _ := zendeskToken.SignedString([]byte(zendeskSecret))
Authenticating visitor into Zendesk Chat
This allows adding the following visitor data to Zendesk Chat:
- name
- email address
- identifier
Use a received Zendesk JWT to authenticate a visitor into Zendesk Chat. Initialize the Web SDK with the
- javascript
 1zChat.init({
 2  account_key: ACCOUNT_KEY,
 3  authentication: {
 4    jwt_fn: function(callback) {
 5      fetch('https://example.com:8001/generate/token', {
 6        credentials: "include"
 7      }).then(function(res) {
 8        res.text().then(function(body) {
 9          const jwt = JSON.parse(body).token;
10          callback(jwt)
11        });
12      });
13    }
14  }
15});
The visitor authentication flow is described in the instruction and Web SDK.
Working with visitor
After successful authentication, a visitor will be displayed in your Zendesk Chat account >
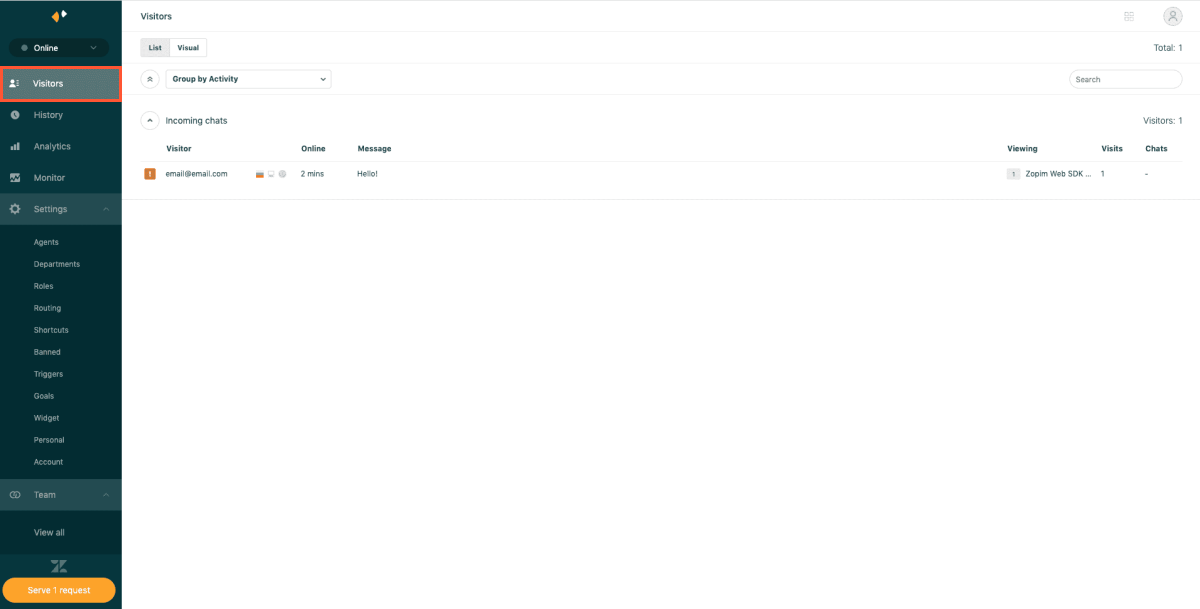
For working with the
- Get visitor data.
- Visitor is linked to your Login project.
Getting visitor data
To execute the
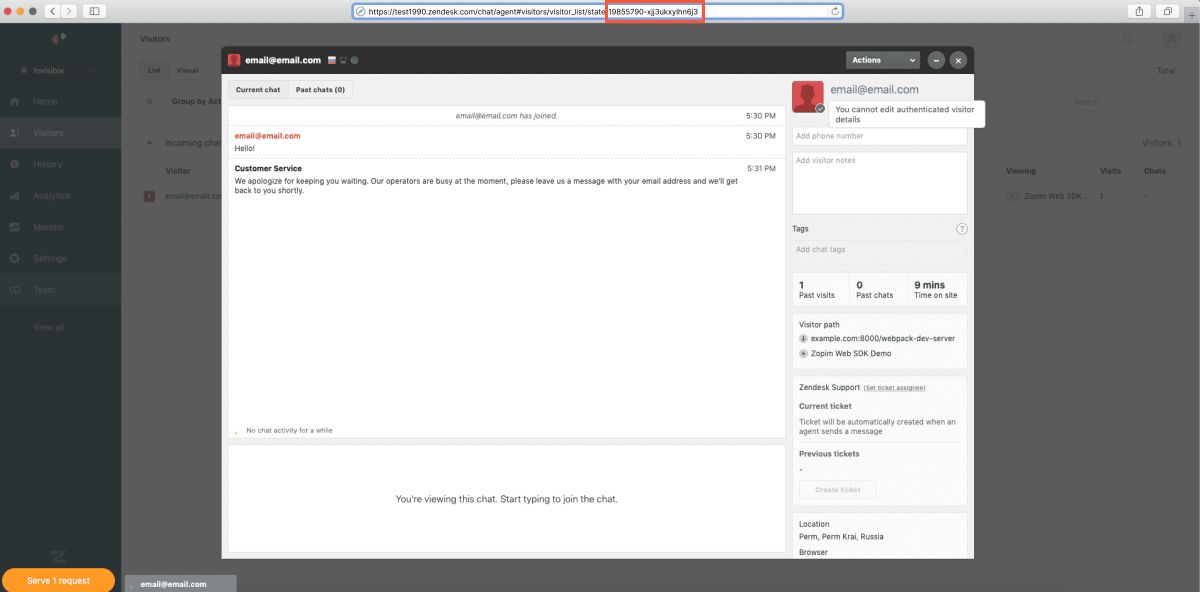
Example of the
http
- http
- curl
1GET https://www.zopim.com/api/v2/visitors/9855790-xjj3u5xPWhW1Fv HTTP/1.1
2Authorization: Bearer <token>
1curl --request GET \
2  --url https://www.zopim.com/api/v2/visitors/9855790-xjj3u5xPWhW1Fv \
3  --header 'authorization: bearer_token'
Example of the response:
http
- http
- json
 1HTTP/1.1 200 OK
 2Content-Type: application/json
 3
 4{
 5  "banned": false,
 6  "notes": "",
 7  "id": "9855790.xjj3ukxyIhn6j3",
 8  "email": "[email protected]",
 9  "phone": "",
10  "created": 1586950554,
11  "name": "[email protected]",
12  "external_id": "82cd5e0c-c3ff-11e9-b199-c1e5fc81c37f"
13}
 1{
 2  "banned": false,
 3  "notes": "",
 4  "id": "9855790.xjj3ukxyIhn6j3",
 5  "email": "[email protected]",
 6  "phone": "",
 7  "created": 1586950554,
 8  "name": "[email protected]",
 9  "external_id": "82cd5e0c-c3ff-11e9-b199-c1e5fc81c37f"
10}
Checking visitor linking to Login project
external_id parameter in received data will correspond with user ID. You can find user ID in Publisher Account > your Login Project > Users > Username/ID.external_id parameter in received data will correspond with user ID. You can find user ID in the account > your Login Project > Users > Username/ID.external_id parameter in received data will correspond with user ID. You can find user ID in the account > your Login Project > Users > Username/ID.external_id parameter in received data will correspond with user ID. You can find user ID in the account > your Login Project > Users > Username/ID.external_id parameter in received data will correspond with user ID. You can find user ID in the account > your Login Project > Users > Username/ID.Found a typo or other text error? Select the text and press Ctrl+Enter.
