Xsolla Bot in Discord setup walkthrough
Overview
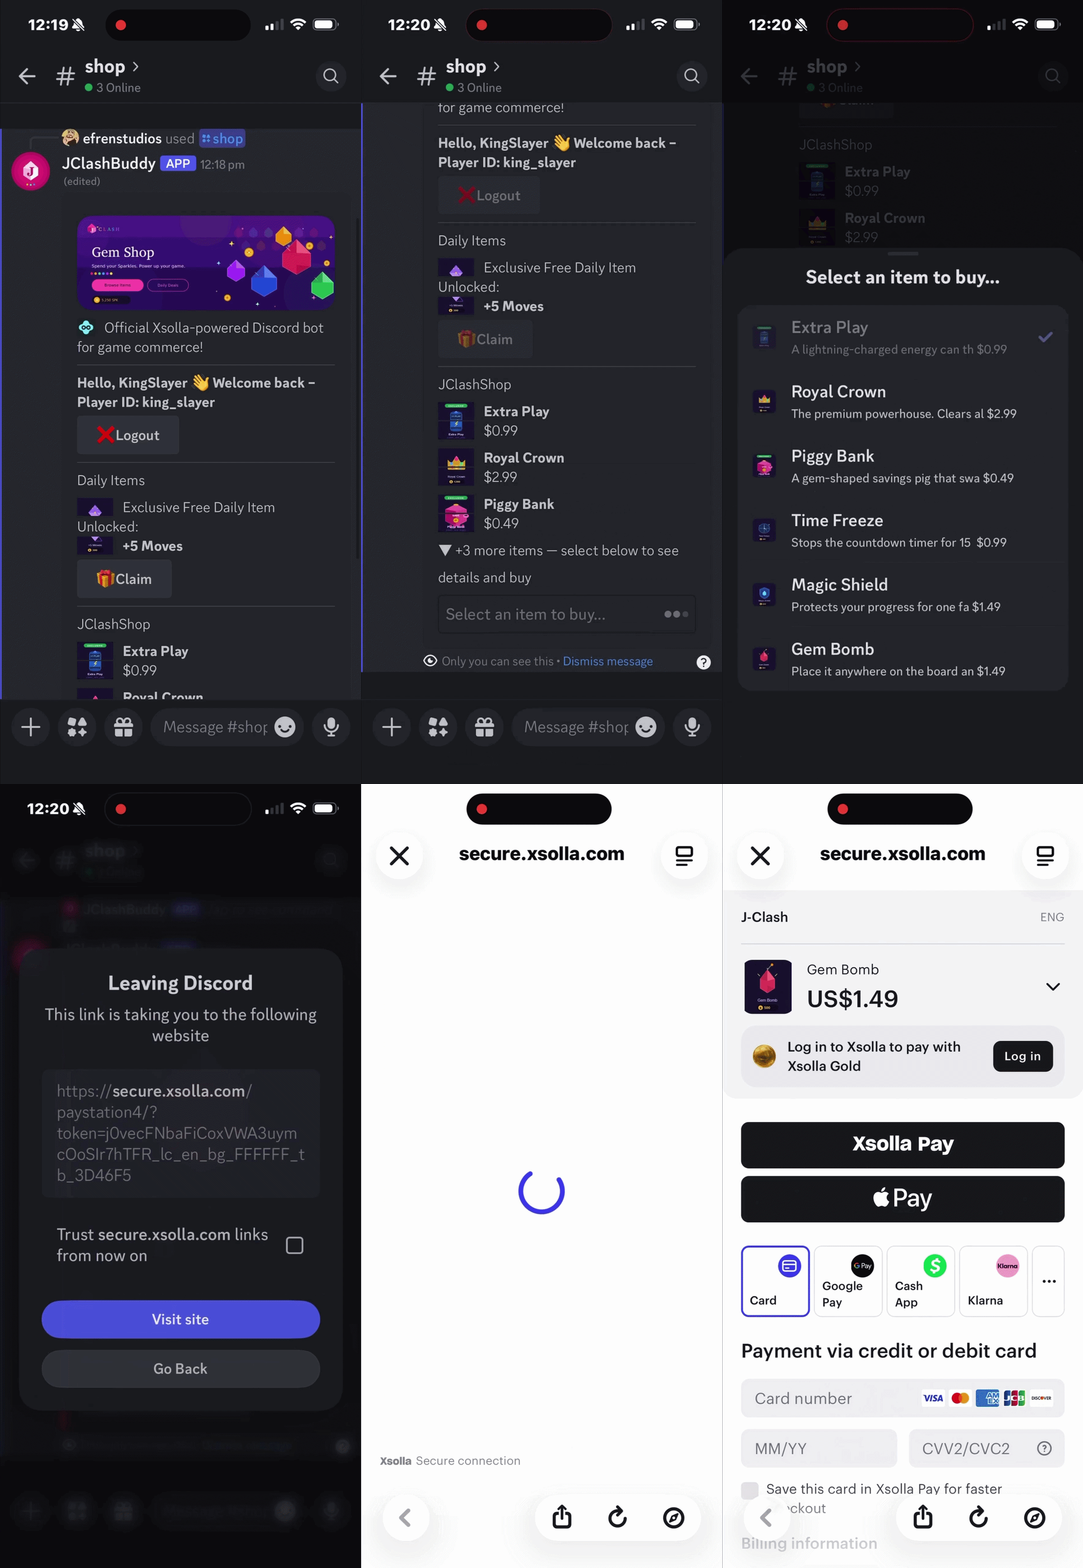
Discord is one of the primary spaces where gaming communities spend time between sessions, coordinating, sharing updates, and staying connected. The Xsolla Bot in Discord brings your storefront directly into your server so players can browse items, claim rewards, and complete purchases through a slash command without leaving Discord.
This guide walks through a complete self-service setup: creating a bot application in the Discord developer portal, connecting it to your Xsolla Publisher Account, configuring your store and rewards, and testing the player-facing experience end to end.
This guide walks through a complete self-service setup: creating a bot application in the Discord developer portal, connecting it to your Xsolla Business Account, configuring your store and rewards, and testing the player-facing experience end to end.
This guide walks through a complete self-service setup: creating a bot application in the Discord developer portal, connecting it to your account for mobile games, configuring your store and rewards, and testing the player-facing experience end to end.
By the end of this guide, you will have a working Xsolla Bot in your Discord server. Players will be able to open a storefront with the /shop command, log in with their in-game player ID, and complete purchases through the Xsolla payment UI.
The guide uses a sample project called J-Clash for reference, but the steps apply to any project with an active items catalog.
Prerequisites
On the Xsolla side, you need to have the following:
- a signed Licensing agreement with Xsolla
- a configured items catalog with virtual items already created and marked as available
On the Discord side, you need to have access to the Discord developers portal to create the bot application (optional).
Available purchase flows
The Xsolla Bot in Discord supports two purchase flows. Understanding the difference will help you decide which one fits your project:
- Direct purchase. When a player selects an item, the Xsolla payment UI launches immediately with the item ready for checkout. There are no intermediate steps or redirects. This is the default flow and the one covered in this guide.
- Web Shop flow. When a player selects an item, your Web Shop opens with the user login and item pre-filled, then the Xsolla payment UI launches. This flow requires a Web Shop already set up and a Web Shop URL configured in the bot settings. Refer to these instructions for detailed information.
Setup steps
Step 1. Create Discord bot application
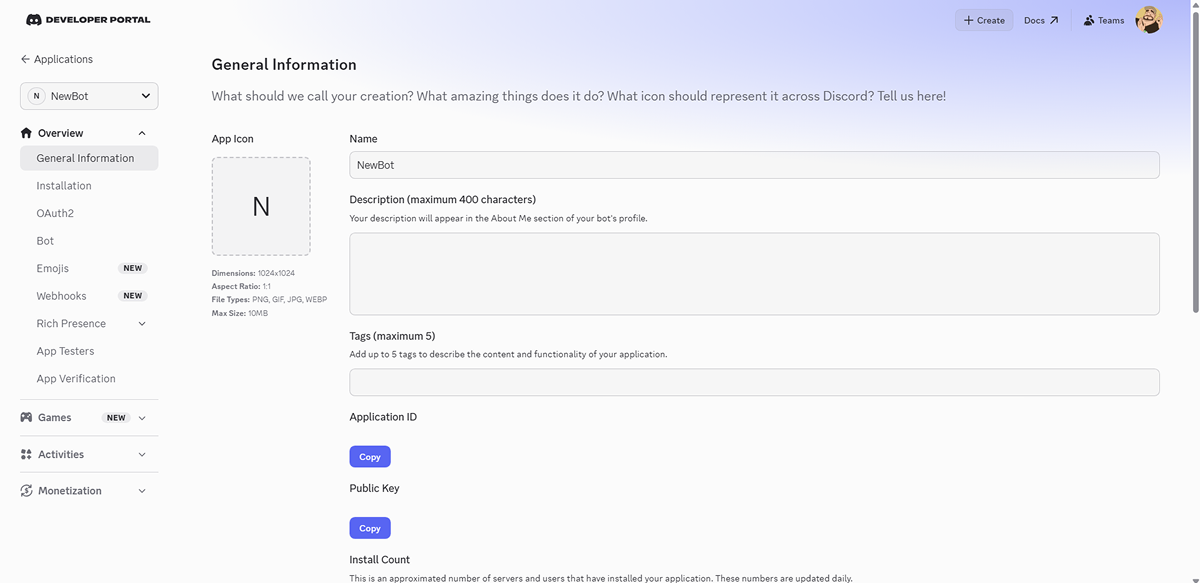
- Go to the Discord developers portal and click New Application.
- Give the bot a name that reflects your game or brand. For this demo, we are using NewBot.
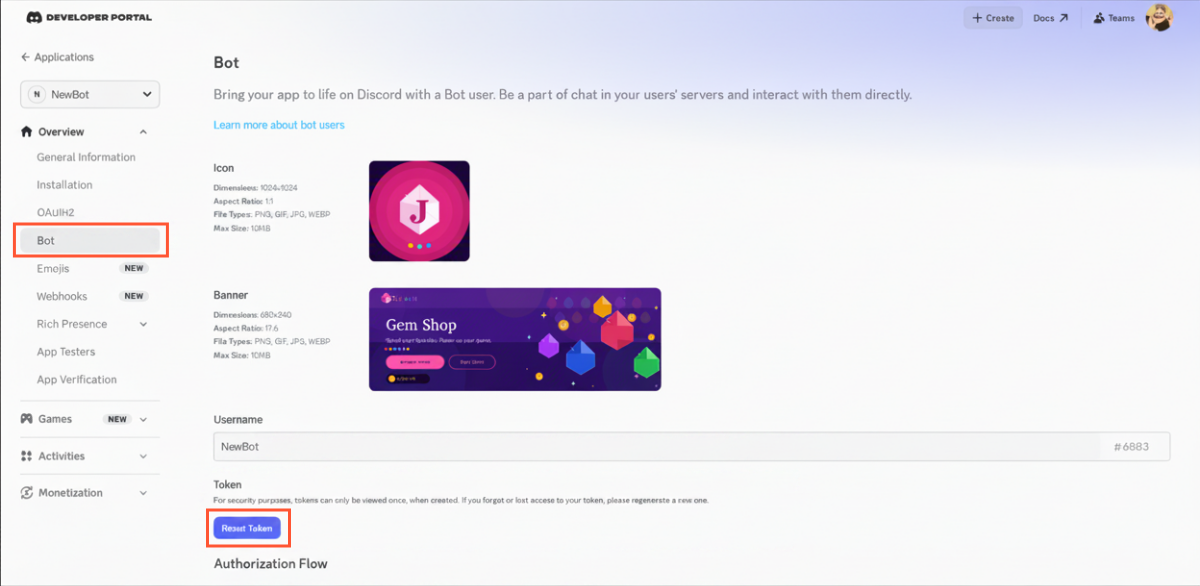
- Once the application is created, open the Bot section. This is a good point to upload an icon and a banner, as both will be visible to players when the bot is active inside Discord.
- Get your bot token that links your Discord application to the Xsolla configuration:
- In the Bot section, click Reset Token. This is the only way Discord lets you view the token.
- Copy the token immediately and store it somewhere safe. You will need it in Step 2.
Step 2. Configure bot in Publisher Account
Step 2. Configure bot in account
- In your project in Publisher Account, go to the Storefront > Xsolla Bot in Discord section.
- In your project in the account, go to the Storefront > Xsolla Bot in Discord section.
- In your project in the account, go to the Storefront > Xsolla Bot in Discord section.
- In your project in the account, go to the Storefront > Xsolla Bot in Discord section.
- In your project in the account for mobile games, go to the Monetization > Xsolla Bot in Discord section.
- Click Create. There is no waiting period, the configuration UI is available immediately.
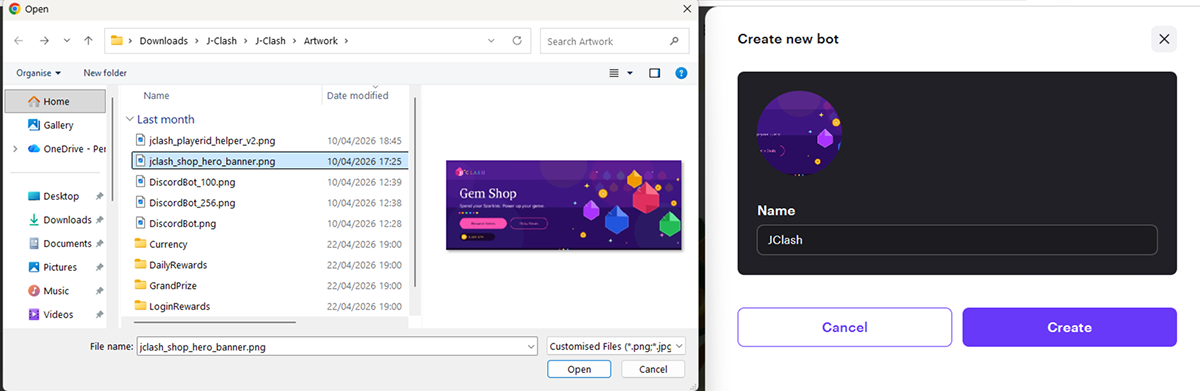
- Name your bot and, optionally, add a logo.
- Click Create.
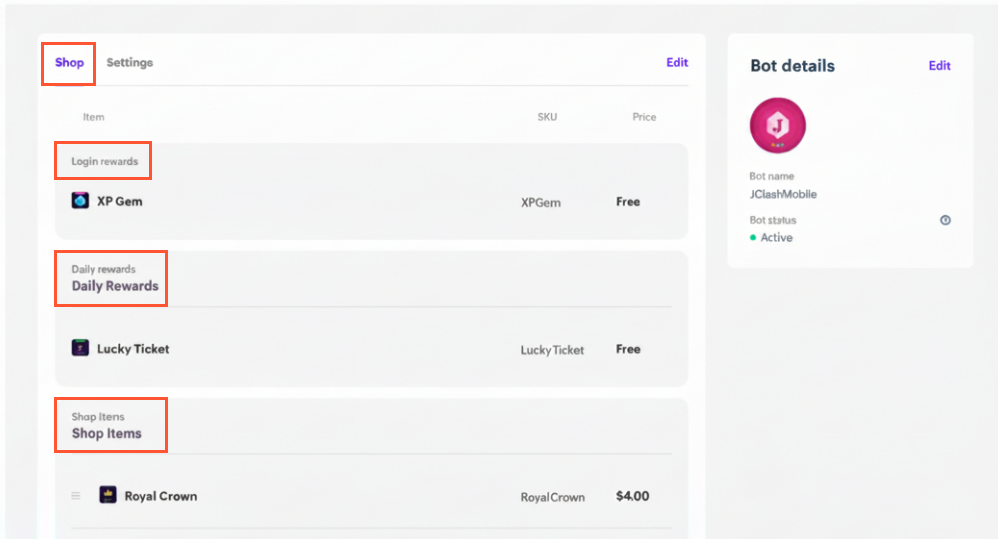
- Open the Shop section to configure the following:
- Login rewards — items awarded when a player logs in for the first time.
- Daily rewards — items awarded on a daily basis.
- Shop items — items available for purchase.
The Daily rewards and Shop items sections require a section title. These fields can’t be left empty.
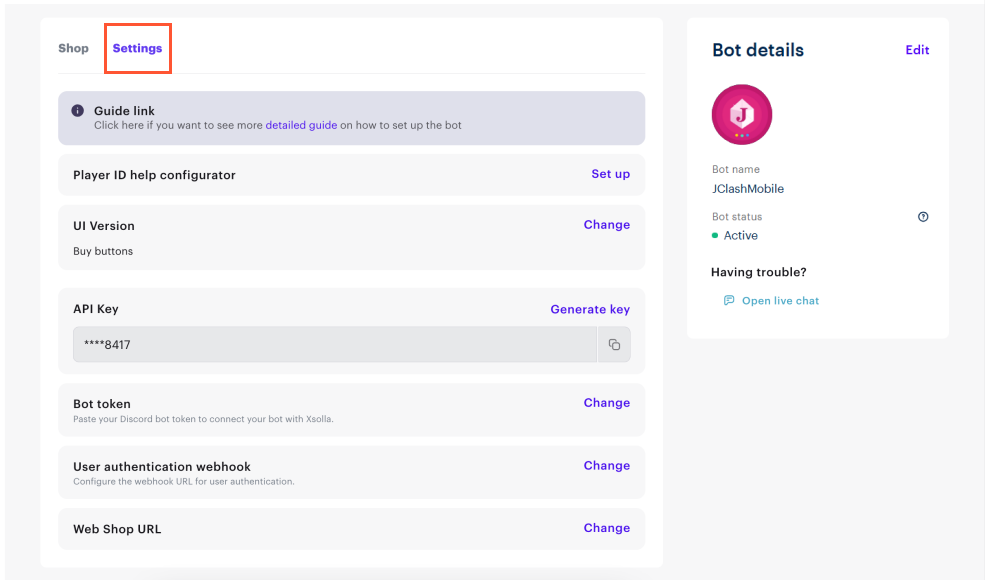
Go to the Settings tab to complete the bot configuration:
- Set up Player ID help. The bot uses each player’s in-game player ID as the login method. Since every game surfaces that ID differently, upload an image that shows players how to find it in your specific game. Players can access this image from inside Discord any time they open the bot.
- API key is generated automatically by default. No action needed.
- Specify the bot token. Paste the token you copied from the Discord developer portal in Step 1. This connects your Discord bot application to Xsolla Bot.
- Specify user authentication webhook. The endpoint on your backend that identifies and authenticates players using their in-game player ID. You configure and host this webhook yourself.
If you’re using the direct purchase flow, leave the Web Shop URL field blank. This field is only required if you’re using the Web Shop flow.
Step 3. Invite bot to your Discord server
To add the bot to your Discord server:
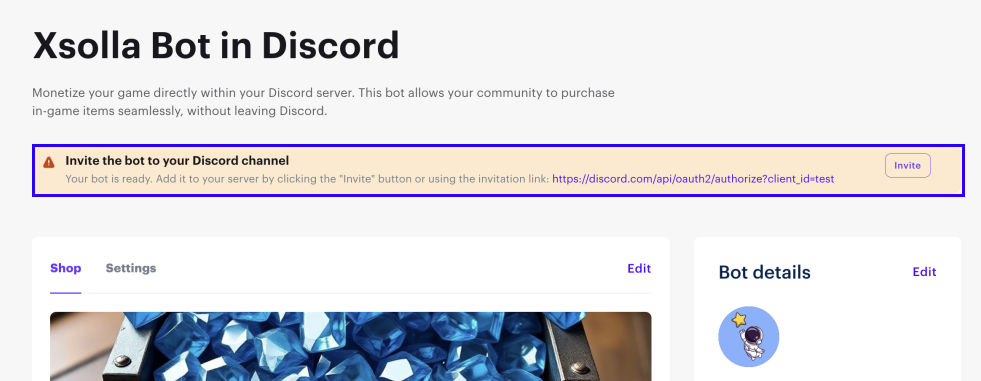
- In the Xsolla Bot in Discord section, at the top of the page, click Invite.
- In the Xsolla Bot in Discord section, at the top of the page, click Invite.
- In the Xsolla Bot in Discord section, at the top of the page, click Invite.
- In the Xsolla Bot in Discord section, at the top of the page, click Invite.
- In the Xsolla Bot in Discord section, at the top of the page, click Invite.
- Review and approve the requested permissions.
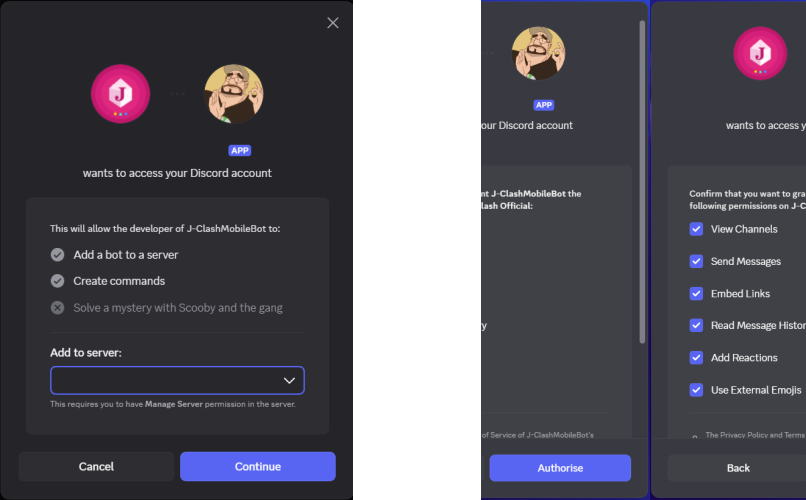
The bot is now connected to your server.
Step 4. Test /shop command
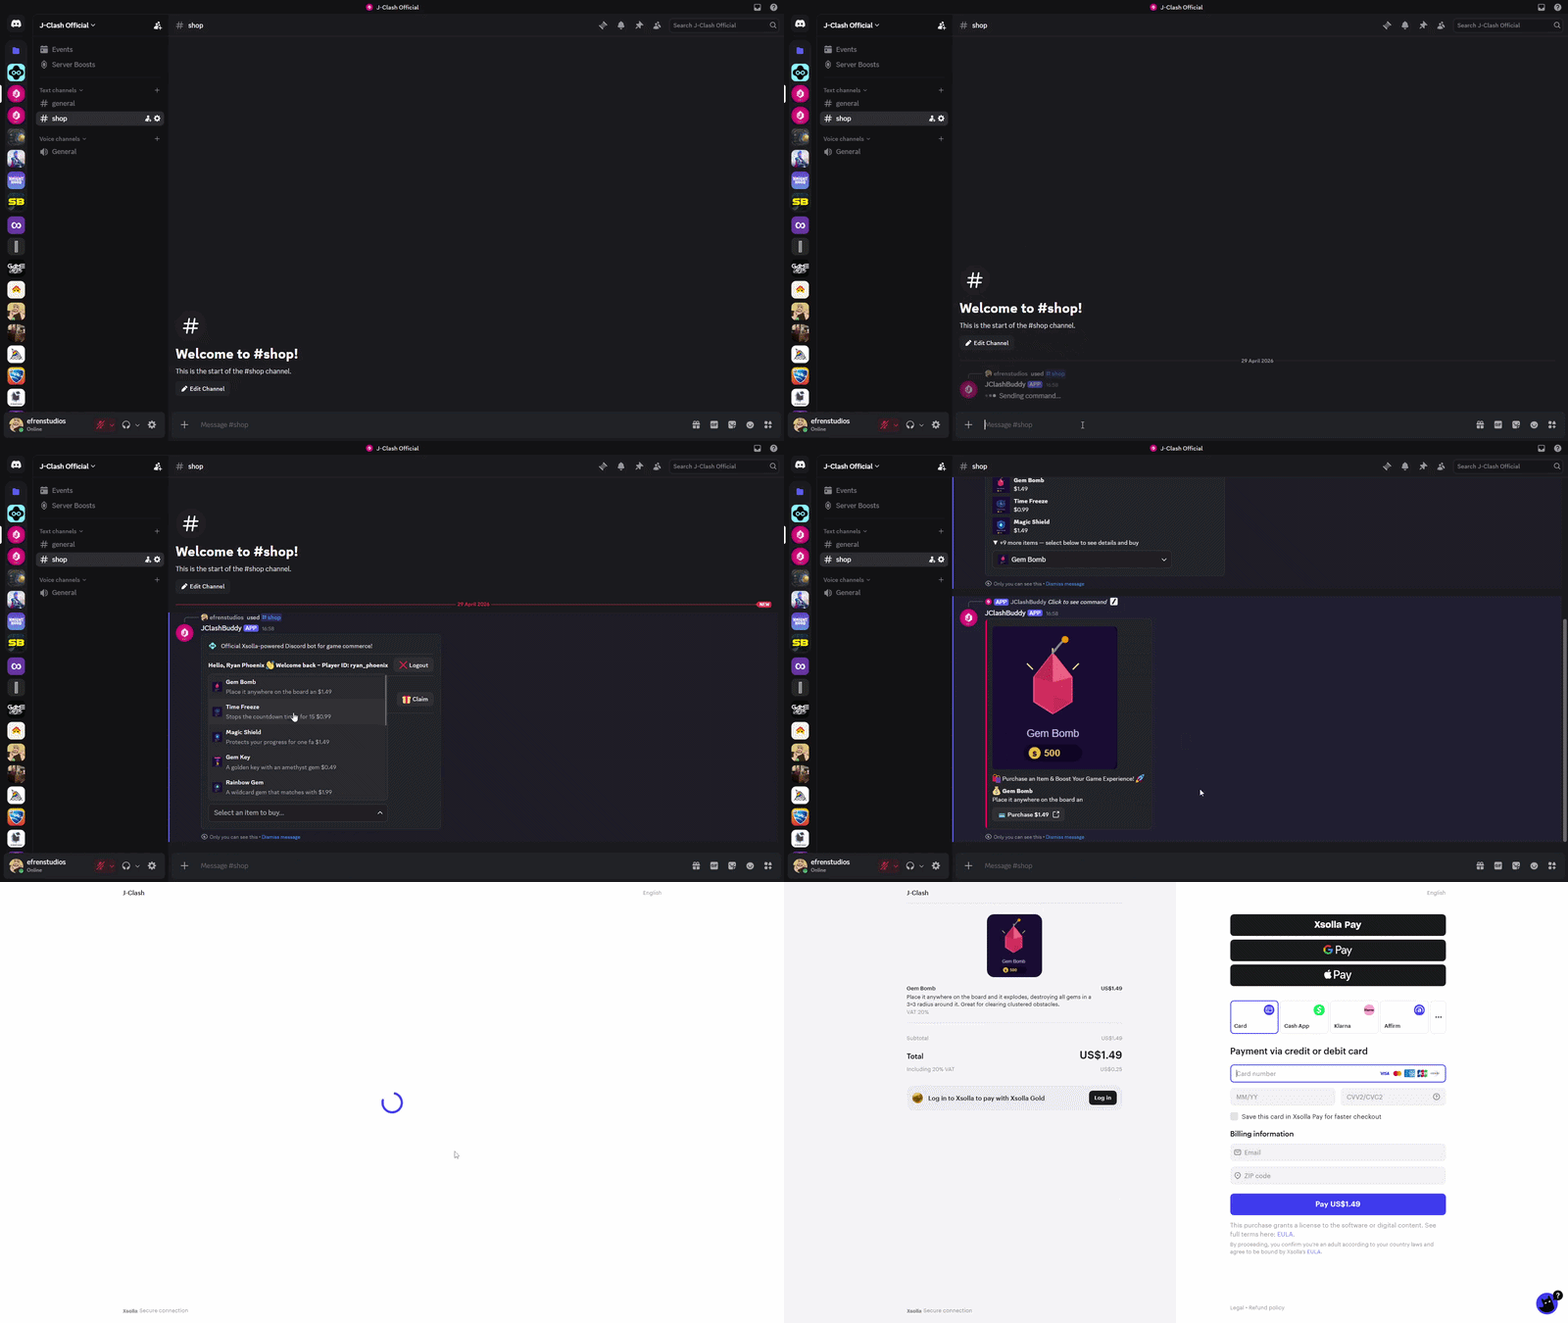
With the bot live in your server, open Discord and run /shop. This is the primary player-facing command, and running it is the clearest way to confirm the integration is working correctly.

The store UI loads in the following order:
- The Player ID help section you configured. Before a player can claim rewards or make a purchase, they need to log in. As soon as they interact with any option, they’re prompted to enter their player ID. Once that succeeds, the UI updates immediately to reflect their logged-in state.
- Any login or daily rewards you set up.
- The Shop section, with the name and items you configured.
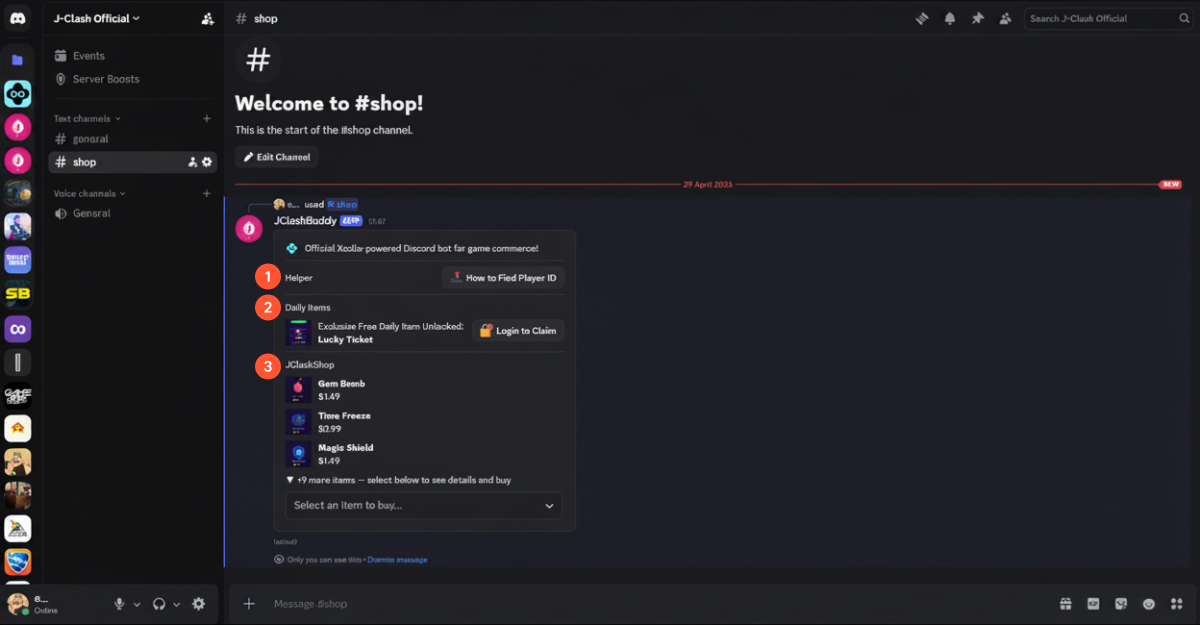
Before a player can claim rewards or make a purchase, they need to log in. As soon as they interact with any option, they will be prompted to enter their player ID. Once that succeeds, the interface updates immediately to reflect their logged-in state. With the direct purchase flow, selecting an item launches the payment UI immediately with the item ready for checkout.
Next steps
That is a complete self-service setup of the Xsolla Bot in Discord. From the Discord developer portal through to a working storefront inside your server, the whole process takes just a few minutes.
A few directions to take it further from here:
- Expand your rewards: Configure Login rewards and Daily rewards in the Shop section to add engagement hooks directly from Discord.
- Customize your store: Update item selection, section titles, and Player ID help imagery in Publisher Account at any time — no need to re-invite the bot.
- Customize your store: Update item selection, section titles, and Player ID help imagery in the account at any time — no need to re-invite the bot.
- Web Shop + Pay Station: If your setup requires players to pass through a Web Shop before checkout, this flow is available. Reach out to the Xsolla team to get that configured for your project.
Found a typo or other text error? Select the text and press Ctrl+Enter.
