Overlay
Use Overlay to display alerts, chats, goals, and other visual elements on your stream. Overlay lets you create custom layouts by combining different layers, grouped into media, Twitch events, and widgets. You can create multiple overlays, typically one per scene in your broadcasting software — for example, a starting, main, and ending scenes. Add each overlay as a separate browser source, and use only one overlay per scene to avoid conflicts like duplicate alert sounds.
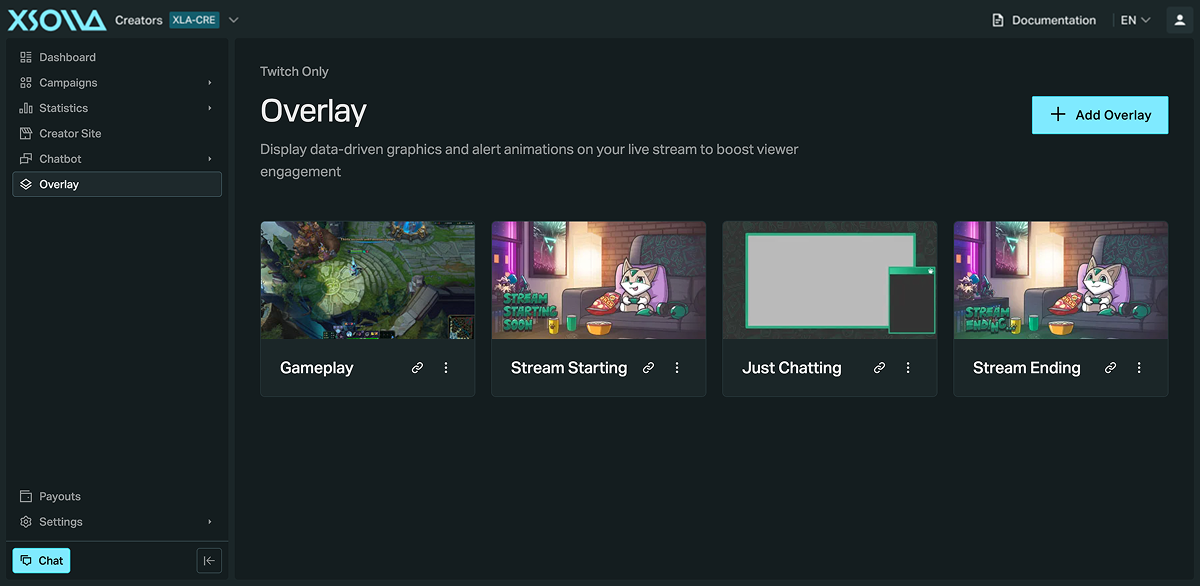
Overlay settings:
| Setting | Description |
|---|---|
| Overlay name | Name the overlay so you know what it’s for. |
| Screen size | Match the overlay resolution to your broadcasting software’s output (default: 1920 x 1080 px). |
| Live background | The background color shown in your broadcasting tool (default: transparent). |
| Editor background | The background color shown in the Partner Network editor. |
Media
Text and labels
To add a Text & Labels layer, click + and select Text & labels. The Content field is used for the text shown on the overlay. Type $ to insert a variable for dynamic content, such as a viewer shout-out.
Preferences:
- Hide until something happens — keeps the layer hidden until a triggering event occurs.
- Hide when all text variables are empty — hides the layer whenever every variable in the text has no value.
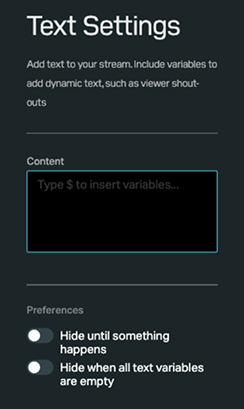
Last follower: $username label that only appears once someone follows — combine a variable in the Content field with Hide until something happens toggle to keep it out of sight the rest of the time.Image and video
To add an Image layer:
- Click + and select Image.
- Click Upload to upload an image:
- Accepted formats: GIF, JPEG, PNG.
- Maximum size: 20 MB.
To add a Video layer:
- Click + and select Video.
- Click Upload to upload a video:
- Accepted formats: MP4, WEBM, M4V, MOV.
- Maximum file size: 20 MB.
Twitch events
Alert
To add an Alert layer, click + and select Alert.
Alert types — Follow, Tip, Subscription, Resubscription, Subscription gift, Community gift, Charity donation, Twitch cheer, Twitch raid. Enable or disable each type, and override any of the settings above for that type individually.
Click Default alert settings to configure the default settings for all alert types. The table below describes each setting:
| Setting | Description | Values |
|---|---|---|
| Media | Image or video displayed in the alert. | Upload a file or select one from the built-in gallery. |
| Sound effect | Audio played when the alert appears. Use Play to preview it and Volume to set its playback level. | Upload a sound file. |
| Duration | Time the alert remains on screen. | Seconds |
| Text delay | Delay before the alert text appears. | Seconds |
| Hide text after | Time before the alert text disappears after appearing. | Seconds |
| Animation in | Entrance animation. | |
| Animation out | Exit animation. |
To position the alert, drag it to any location on the overlay. To test it, use the Test button to preview each alert type before going live.
Banner

To add a Banner layer, click + and select Banner.
Settings:
- Background image — upload an image, or select one from the built-in gallery.
- Hide banner timing — enable Periodically hide/show this banner, then set Hide (seconds) and Then show (seconds) to control the cycle.
Add one or more banners with Add new; delete any with the trash icon, or click one to configure it. The table below describes each setting:
| Setting | Description | Values |
|---|---|---|
| Title | Label for this banner. | |
| Type | Сontent type displayed in the banner. | Latest tips, Top tips, Top tippers, Latest followers, Latest subscribers, Latest charity donations, Top charity donations, Latest raids, Latest cheers, Top cheers, Top cheerers, None |
| Message | Text shown as the banner cycles. Supports text variables. | |
| Time | Time period used for the selected type. | Today, This week, This month, This year, All time |
| Max shown | Maximum number of viewers shown per type. | |
| Animation | Bunner animation. | Fade in and out, Scroll across, Show all |
| Show inline avatars | Viewer’s Twitch avatar displayed on the banner. | On, Off |
Heading background, background color, transparency, and font are also customizable per banner.
Chat
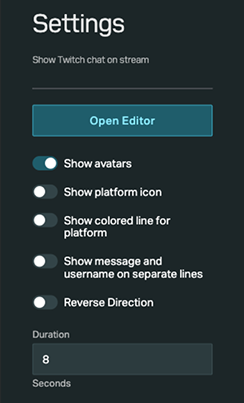
To add a Chat layer, click + and select Chat.
Configure the following settings:
- Show avatars — shows the viewer’s profile picture next to their message.
- Show platform icon — shows the platform icon next to each message.
- Show colored line for platform — shows a colored line that indicates the sender’s role. Role colors:
- Streamer (You)
- Moderator
- Subscriber
- Turbo
- Viewer
- Show message and username on separate lines — displays the username and message on separate lines.
- Reverse direction — controls whether new messages appear from the top or bottom.
- Duration (seconds) — time a message remains on screen.
Events
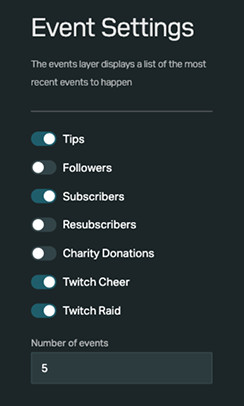
To add an Events layer, click + and select Events.
Configure the following settings:
- Event types — select which event types to display. Available types:
- Tips
- Followers
- Subscribers
- Resubscribers
- Charity Donations
- Twitch Cheer
- Twitch Raid
- Number of events — the maximum number of events displayed at once.
Goal
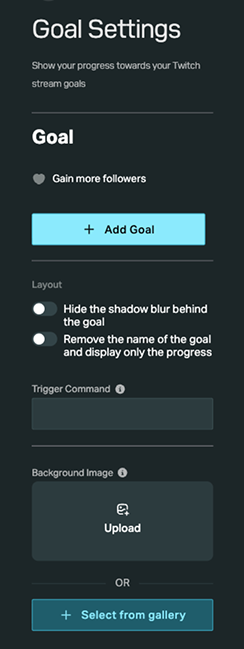
A goal tracks progress toward a target, such as follower count, subscriber count, or Twitch bits. To add a Goal layer, click + and select Goal, then click Add goal. Configure the following settings:
| Setting | Description | Values |
|---|---|---|
| Goal type | Metric tracked by the goal. |
|
| Name | Goal name. | |
| Target | Target value for the selected goal type. | |
| Layout | Goal appearance. |
|
| Trigger command | The command that fires a Trigger layer on the same scene when the goal is reached. |
You can also upload a background image or select one from the gallery.
Trigger
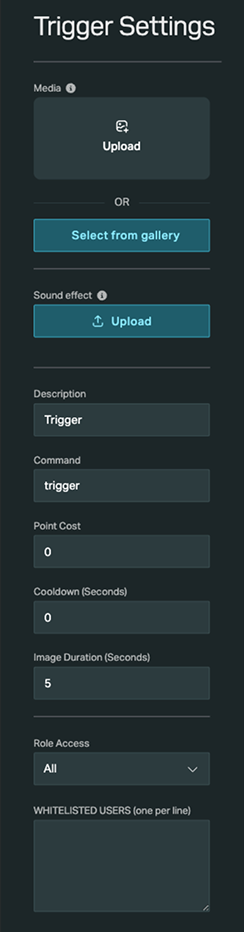
Trigger layers create chat commands that display media and/or sound on your stream. Access can be limited by chat role, or cost loyalty points from your Partner Network loyalty program (Twitch channel points aren’t used for this).
To add a Trigger layer, click + and select Trigger. Configure the trigger using the following settings:
| Setting | Description | Values |
|---|---|---|
| Description | Description shown in your Creator Site’s list of available commands. | |
| Command | Chat command used to trigger the action. | |
| Point cost | Loyalty points required to use the trigger. | |
| Cooldown | Time before the trigger can be used again. | Seconds |
| Image duration | Time the media remains on screen. | Seconds |
| Role access | Users allowed to use the trigger. | All, Subs, None (allowlist) |
| Media | Image or video displayed when the trigger fires. | JPG, PNG, GIF, MPEG (max 20 MB) |
| Sound effect | Audio played when the trigger fires. | MP3, WAV, OGG (max 20 MB) |
Widgets
Countdown
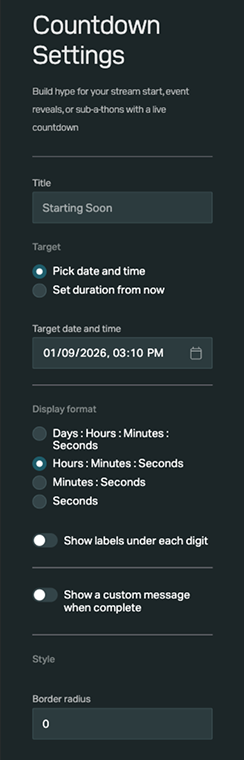
Countdown layers display a live countdown to your stream start, an event reveal, or a sub-a-thon.
To add a Countdown layer, click + and select Countdown.
Configure the following settings:
- Title — text shown above the countdown (e.g., Starting Soon)
- Target — countdown target:
- Pick date and time — counts down to fixed date and time.
- Set duration from now — counts down for a specified duration.
- Display format:
- Days : Hours : Minutes : Seconds
- Hours : Minutes : Seconds
- Minutes : Seconds
- Seconds
- Show labels under each digit — displays the labels for the time units used in the countdown.
- Show a custom message when complete — displays a custom message after the countdown ends.
- Style — border radius.
Now playing
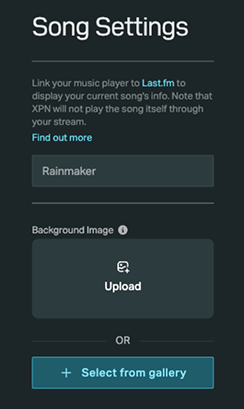
Now playing layer displays the song currently playing on a music player connected to Last.fm.
To add a Now playing layer:
- Click + and select Now playing.
- Create a Last.fm account if you don’t have one.
- Set up a Last.fm scrobbler — the tool that sends your music data to Last.fm. Many players support this natively, others need extra software or a Chrome extension for web-based players. Last.fm syncs with Spotify, YouTube, Apple Music, Tidal, and SoundCloud.
- Link your music player to your Last.fm account.
You can also upload a background image or select one from the gallery.
If the song doesn’t appear on your overlay, check your Last.fm profile to confirm your scrobbler is sending song data there. If the song doesn’t appear on Last.fm either, the scrobbler itself isn’t working — check your player’s Last.fm connection or extension.
Code
Code layers let developers build their own overlay layers with custom code. There’s no limit on how many layers you can add to your overlay.
To add a Code layer, click + and select Code.
Configure the following settings:
- Set the Message field — a variable your code can reference (default:
Hello ${username}) - Click Open editor to edit your layer using HTML, CSS, JavaScript, or Blueprint.
- Click Save to apply your changes.
Add your overlay to your broadcasting software
To add your overlay to your broadcasting software, go to the Overlay tab in your dashboard, copy your overlay URL, and add it as a browser/web source:
Lightstream
Lightstream Studio uses the same overlay editor as Partner Network — every layer type available in the Partner Network Overlay editor is also available directly in Lightstream Studio, and any scene you build there is viewable in Partner Network. In most cases, if you’re using Lightstream Studio, you can build your overlay directly there instead of importing one from Partner Network.
If you already built a separate overlay in Partner Network creator account and want to bring it into Lightstream via URL:
- Go to the Overlay page.
- Click the URL chain button to copy your overlay URL.
- Go to Lightstream:
- For Lightstream Studio Browser Source:
- Click Add.
- In the 3rd party integrations section click Browser source.
- Choose Xsolla Partner Network.
- Paste your URL and click Check URL.
- For Lightstream Studio Browser Source:
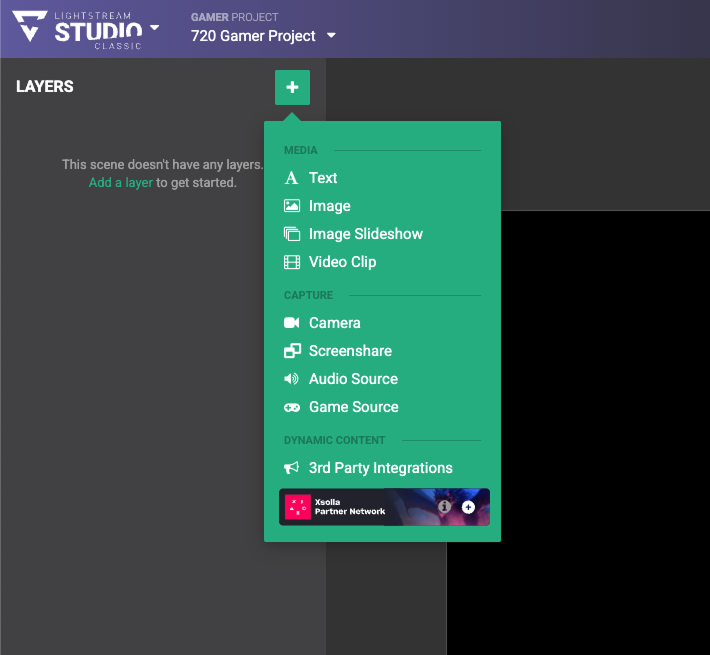
- For Lightstream Classic Browser Source:
- Click Add layer.
- Click:
- 3rd party integrations and choose Xsolla Partner Network.
- The Partner Network banner at the bottom.
- Paste your URL and click Check URL.
- For Lightstream Classic Browser Source:
OBS Studio
To add your overlay in OBS Studio:
- Go to the Overlay page.
- Click the URL chain button to copy your overlay URL.
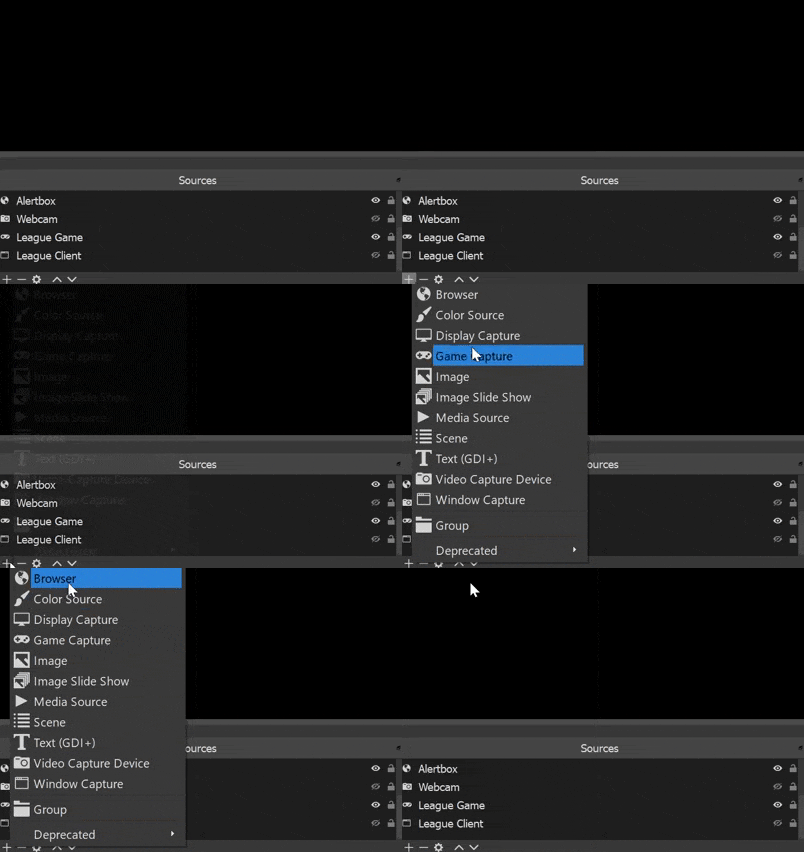
- In OBS Studio, click the + sign under the Sources section and select Browser.
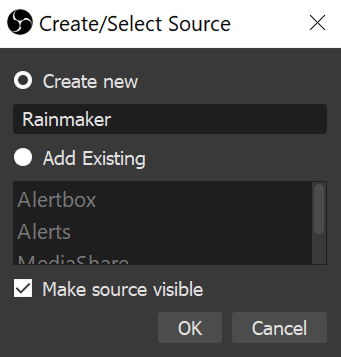
- Name the source and click OK.
- Paste your overlay URL into the URL field. Under Width & height, match the resolution to your overlay (default: 1920 x 1080 px).
Console streaming
Xbox and PlayStation consoles don’t support browser sources, so you can’t add an overlay to your stream from the console itself. We recommend using Lightstream:
- Set your console to stream to Lightstream instead of directly to Twitch.
- Add your overlay in the Lightstream web editor. Lightstream sends the combined stream to Twitch, so you only need a device with a web browser.
Alternatively, stream from a PC using a capture card and broadcast software.
Even without an overlay set up, tips and in-chat notifications will still work if enabled.
Found a typo or other text error? Select the text and press Ctrl+Enter.
