Create first project
Publisher Account is the main tool to configure Xsolla features, as well as to work with analytics and transactions.
The data about the company and your application specified during registration will be used to create a draft licensing agreement with Xsolla and to generate recommendations on solutions that are suitable for you. You can change the data later, but providing the correct data when you sign up will speed up the process of signing the licensing agreement.
To create a project:
- Sign up to Publisher Account.
Rules on the password generation
The password from Publisher Account can consist of Latin letters, numerals, and special characters and must include at least:
- 8 characters
- one digit
- one capital letter
- one lowercase letter
To ensure password security, we recommend:
- changing your password at least once every 90 days
- using a new password that does not match the last 4 passwords on your account
- using a unique password that does not match passwords used anywhere else
- not storing your password where it is easily accessible
- using password managers to store your password
Publisher Account uses two-factor authentication and sends a confirmation code with each authentication attempt.
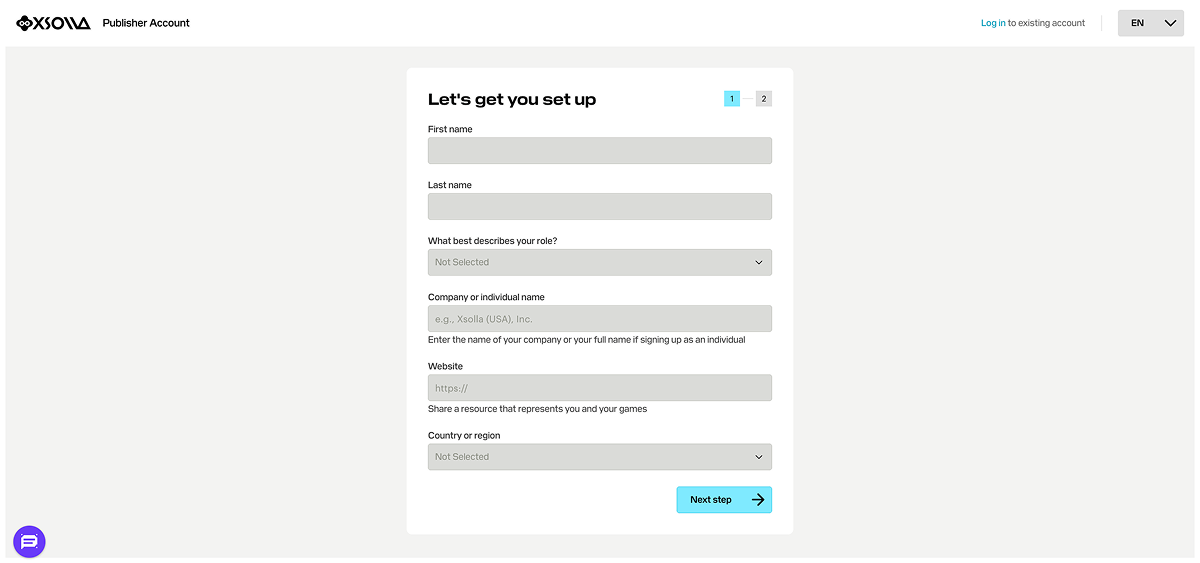
- Provide the following information to create your account:
- Your first and last name.
- Your role in the company.
- Company name. If you sign up as an individual, enter your full name.
- Link to detailed information about you and your game or product (optional).
- Your country or region.
- Click Next step.
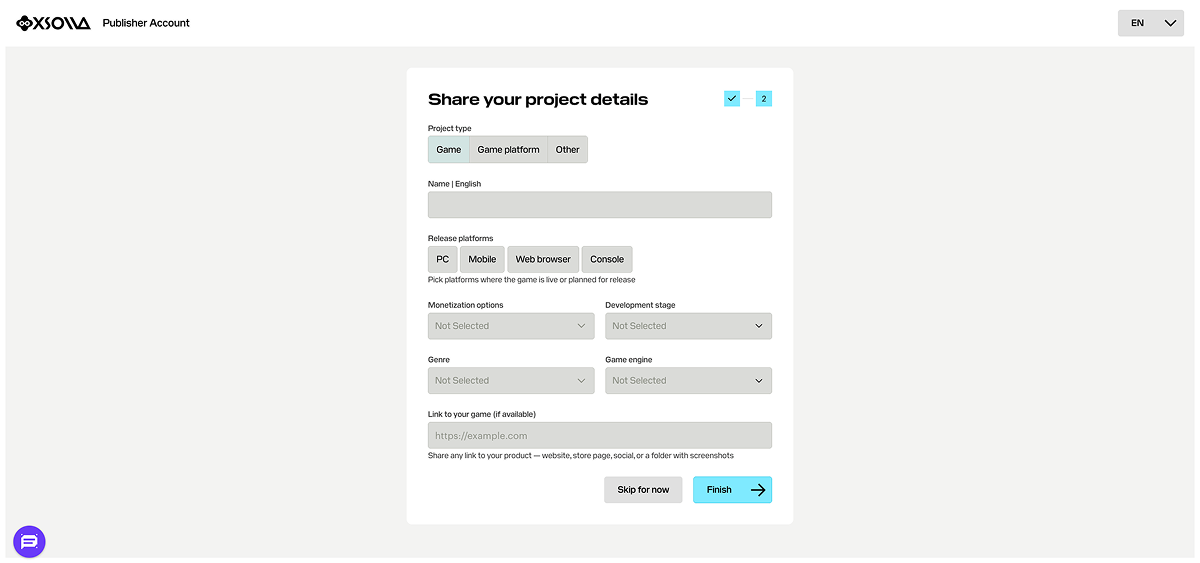
- To automatically create your first project, specify the main information about it:
- Choose a project type: Game, Game platform, or Other.
- Enter the project name in English.
- Choose one or several release platforms.
- Select monetization options you use or plan to use.
- Select a development stage.
- If your project type is Game, select its genre and game engine.
- Add a link to your game or product (optional).
- Click Finish.
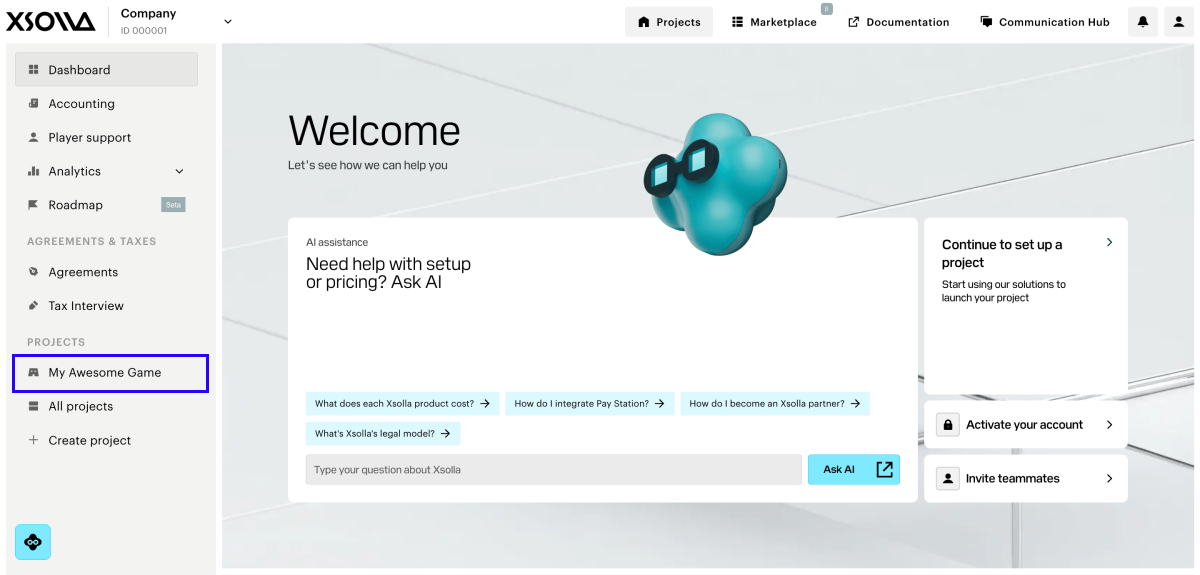
Once the project is created, you will be redirected to the company page. The created project is displayed in the side menu:
- Click its name to start integrating Xsolla products and solutions.
- Go to the Project settings section to add additional languages and localized project names (optional).
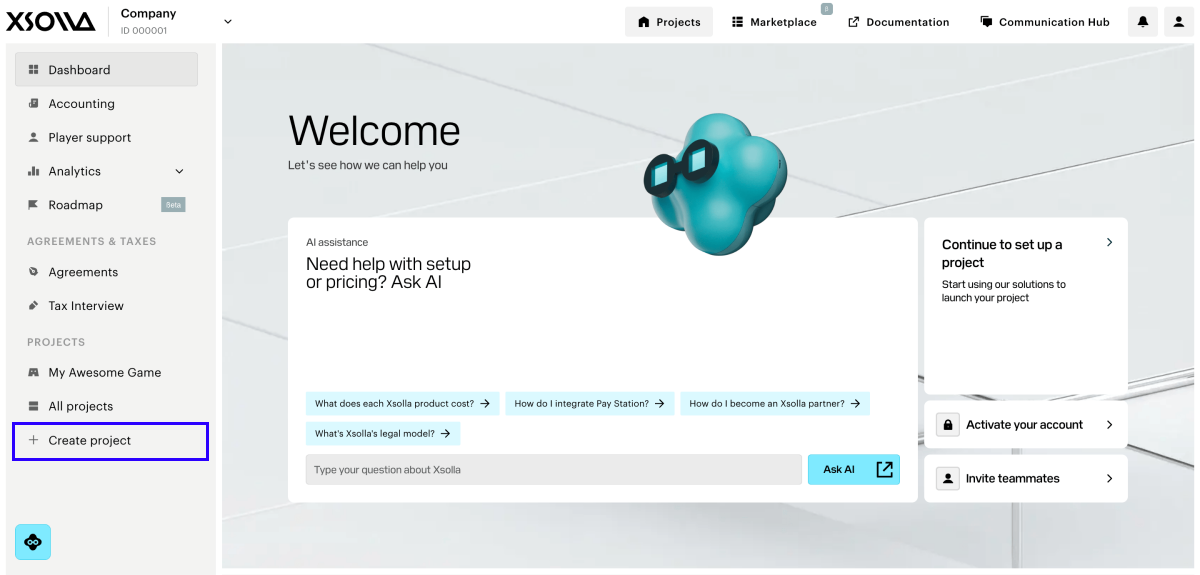
If you have multiple games or products, create a separate project for each. To do this, on the company page, in the side menu, click Create project and specify the necessary information.
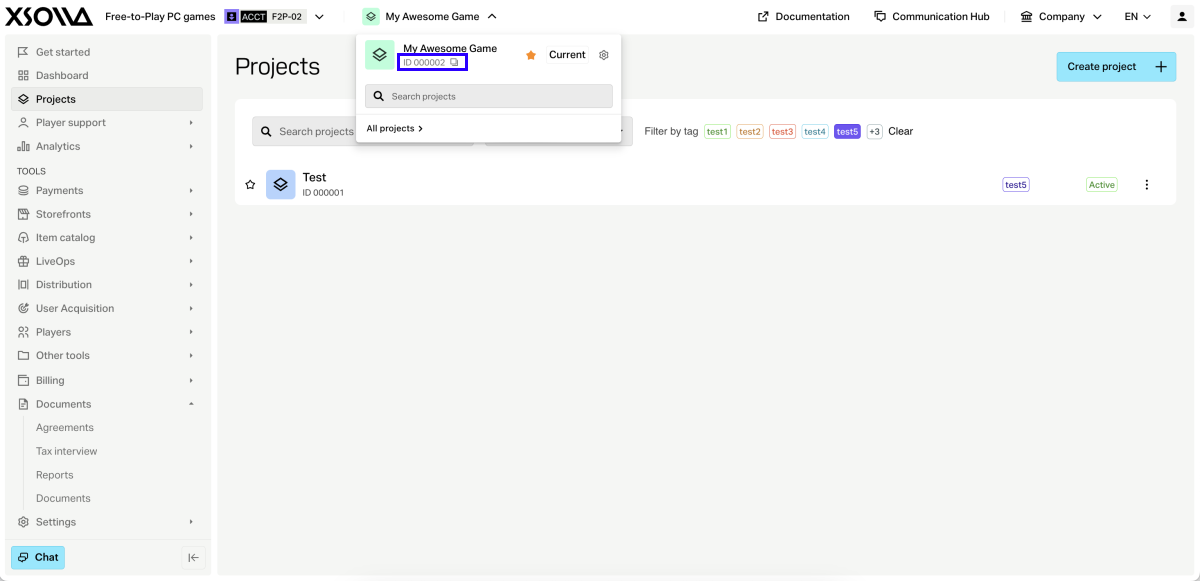
During the integration process, you need to provide the project ID that can be found in your Publisher Account next to the project name.
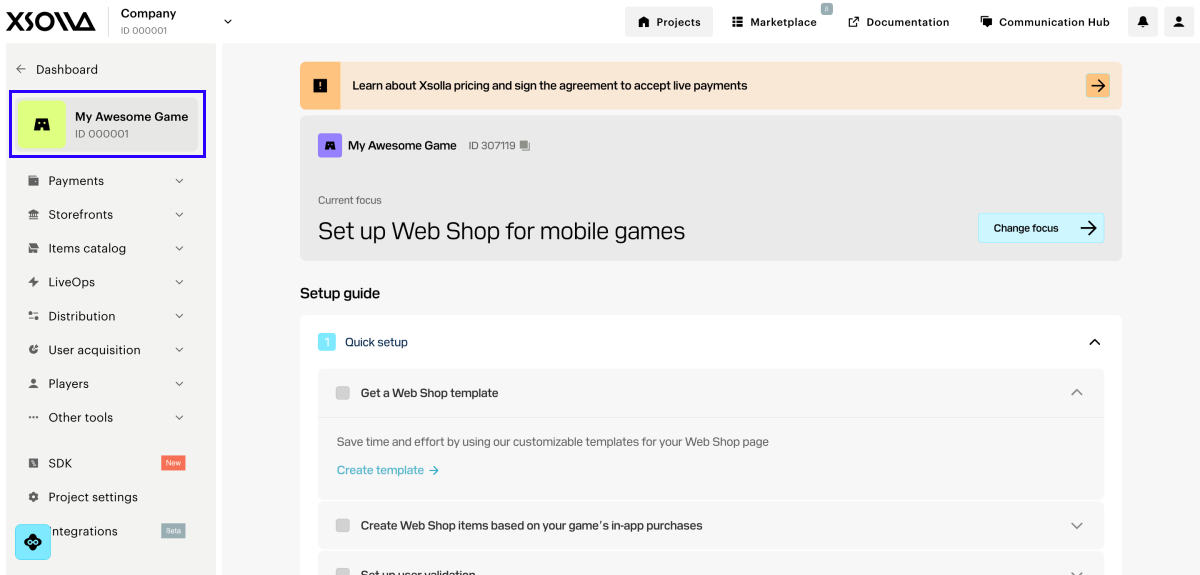
Business Account is the primary tool for configuring Xsolla features, as well as for working with analytics and transactions.
Xsolla develops tools for different business categories. To simplify navigation, these tools are grouped by target audience into separate accounts.
The documentation is also tailored to audience: select the Business Account that matches profile in the left-hand menu to see relevant instructions.
The full list of available business accounts is provided in the Account Hub.
The data about the company and your application specified during registration will be used to create a draft licensing agreement with Xsolla and to generate recommendations on solutions that are suitable for you. You can change the data later, but providing the correct data when you sign up will speed up the process of signing the licensing agreement.
To sign up for Xsolla and create your first project:
- Select the corresponding audience in the Account Hub and proceed to registration.
Rules on the password generation
The password for Business Account can consist of Latin letters, numerals, and special characters and must include at least:
- 8 characters
- one digit
- one capital letter
- one lowercase letter
To ensure password security, we recommend:
- changing your password at least once every 90 days
- using a new password that does not match the last 4 passwords on your account
- using a unique password that does not match passwords used anywhere else
- not storing your password where it is easily accessible
- using password managers to store your password
Business Account uses two-factor authentication and sends a confirmation code with each authentication attempt.
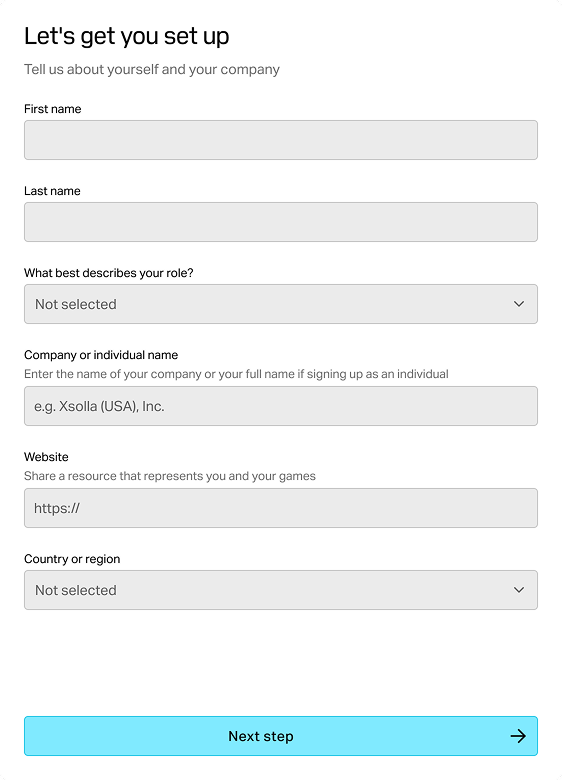
Provide the following information to create your account:
- Your first and last name.
- Your job title in the company.
- Business name — your company name or your full name if you sign up as an individual.
- Link to the business site of your company or site with detailed information about your game (optional).
- Your country or region.
Click Next step.
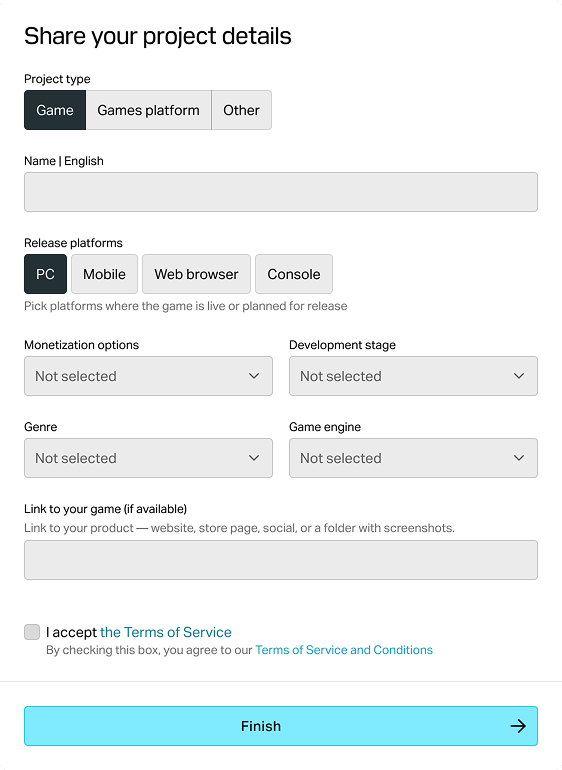
To create your first project, specify the main information about it:
- Choose a project type: Game, Games platform, or Other.
- Enter the project name in English.
- Choose one or several release platforms.
- Select monetization options you use or plan to use.
- Select a development stage.
- If your project type is Game, select its genre and game engine.
- Add a link to your game (optional).
Review the Terms of Service, then check the box to confirm your agreement.
Click Finish.
Once the project is created, you will be redirected to the project page. To add additional languages and localized project names (optional), go to the Settings > Project section.
If you have multiple games, create a separate project for each. To do this:
In the header, click your project name and go to the All projects section.
Сlick Create project and specify the necessary information.
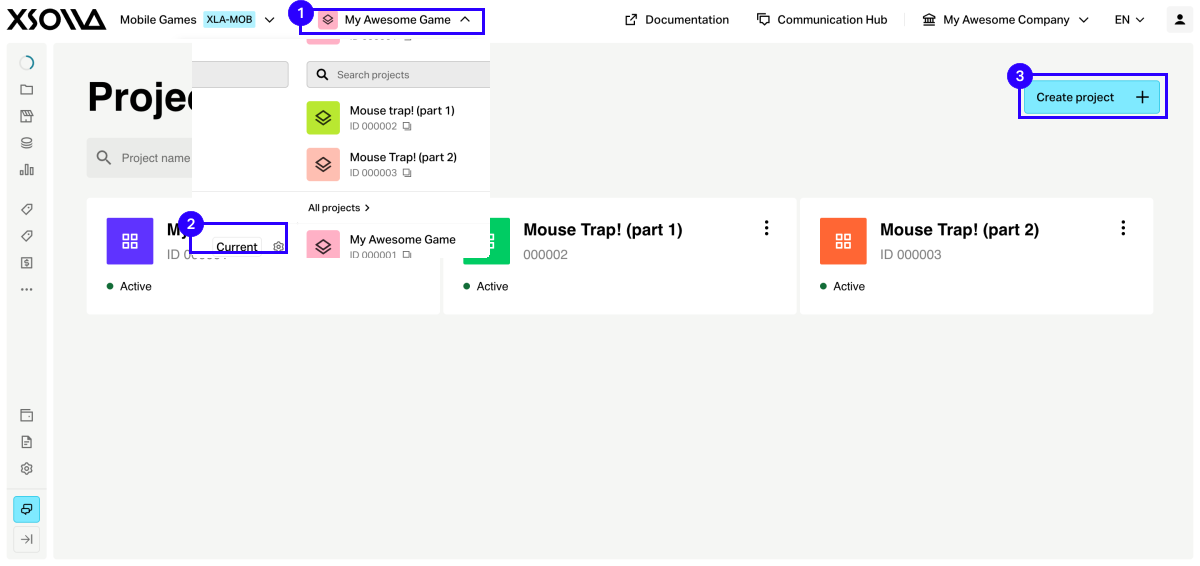
During the integration process, you need to provide the project ID that can be found in your account next to the project name.
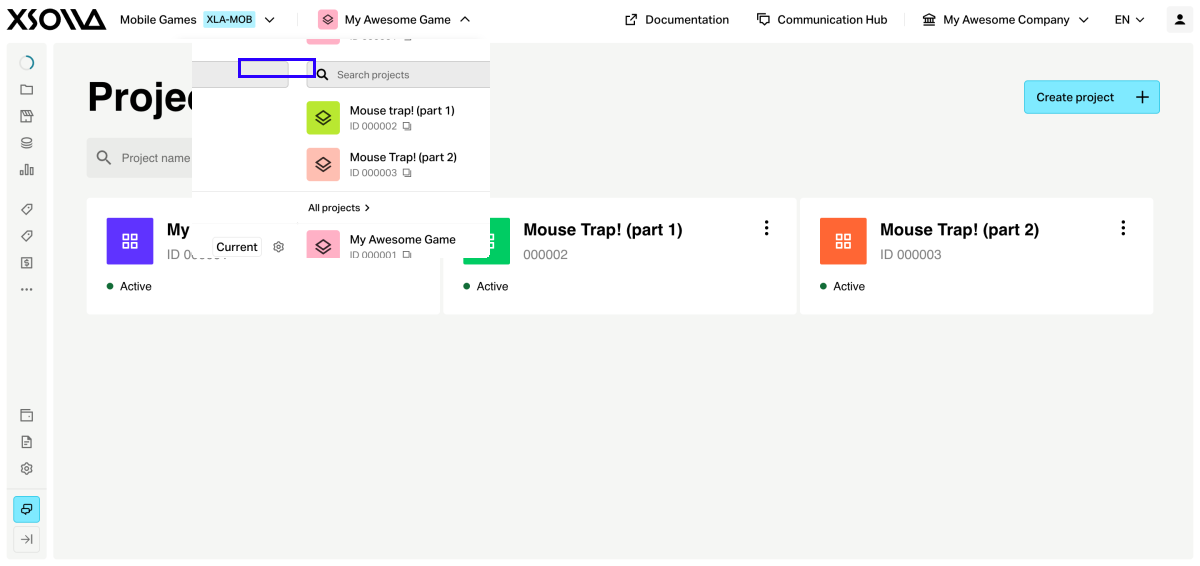
Once the project is created, you will be redirected to the project page. To add additional languages and localized project names (optional), go to the Settings > Project section.
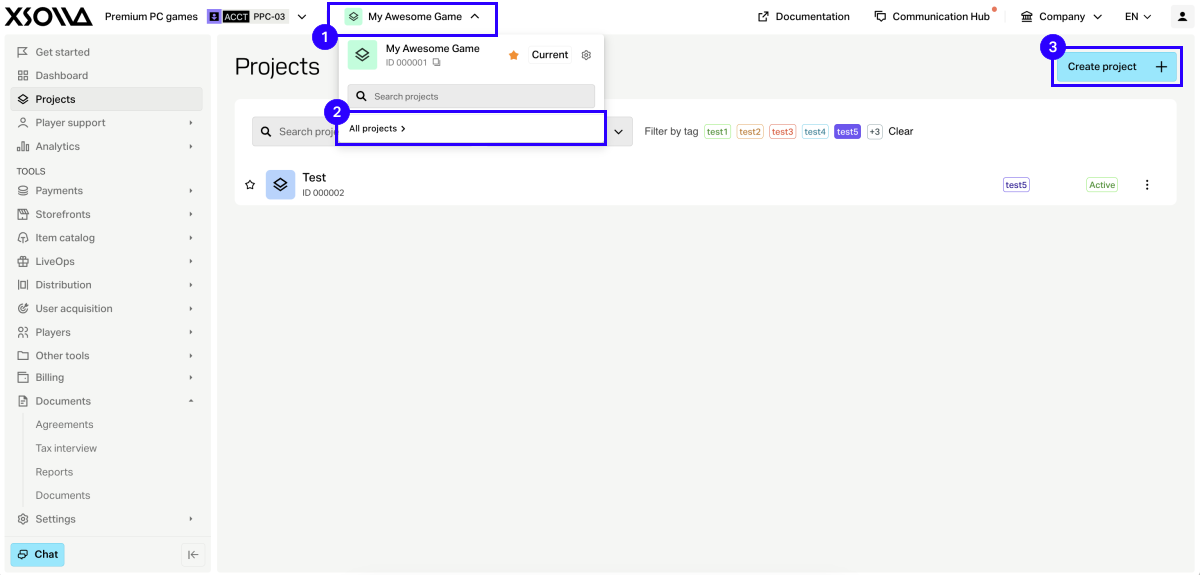
If you have multiple games, create a separate project for each. To do this:
In the header, click your project name and go to the All projects section.
Сlick Create project and specify the necessary information.
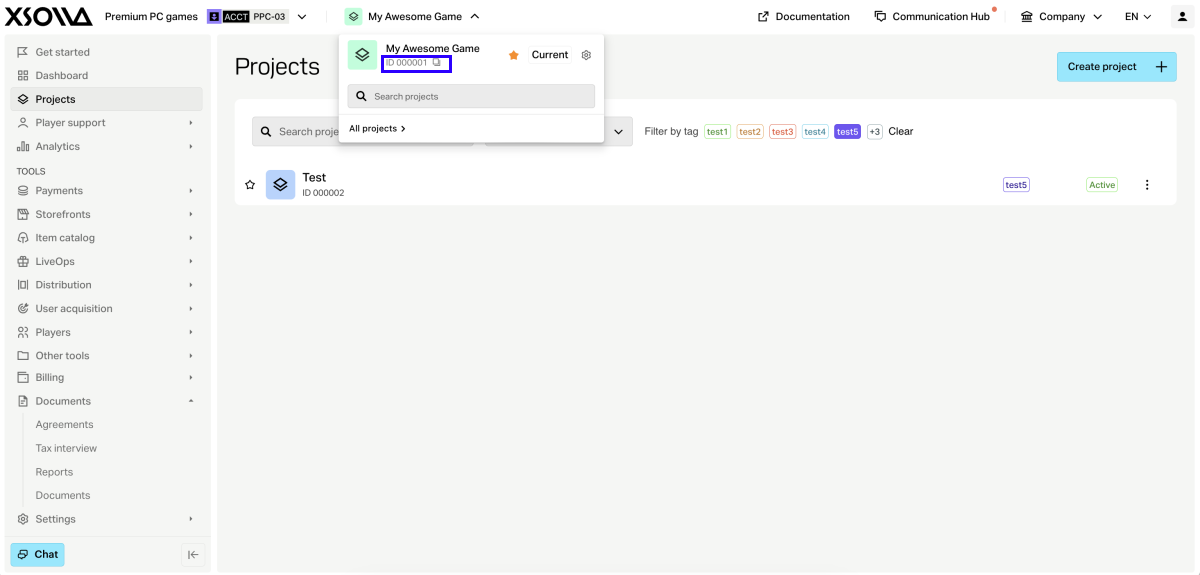
During the integration process, you need to provide the project ID that can be found in your account next to the project name.
Once the project is created, you will be redirected to the project page. To add additional languages and localized project names (optional), go to the Settings > Project section.
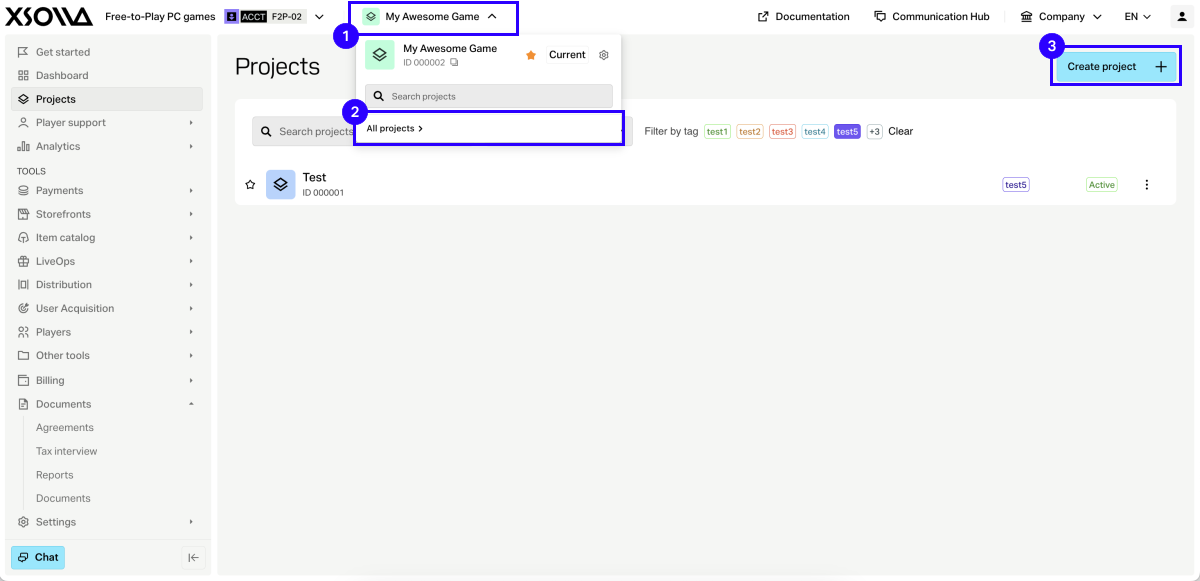
If you have multiple games, create a separate project for each. To do this:
In the header, click your project name and go to the All projects section.
Сlick Create project and specify the necessary information.
During the integration process, you need to provide the project ID that can be found in your account next to the project name.
Once the project is created, you will be redirected to the project page. To add additional languages and localized project names (optional), go to the Settings > Project section.
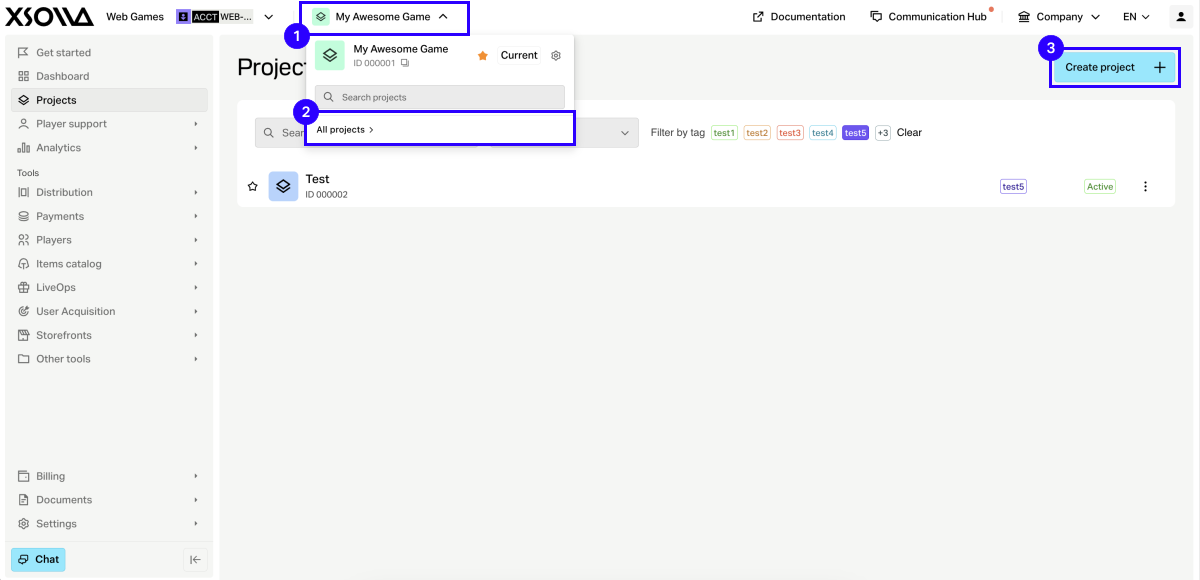
If you have multiple games, create a separate project for each. To do this:
In the header, click your project name and go to the All projects section.
Сlick Create project and specify the necessary information.
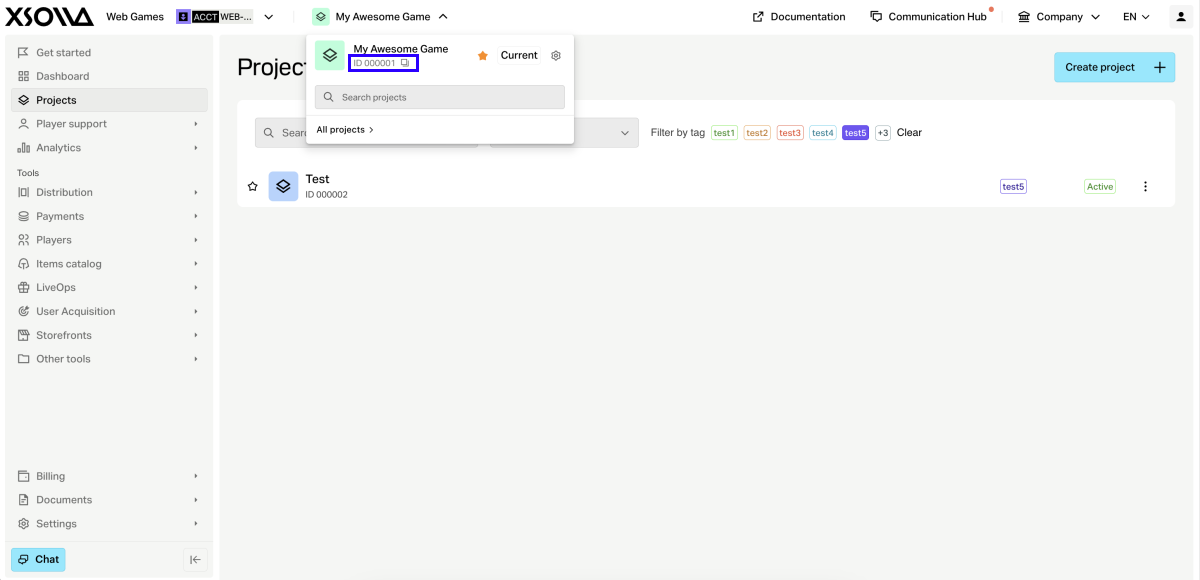
During the integration process, you need to provide the project ID that can be found in your account next to the project name.
Continue reading
Last updated: September 7, 2026Found a typo or other text error? Select the text and press Ctrl+Enter.
