Create discount promotion
Discount promotions are a convenient marketing tool for attracting attention to items and increasing sales.
You can apply a discount to any number of items, and any number of discounts can be applied to a single item. The system automatically calculates both the discounted and original prices, ensuring accurate display of information in the store.
You can set up different types of promotions for an item: discounts, promo codes, and bonuses.
If several promotions are valid for an item at the time of purchase, discounts are applied to the item one by one. The order in which discounts are applied does not matter.
For example:
The price of a virtual item is $10. In your account, the following promotions have been created for the virtual items:
- Black Friday discount promotion with a discount of 10% from November 4–30
- Sale discount promotion with a discount of 20% from November 15 – December 15
- promotion with a promo code for a 5% discount from November 4–30
If the item is purchased on November 20, both discount promotions and a promotion with a promo code are valid.
The total cost of the virtual item is then calculated as (($10 - 10%) - 20%) - 5% and will be $6.84.
Create discount promotions
To create a discount promotion:
- In your project in Publisher Account, go to the LiveOps > Canvas section.
- In the project in your account for mobile games, go to the Operation > LiveOps section.
- In the project in your account, go to the LiveOps > Canvas section.
- In the project in your account, go to the LiveOps > More > Canvas section.
- Start creating a promotion in one of the following ways:
- Option 1:
- In the toolbar, click the
icon. - In the promotion list area, click the + icon.
- In the toolbar, click the
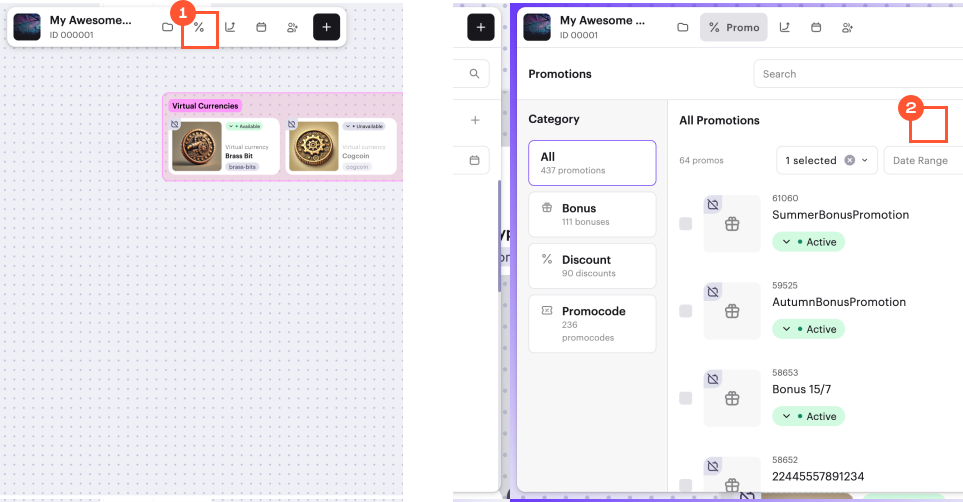
- Select Discount and click Create.
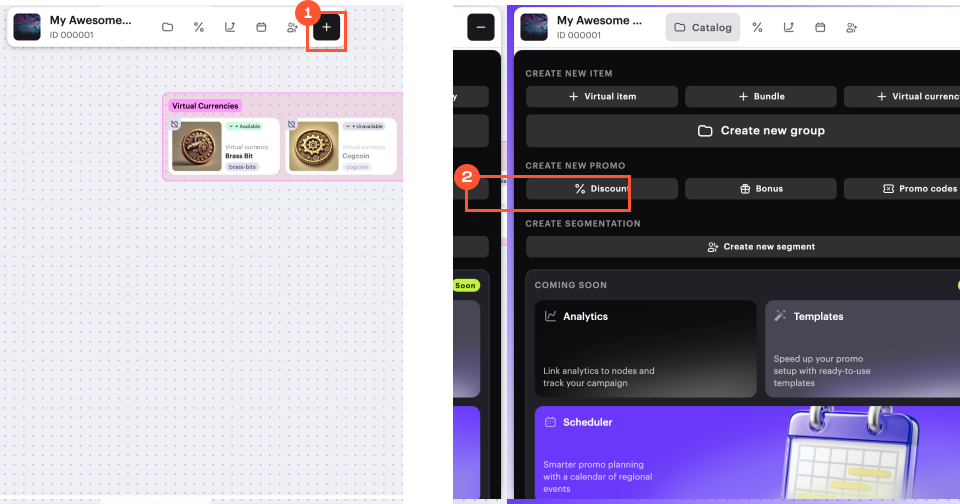
- Option 2: In the toolbar, click the + icon and select Discount.
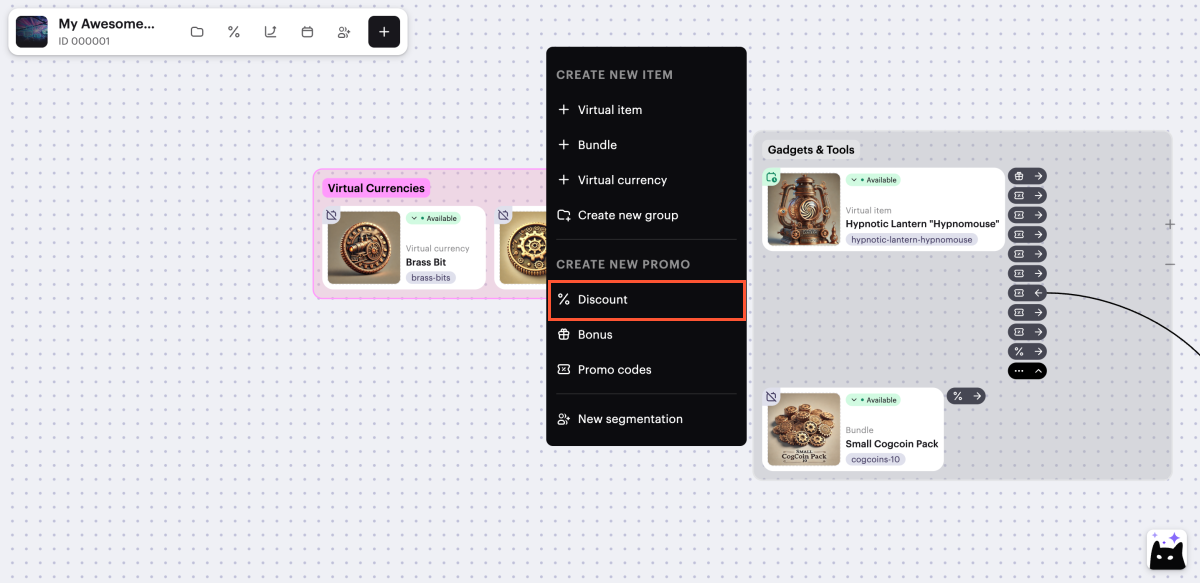
- Option 3: Open the context menu anywhere on the canvas and select Discount.
- Specify the promotion name.
- Specify the discount percentage.
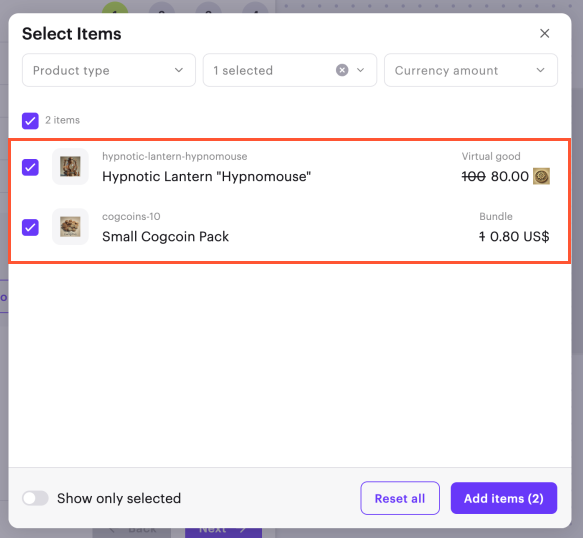
- Select the items to which the discount will apply:
- In the Promotional items field, click Select items.
- In the window that opens, check the boxes next to the required items.
- Click Add items.
- Click Next.
- Add conditions and limitations (optional):
- To give users a discount on an item for their first purchase, set the First-time buyer discounts toggle to active.
- To set a limit on how many times a user can use the promotion, set the Discount limits toggle to active and enter the required number.
- To create a personalized promotion (for example, available only to users above a certain in-game level), set the Custom user discounts toggle to active and specify the necessary conditions.
To set up a personalized promotion, user attributes must be configured.
You can define one or multiple conditions for a personalized promotion. Keep in mind that while the promotion is active, you can’t modify it.
- Click Next.
- Specify the promotion period.
- Click Next.
- Review the promotion settings.
- To activate the promotion immediately (optional), set the Create in Active status toggle to active.
- Click Create.
- To add the created discount promotion to the site (optional):
- Open the site in the builder by clicking Open or Open in Site Builder on the banner in the editing form.
- Follow the instructions from the Display discounted items in store section.
To manage their display, click the → or ← icon to the right of the promotional item card, next to the
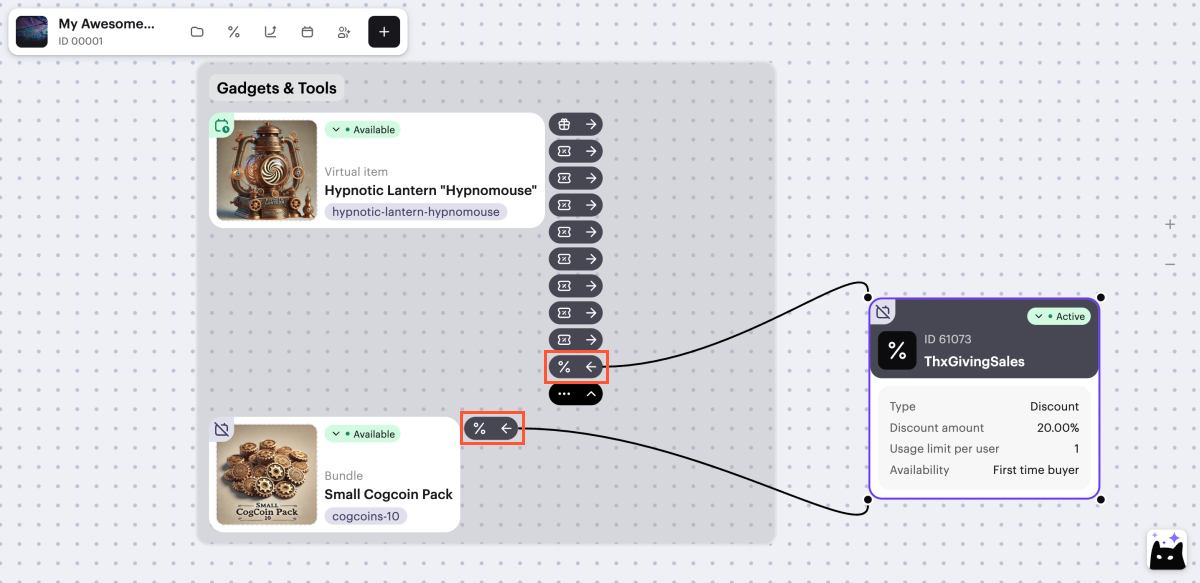
When setting up a promotion via the canvas, the following options are not available:
- Setting up a promotion with game keys.
- Setting a discount with fractional percentages.
- Setting up a promotion with no end date.
Advanced options for configuring discount promotions are available via Publisher Account and API calls.
When setting up a promotion via the canvas, the following options are not available:
- Setting up a promotion with game keys.
- Setting a discount with fractional percentages.
- Setting up a promotion with no end date.
Advanced options for configuring discount promotions are available via API calls.
When setting up a promotion via the canvas, the following options are not available:
- Setting up a promotion with game keys.
- Setting a discount with fractional percentages.
- Setting up a promotion with no end date.
Advanced options for configuring discount promotions are available in your account and via API calls.
Display discounted items in store
If you sell items through your own interface, you can retrieve item pricing information, including discounted prices, by calling client API methods to get an item catalog (calls from the Common > Catalog, Virtual Items and Currency > Catalog, and Bundles > Catalog subsections).
If your site is created using Xsolla site builder, a timer appears on an item’s card 30 days before the end of the promotion to show the remaining time:
- If the end of the promotion is in more than a week, the timer shows days and hours.
- If the end of the promotion is in more than one day, the timer shows hours and minutes.
- If the end of the promotion is in less than a day, the timer shows minutes and seconds.
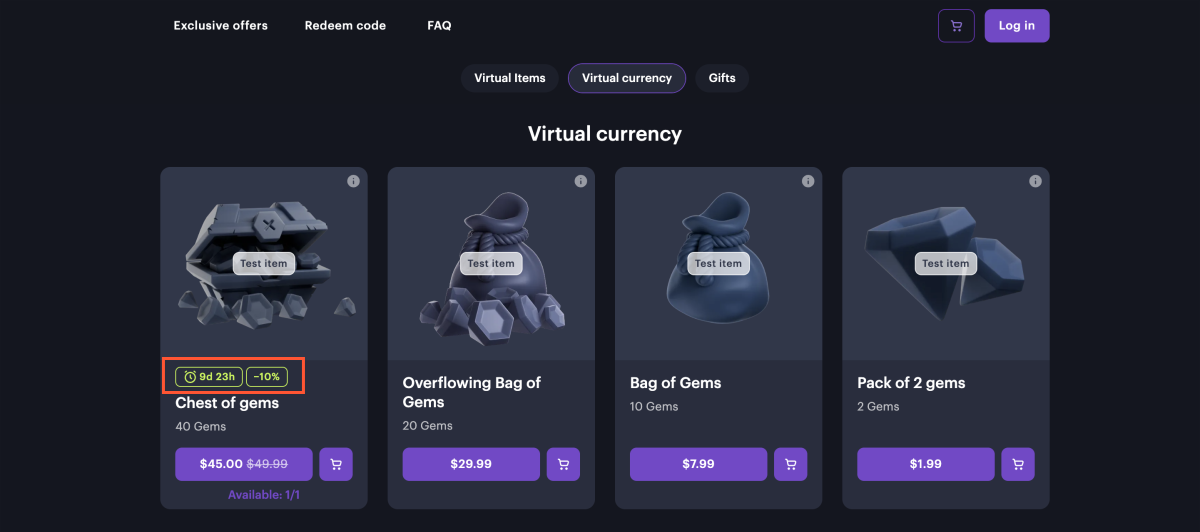
To change the color of the timer and discount amount:
- In your project in Publisher Account, go to the Storefronts > Websites section.
- Select your site and click Open Site Builder.
- Open the project in your account and go to the Storefronts > Website section.
- Click the pane of your site.
- Open the project in your account and go to the Storefronts > Website section.
- Click the pane of your site.
- Open the project in your account and go to the Storefronts > Website section.
- Click the pane of your site.
- Open the project in your account and go to the Web Shop section.
- Click the pane of your site.
- In the side menu, go to the Theme section.
- Select a new color in the Secondary field.
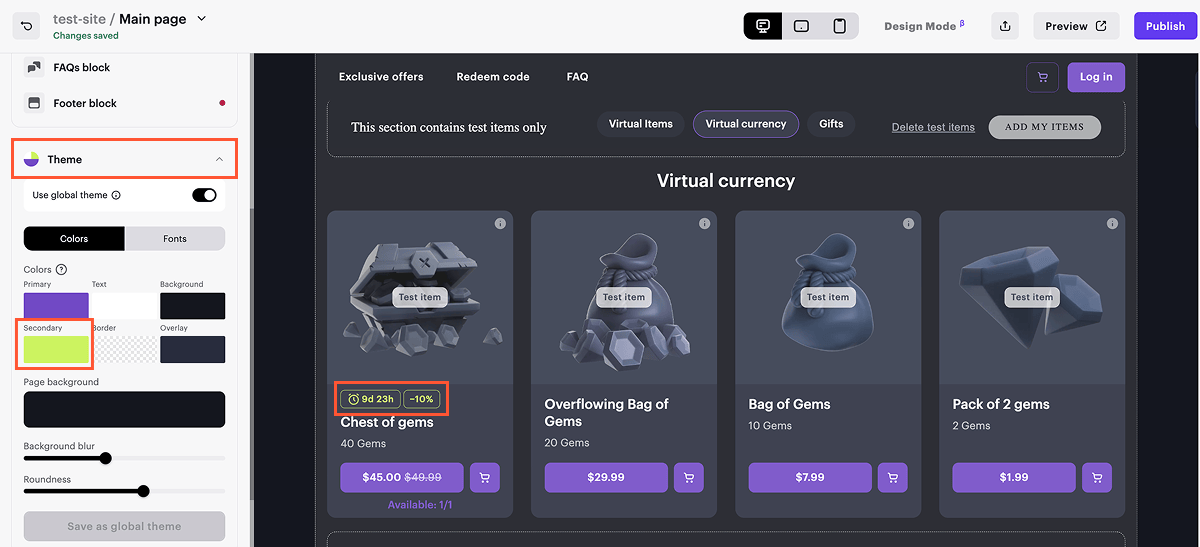
- To apply changes, publish the website:
- In the upper-right corner of the site builder, click Publish.
- Check the boxes next to the pages you want to publish.
- Click Publish.
If site publication is not available, make sure all the conditions are met:
- There are no empty sections in the builder (marked with a red indicator).
- The licensing agreement with Xsolla has been signed.
- The main page is published or selected for publication. You can’t publish child pages before the main page.
Found a typo or other text error? Select the text and press Ctrl+Enter.
