Create personalized catalog
Personalization allows you to control which catalog items are visible to specific groups of authorized users.
The feature is implemented through segments — sets of rules that define which users can see specific products. By assigning a segment to an item, you determine the conditions under which the item will be visible in the catalog.
Prerequisites
Segments are defined based on user attributes. You need to configure these attributes in your project before using personalization. Attributes describe the properties of your users and allow you to create flexible conditions for item visibility in the catalog.
Typical use cases include targeting by region, platform, game progress, or important dates such as registration or birthday. Combining several attributes in one segment lets you fine-tune which items are shown to each user group.
The personalization rules and logic are configured and stored on Xsolla’s side. You send user attributes to Xsolla, and then Xsolla creates the catalog according to the configured logic.
If you prefer to keep all personalization logic on your side, refer to the Shop Builder: Personalization section.
Create segment
To create segment:
- In your project in Publisher Account, go to the LiveOps > Canvas section.
- Start creating a segment in one of the following ways:
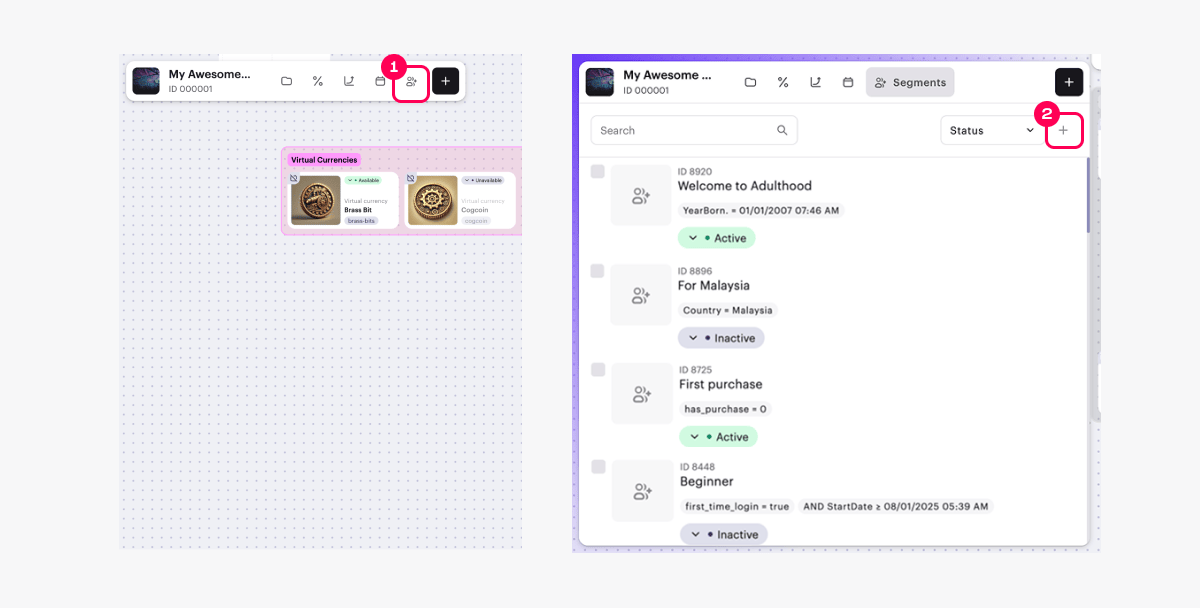
- Option 1:
- In the toolbar, click the icon.
- In the segment list area, click the + icon.
- Option 1:
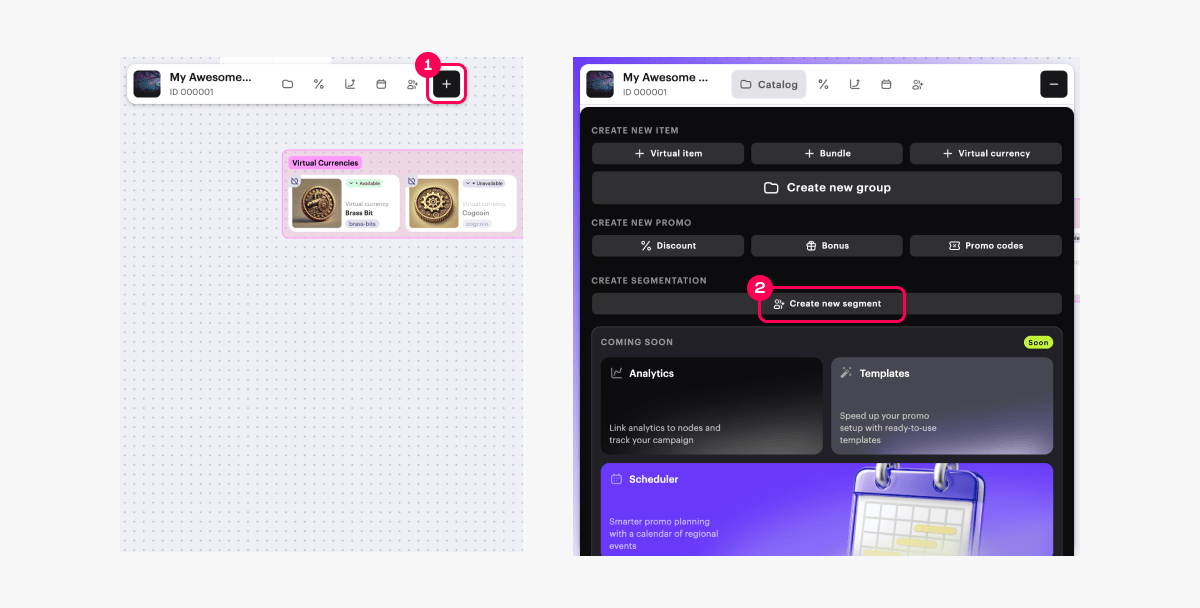
- Option 2: In the toolbar, click the + icon and select Create new segment.
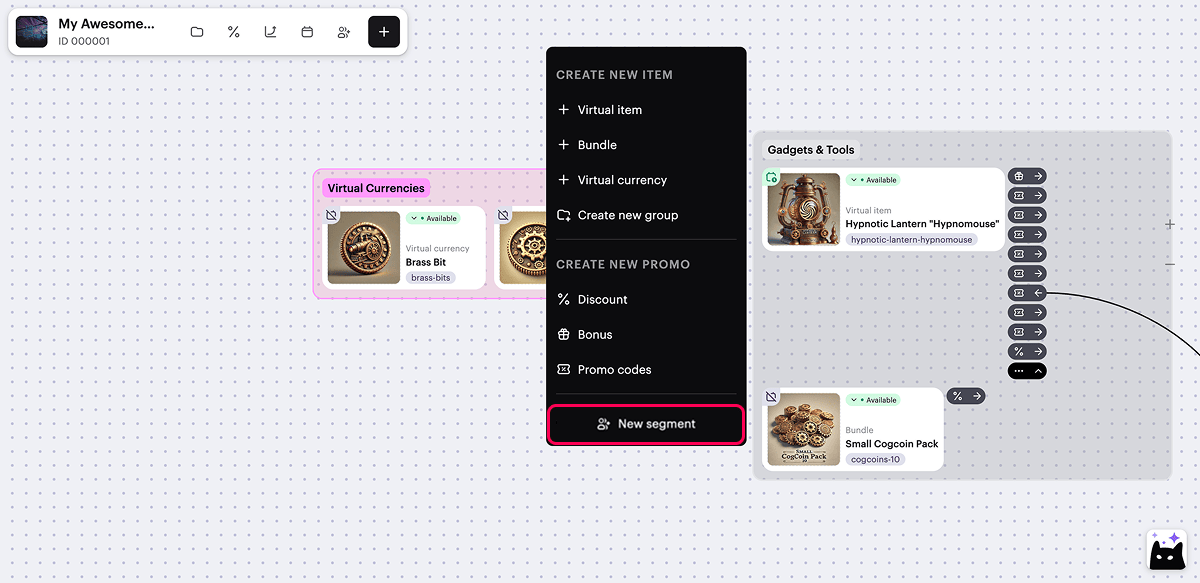
- Option 3: Open the context menu anywhere on the canvas and select New segment.
- Specify segment name and description.
- Click Next.
- Specify the condition:
- Specify the user attribute type — string, number, or date.
- Select the user attribute from the drop-down list.
- Select the comparison operator.
- Specify the user attribute value.
- To add more conditions, click Add condition and fill in the displayed fields (optional).
- To change the position of the condition (optional), drag the row to the desired position using the ☰ icon.
- Click Next.
- Review the settings and click Create segment.
- To add items to which the segment conditions apply:
- In the Affected Items section, click Select items.
- In the window that opens, check the boxes next to the required items.
- Click Select.
- Activate personalization conditions (optional).
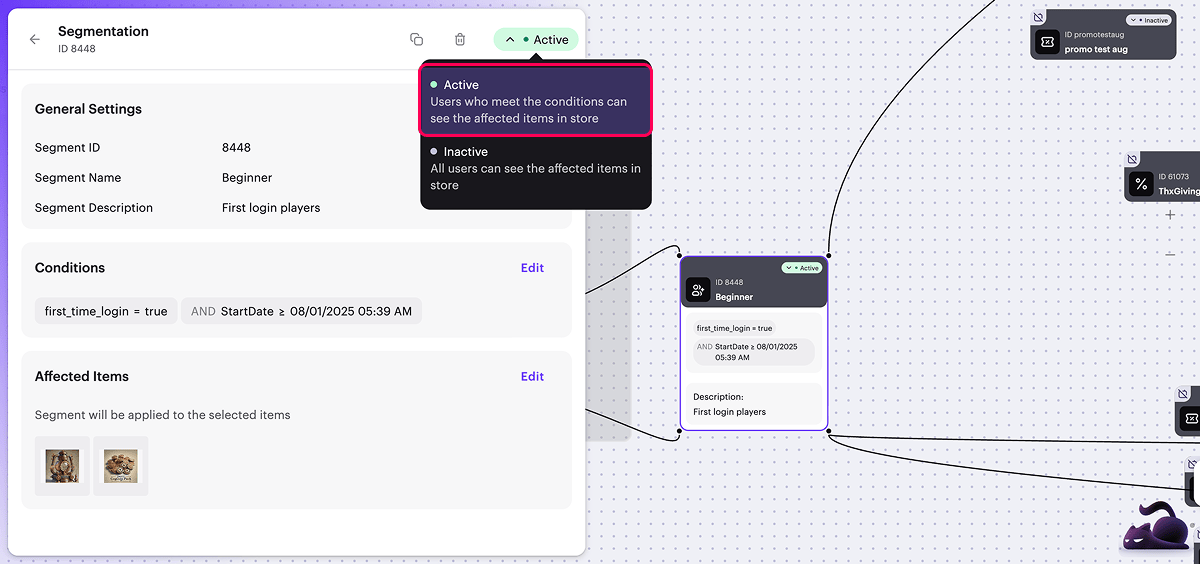
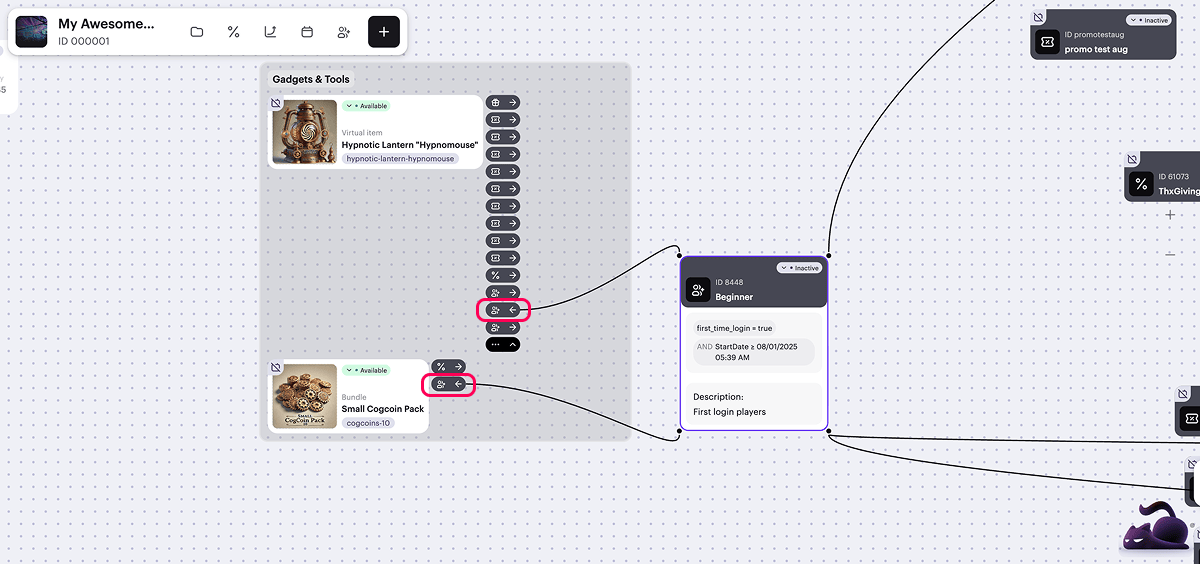
On the canvas, visual links are displayed between the segment card and related items.
To manage their display, click the → or ← icon to the right of any related item card, next to the icon. If an item belongs to multiple segments, only one link is displayed at a time.
Encontrou um erro de texto ou digitação? Selecione o texto e pressione Ctrl+Enter.
