
Configure o SDK
- Open your Unity project.
- Click
Window > Xsolla > Edit Settings in the main menu. - Specify the main project parameters in the
Inspector panel in one of the following ways:
- Import settings from Publisher Account:
- Click
Fill settings by PA . - Specify Publisher Account authorization data in the
Login andPassword fields. - Click
Log In . - Fill in the fields in the
Publisher Account section.
- Click
- Import settings from Publisher Account:
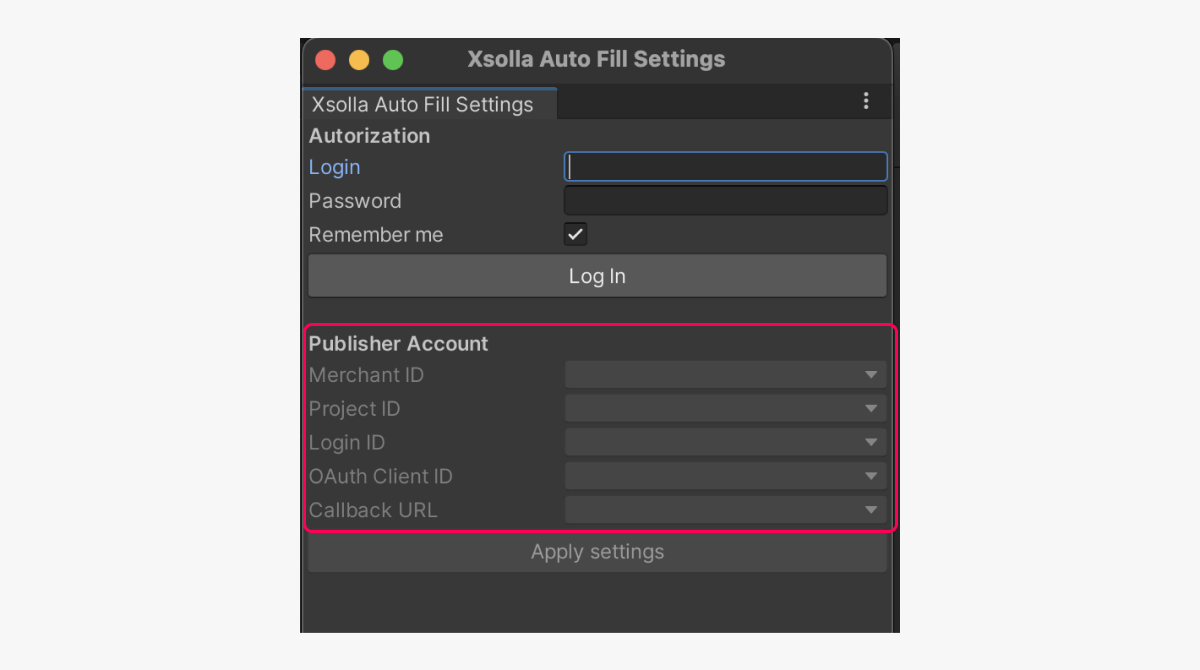
- Click
Apply Settings .
- Click
Observação
If you use a social network to register in Publisher Account, you need to add a password in one of the following ways to be able to import settings from your Publisher Account:
- On the sign-up/login page of Publisher Account, click Forgot your password? and follow the instructions.
- Specify a new password in Publisher Account in the Profile settings > Change password section (in the Current password field, enter an arbitrary value).
- Specify the parameters manually:
- In the
Project ID field, specify the project ID that can be found in Publisher Account next to the name of your project. - In the
Login ID field, specify the ID of the Login project. To get it, open Publisher Account, go to the Login > Dashboard > your Login project section, and click Copy ID next to the name of the Login project. - In the
Callback URL field, specify the URL or path where users are redirected after they have successfully authenticated, confirmed their email, or reset their password. The value must match the one specified in Publisher Account in the Login > your Login project > Security > OAuth 2.0 section.
- In the
- Specify the parameters manually:
Observação
If the Callback URL field is empty, Edit > Project Settings > Player > Android (iOS) > Other Settings > Bundle Identifier . The same value must be added in Publisher Account in the Login > your Login project > Security > OAuth 2.0 section.
app://xlogin.<APP_ID> is used for redirection, where <APP_ID> is the application ID from - In the
OAuth Client ID field, specify client ID for OAuth 2.0 that can be found in Publisher Account in the Login > your Login project > Security > OAuth 2.0 section.
- In the
- Set other settings if necessary (e.g., display options for the payment UI in the
Pay Station UI section).
Este artigo foi útil?
Obrigado pelo seu feedback!
Avaliaremos sua mensagem e a usaremos para melhorar sua experiência.Encontrou um erro de texto ou digitação? Selecione o texto e pressione Ctrl+Enter.
