
Server-side integration
This type of integration is suitable for partners who have already implemented the game logic for authorization, in-game store, and player’s inventory on their servers and want to use Xsolla Pay Station. You will need to get the Pay Station access token and configure the handling of webhooks.
During server integration, the following payment processing logic is implemented:
- The client sends a request to the application server to open the payment interface.
- The application server sends information about the currency and amount of the payment to the Xsolla server.
- The Xsolla server returns a token with purchase details and Pay Station parameters.
- The application server sends the received token to the client.
- The client opens Pay Station in a browser using the SDK.
- After paying for the purchase, a webhook with the payment status is sent to the application server.
Integration flow
To integrate Xsolla products with your servers using the Game Commerce asset:
- Install the asset.
- Set up the project in your Publisher Account.
- Set up an in-game store and product catalog on your server.
- Set up your Unity project.
- Get a token.
- Open the payment UI.
- Set up webhook handling.
After the integration is complete, test the payment process.
Install asset
- Download Unity.
- Pick a personal or professional Unity license based on your preferences.
- Create a new Unity project.
- Download the asset.
- Unzip the package.
- In the Unity editor, go to
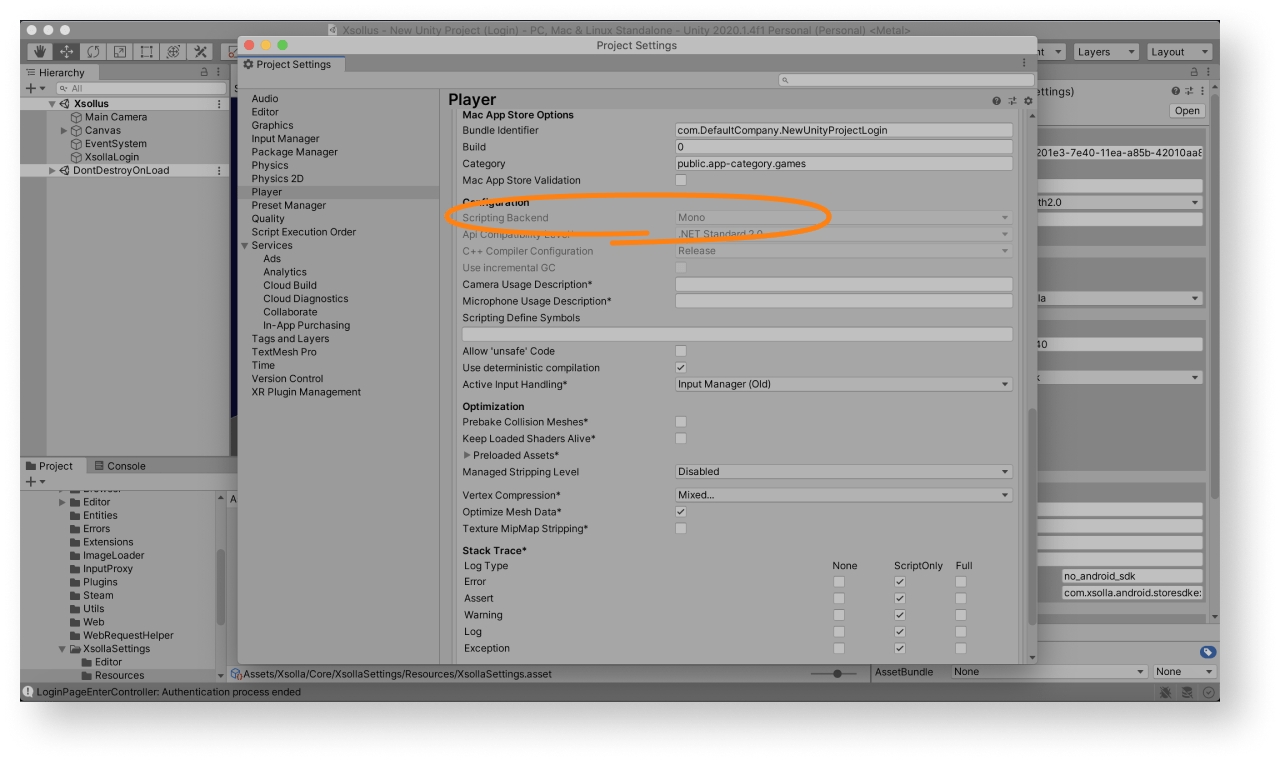
Assets > Import Package > Custom Package in the main menu and select the asset. - Make sure that the Mono compiler is used for creating a game build (for standalone builds only). To do this:
- Click
Edit > Project Settings in the main menu. - Go to the
Other Settings > Configuration section. - Make sure that
Mono is chosen in theScripting Backend field.
- Click
After installing the asset, launch the
For the demo scene, a project in Publisher Account is preset and an in-game store is fully configured.
Default values for the
| Key | Value |
|---|---|
| Login ID | 026201e3-7e40-11ea-a85b-42010aa80004 |
| Project ID | 77640 |
You can use the demo scene in two ways:
- as an example
- as an initial version of the login system, inventory, and in-game store in order to get a quick result and expand its capabilities if necessary
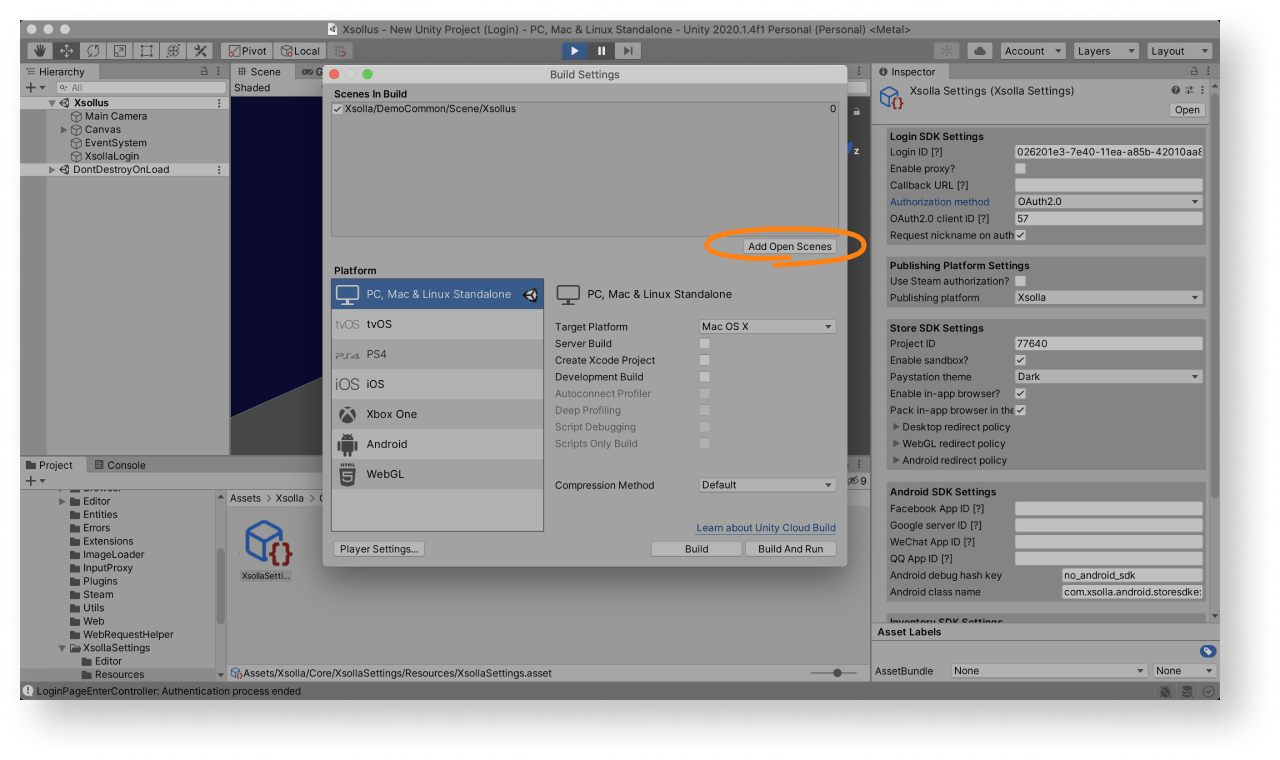
To use the demo scene or its parts in your application, add it in build settings:
- Go to
Assets > Xsolla > DemoCommon > Scene and launch theXsollus scene. - Open
File > Build settings and clickAdd Open Scenes .
Create project in Publisher Account
- Sign up to Publisher Account.
- Configure your project:
- To fill in the game data automatically, provide the Link to your game on any platform. As a result, the image of the game, its name, and description will be added to the project settings.
- To fill in the game data manually, click I don’t have a link, set up manually and specify:
- project languages (English is set by default)
- project name for all specified languages
- game website (optional)
- Click Create project.
You will need the following parameters for the integration:
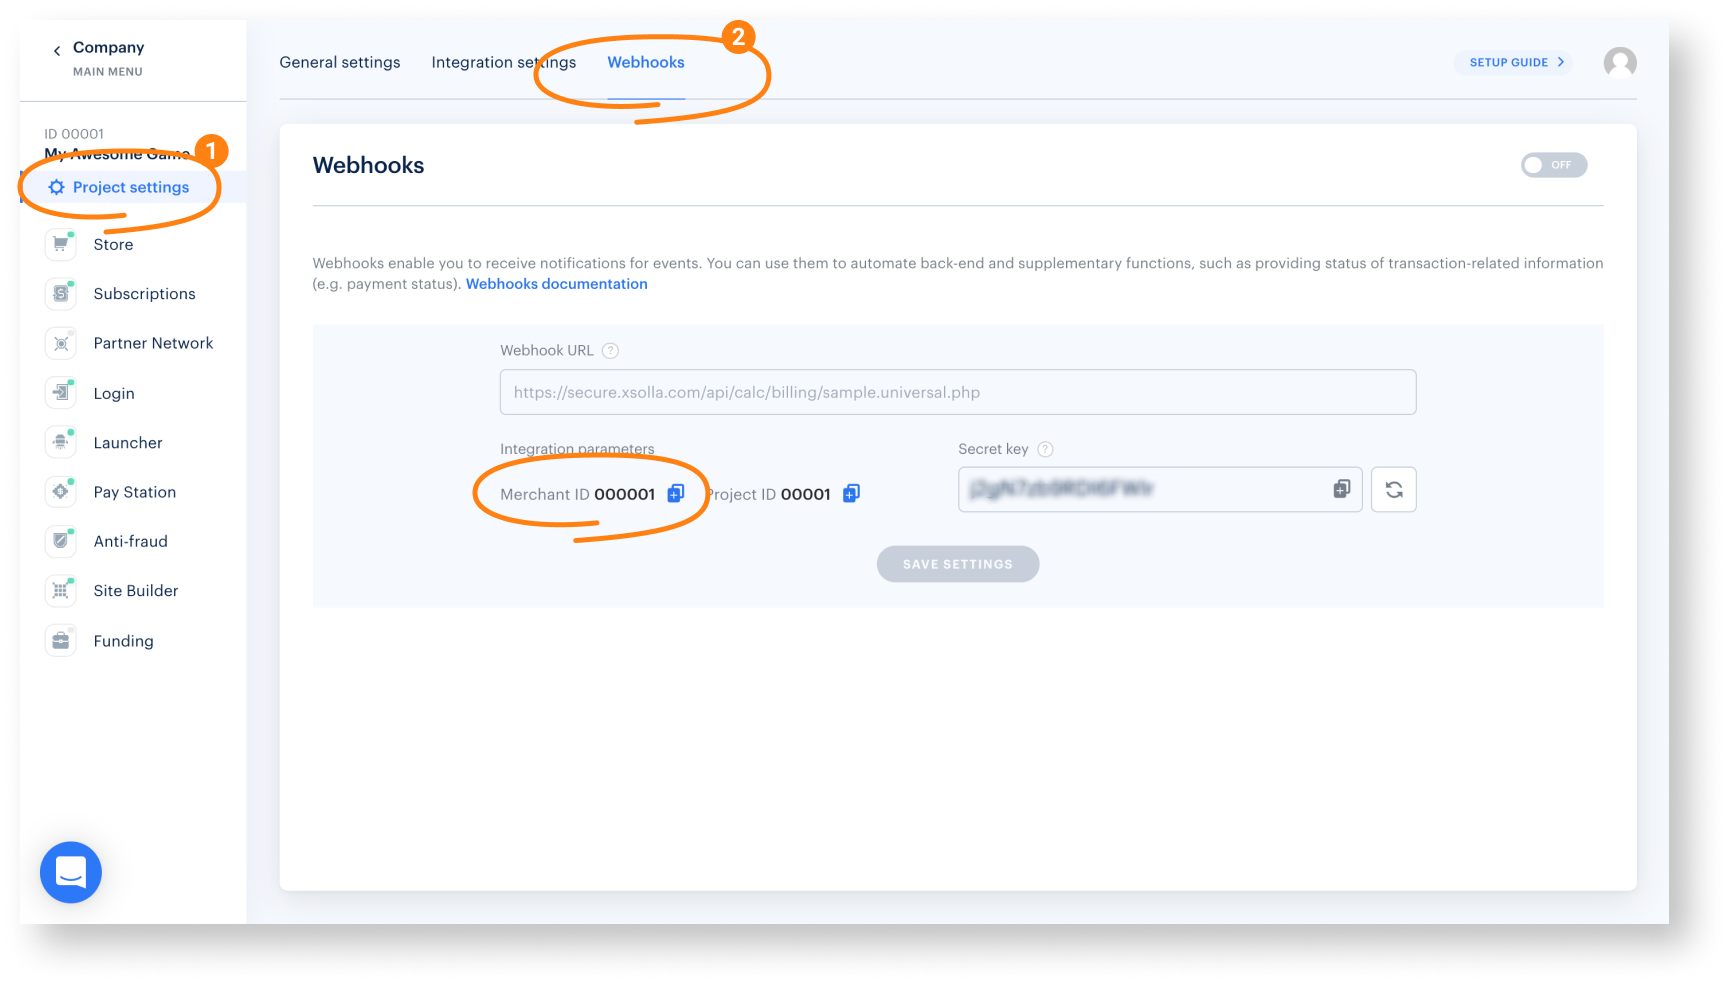
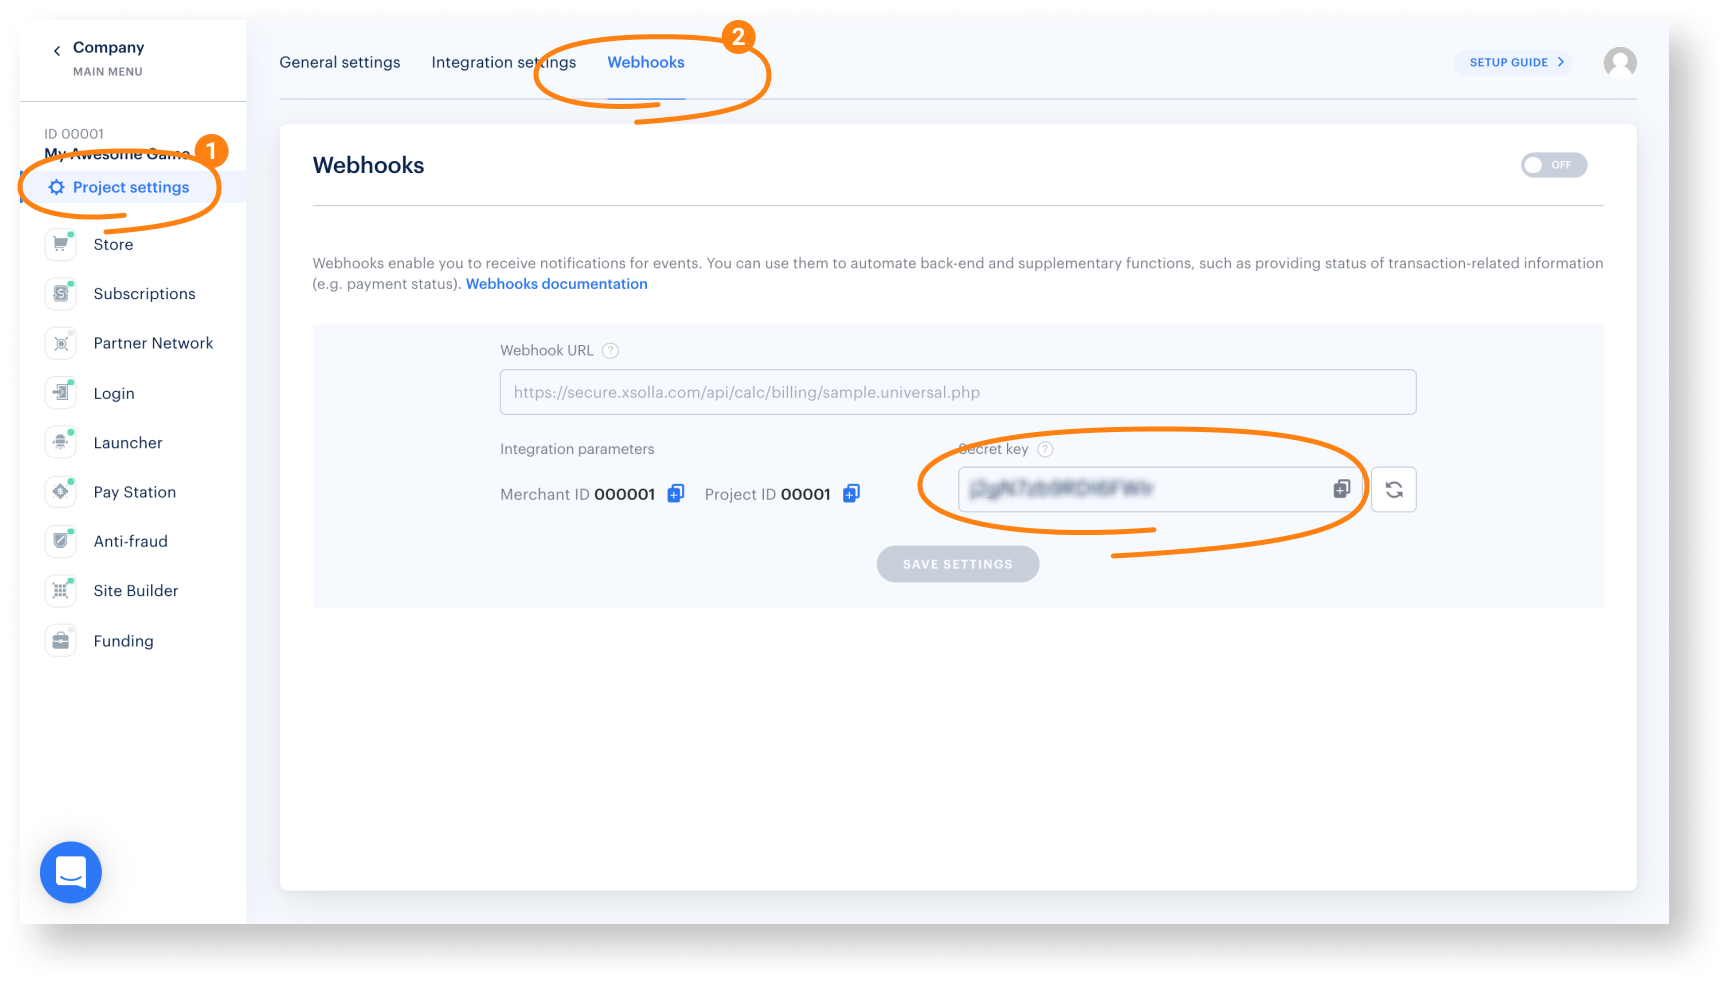
- Merchant ID found in Project settings > Webhooks.
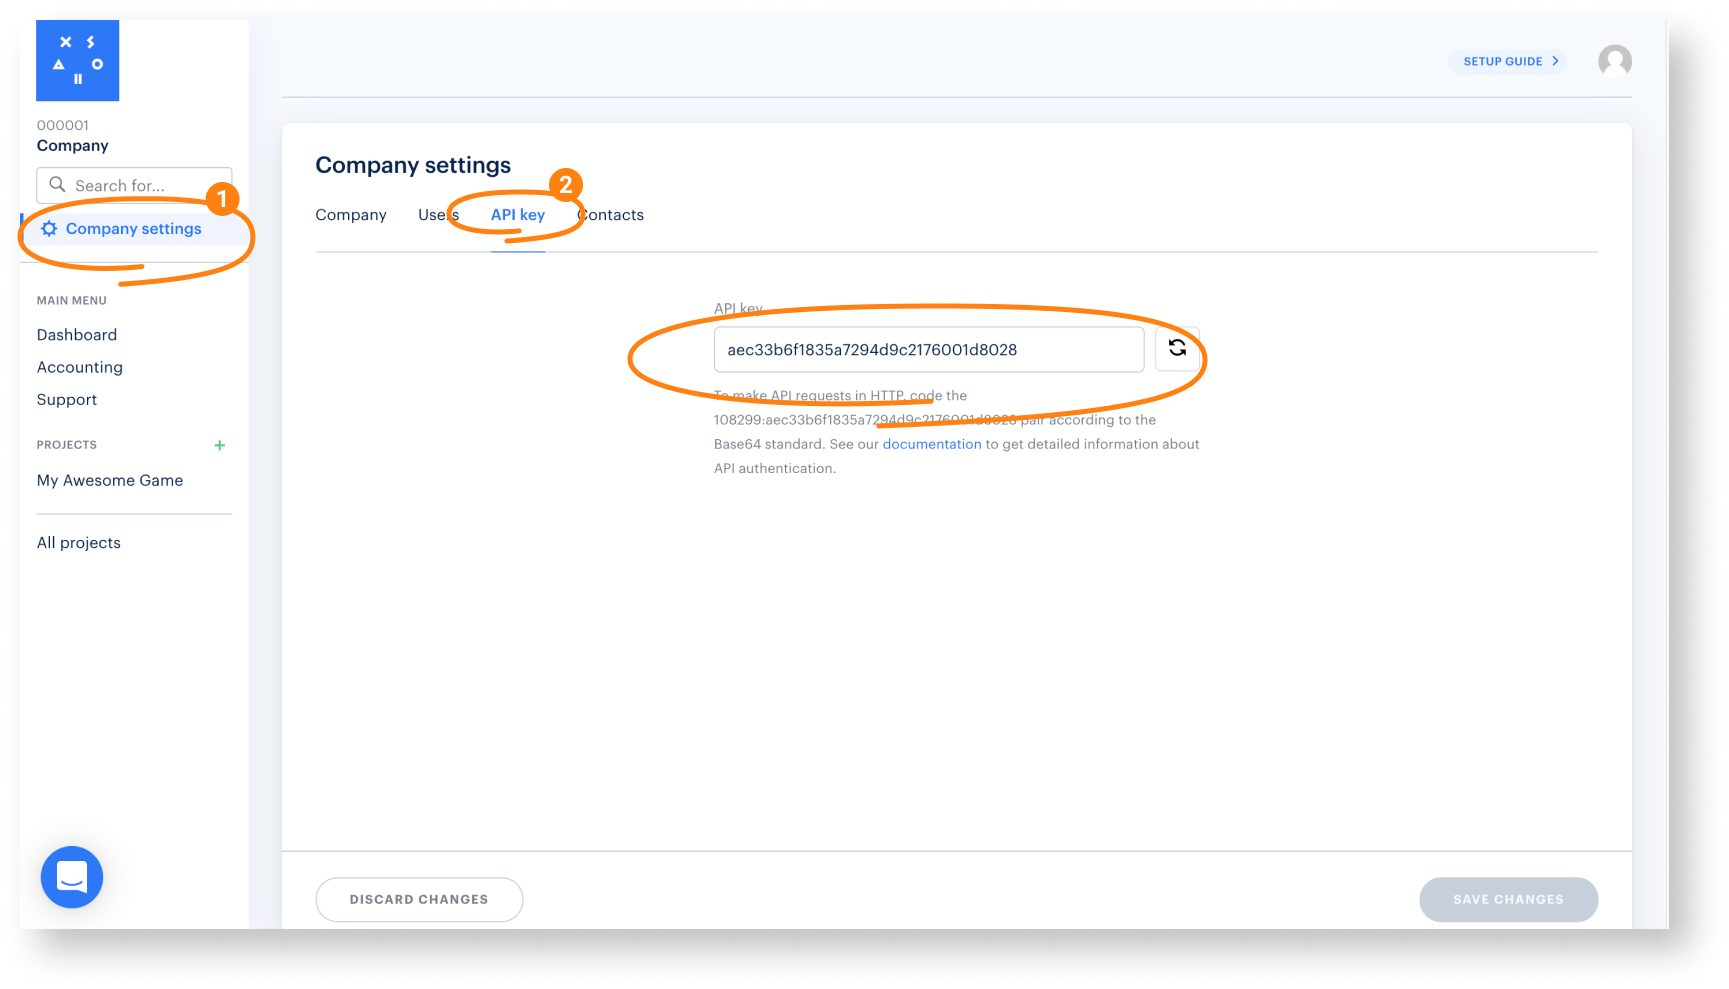
- API key found in Company settings > API key section.
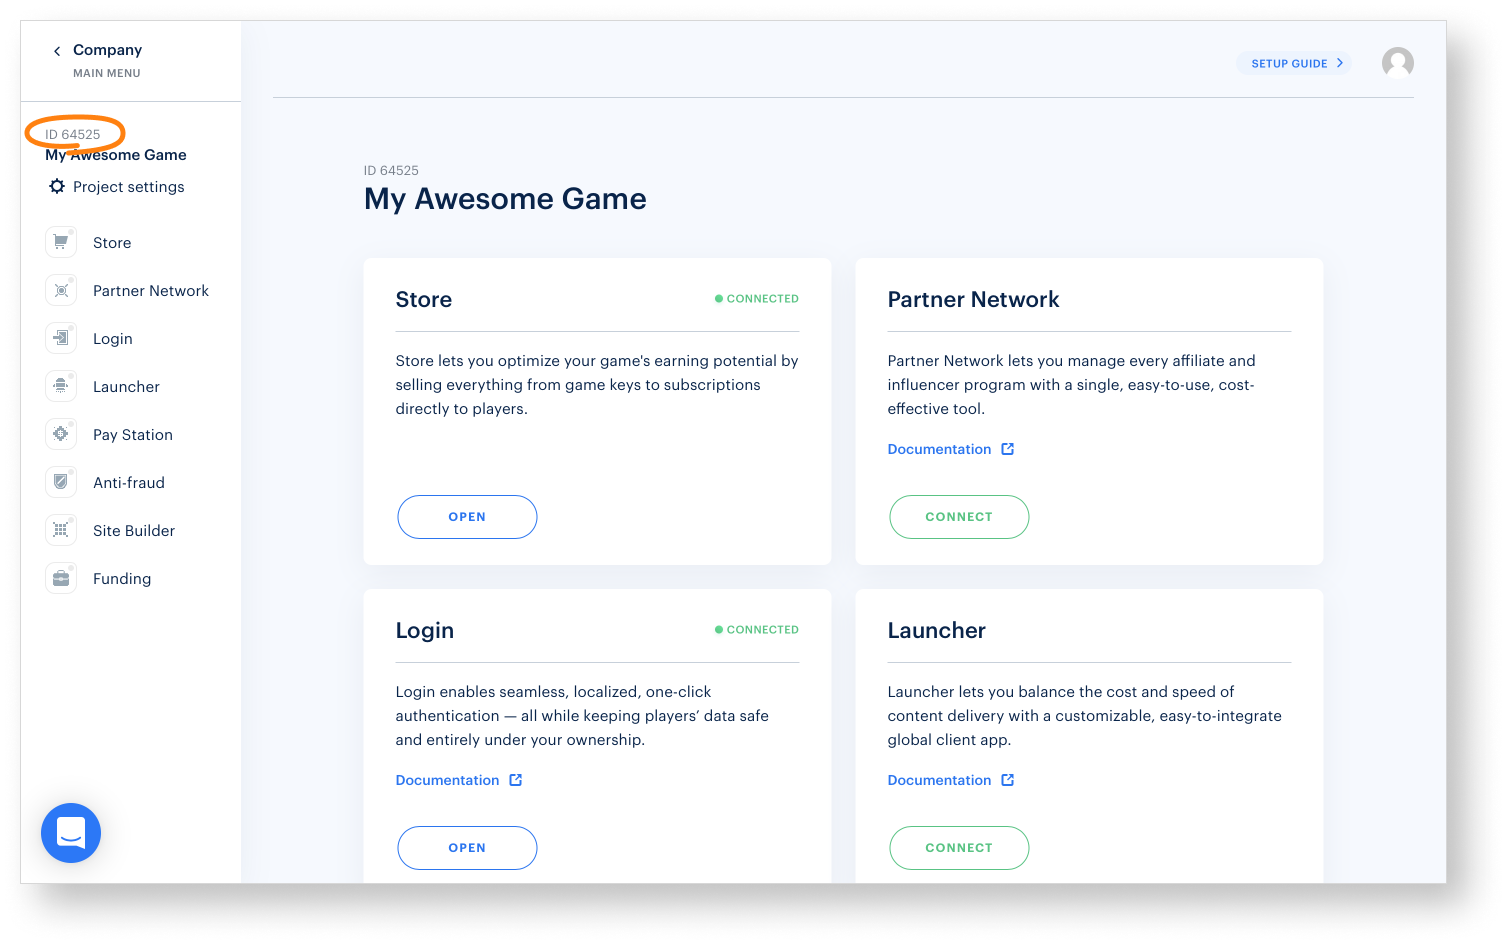
- Project ID found in Publisher Account beside the name of your project.
- Secret key found in Project settings > Webhooks section.
Set up Unity project
- Open your Unity project.
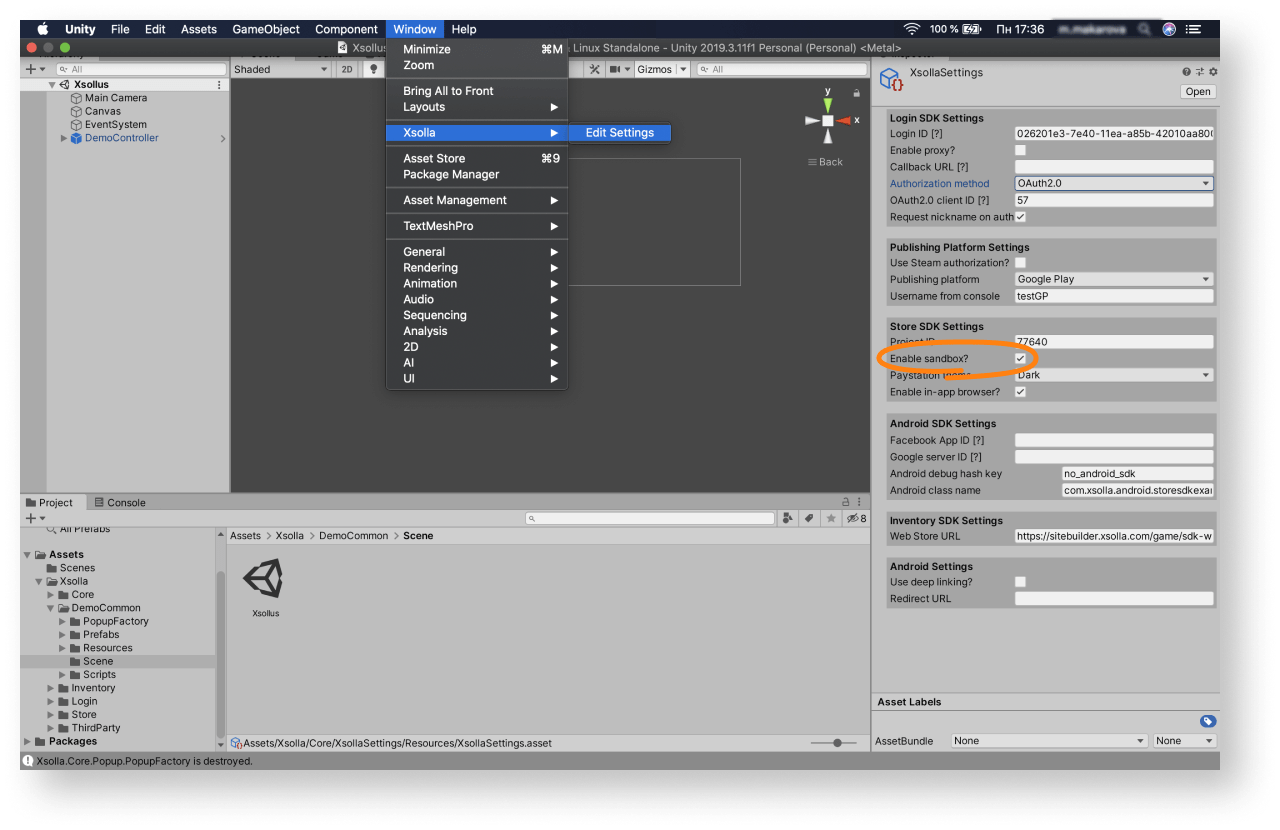
- Click
Window > Xsolla > Edit Settings in the main menu. - To enable sandbox mode, check the
Enable sandbox? box in theInspector panel.
- Design an interface for the login system, in-game store, and other pages for your application. You can create your own solution by following Unity instructions.
- Set up event handling according to your application logic using SDK methods.
Get token
To obtain a token, use the
- the ID of the user who made the purchase
- amount of payment
- payment currency
- purchase details (optional)
- Pay Station parameters (optional)
You can pass purchase information in one of the following ways:
- as a list of items via the
itemparameter - as a description of the purchase via the
descriptionparameter
Pay Station parameters (e.g., localization language, interface properties, theme) are passed in the settings object. To enable/disable sandbox mode, you need to change the value of the sandbox parameter in the request to receive a token, and change the SDK settings. To change the rest of the Pay Station interface settings, you need to change the parameters of the request for a token.
custom_parameters parameter. This information will also be passed in the configured webhooks.Open payment UI
To open the payment UI, pass the token obtained in the previous step to the OpenPurchaseUi SDK method.
Set up webhooks
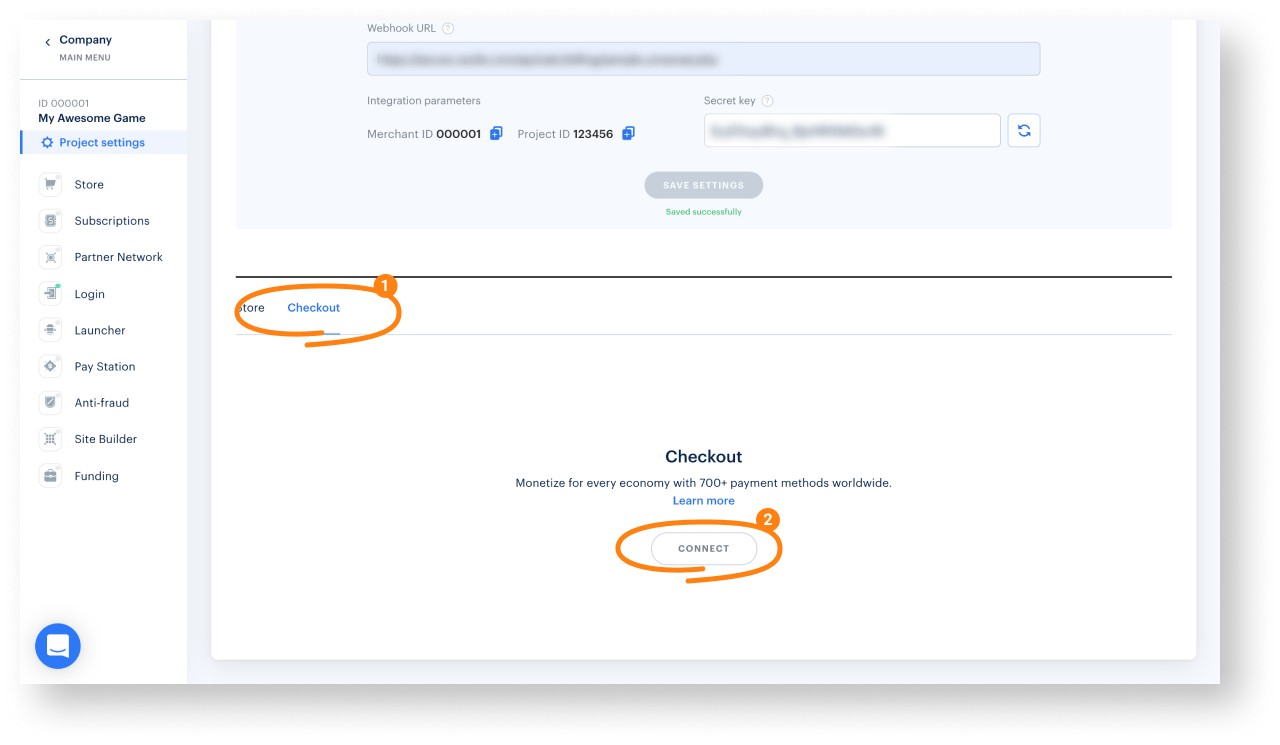
- Go to your project in Publisher Account.
- Go to Project settings > Webhooks, specify the Webhook URL, and generate a secret key to sign project webhooks.
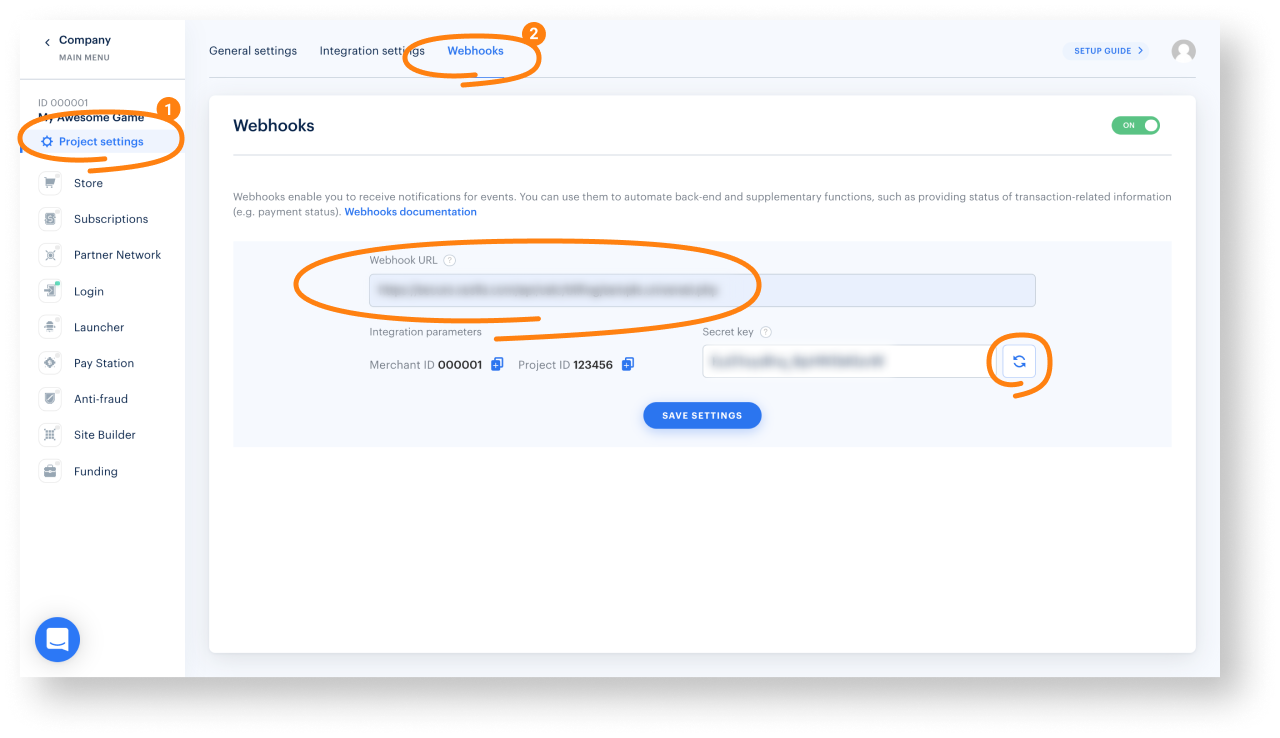
- Save settings.
- Implement the following webhooks for Pay Station:
- Go to the Checkout tab and click Connect.
- Test the webhook handler.
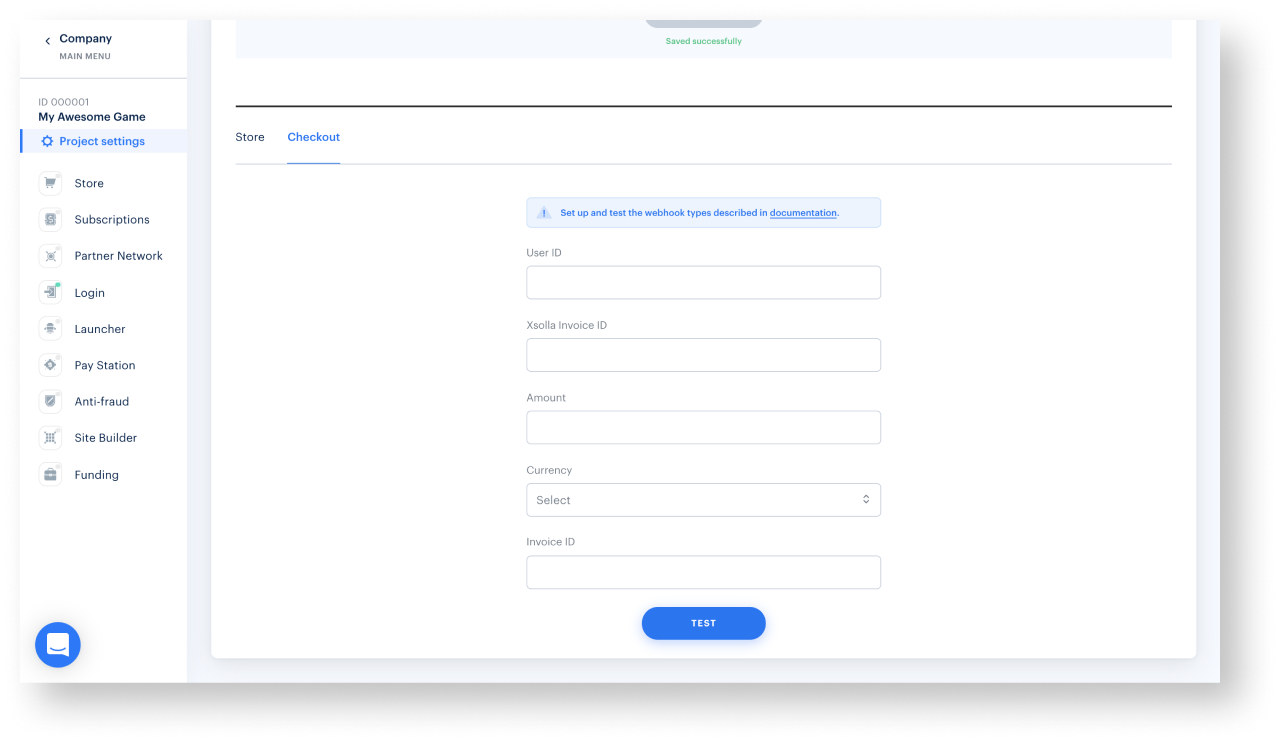
- HTTP code 204 without a message body
- HTTP code 400 describing the problem if the specified user was not found or if an invalid signature was passed
- Click Pay Station in the side menu and go to Settings.
- Set the Checkout toggle to On.
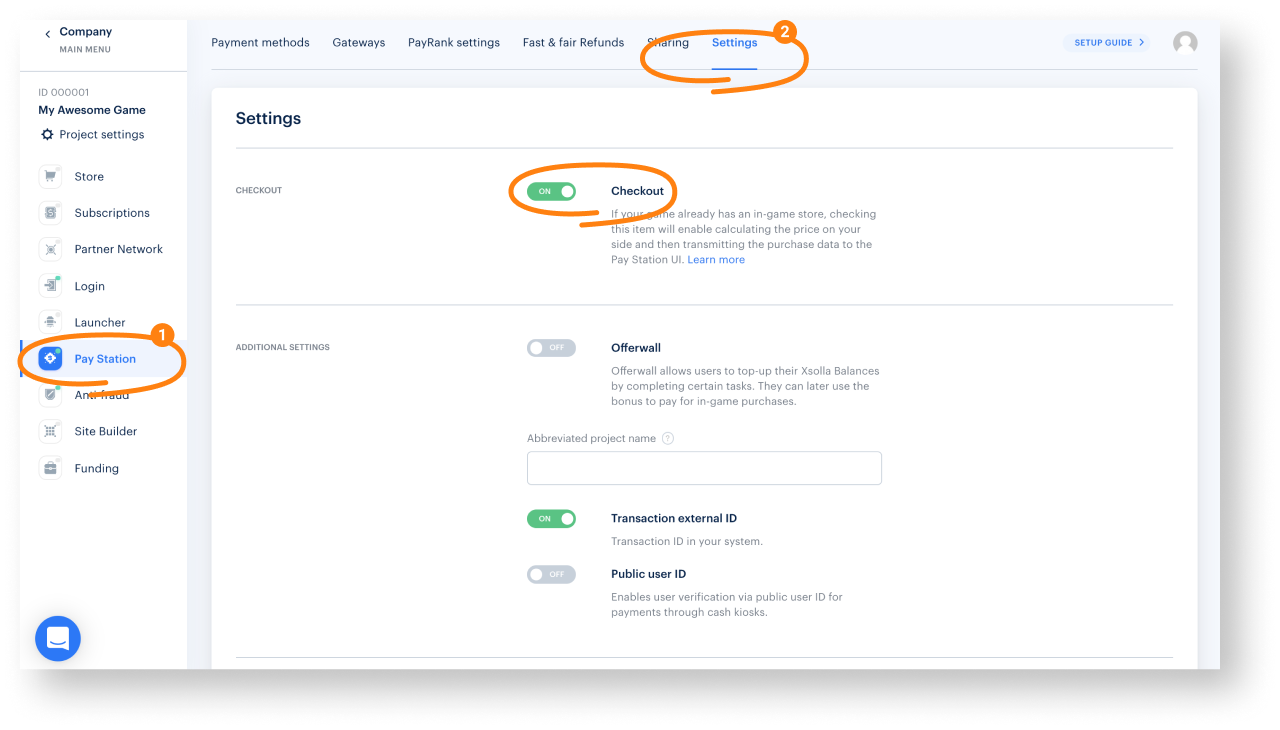
- Click Save.
Test payment process
After successfully configuring the asset, test the payment process. By default, all payments are made in sandbox mode for any users. Use a test bank card to simulate a successful payment process.
To test the payment process with real payments:
- Make sure that you have signed a contract with Xsolla.
- In your Unity project, uncheck the
Enable sandbox? box in theInspector panel. - Set the
sandboxparameter tofalsein the request for the token.
Found a typo or other text error? Select the text and press Ctrl+Enter.
