Enable Buy Button via link-outs to Web Shop
Why is it important
Following recent updates to Apple’s policies in certain regions, developers are now permitted to guide users from their apps to external websites to accept payments for virtual items.
You can add visible buttons, banners, messages, and other calls to action that take users directly from your game to item purchase using a secure, browser-based checkout (to your Web Shop or payment UI) in a single click — without violating Apple’s rules or risking enforcement.
Buy Button integration via Web Shop link is a quick, low-code way to enable item-specific purchases from your game using a browser-based checkout. It offers:- A seamless flow — tapping Buy Button opens the Web Shop checkout for a specific item, allowing users to automatically return to the game after a successful payment.
- Support for a wide range of payment methods, including one-click payments via Apple Pay, for fast and familiar mobile checkout.
- Fast setup — if your Web Shop is already set up, you only need to add a link with parameters to the game.
- Instant onboarding — if you don’t have Web Shop yet, you can get started quickly by instantly creating Web Shop, adding payment links to your game, and going live.
This integration option gives you access not only to Buy Button integration, but also to the full Web Shop experience including features like personalization, referral program, loyalty system, promo codes, and more.
Check the integration via Xsolla SDK if you’re using a custom Web Shop not based on Site Builder and are looking to integrate Pay Station directly into your game.
How it works
- The user opens the app on iOS.
- The user taps the
Buy Button next to the desired item. - The app launches a browser with a Web Shop link that includes the
user-id,purchase-skuandredirect-urlparameters. - Web Shop automatically authenticates the user and displays the payment UI for the selected item.
- The user chooses a payment method and completes the purchase.
- The user is automatically redirected back to the game via a deep link.
- The app receives the purchase confirmation via a webhook and delivers the purchased item.
How to get it
- Create a Web Shop:
- Add logic to your iOS app to show the button with purchase link only to users in the United States:
“USA”), the button with the purchase link should be displayed to the user.Quick start
Sign up for your Publisher Account and create a project
Publisher Account is the main tool to configure Xsolla features, as well as to work with analytics and transactions.
To sign up, go to Publisher Account and create an account. To create a project, click Create project in the side menu and provide any necessary information. You can modify the settings later.

During the integration process, you need to provide the project ID, found in your Publisher Account next to the project name.

Set up Web Shop template
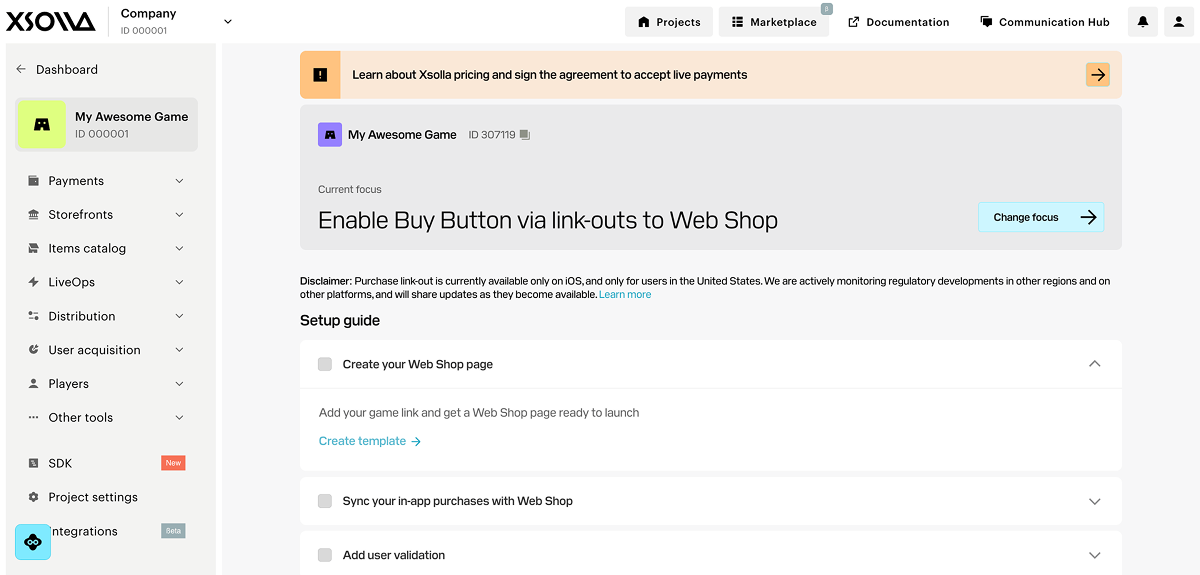
- Open your project in Publisher Account.
- On the project main page, click Change focus and select Enable Buy Button via link-outs to Web Shop.
- On the Create your Web Shop page step, click Create template.
- Select the Web Shop type:
- Single-page shop — a site where all sections are placed on a single page.
- Multi-page web portal — a site with three separate pages: a main page, an item catalog page, and a news page.
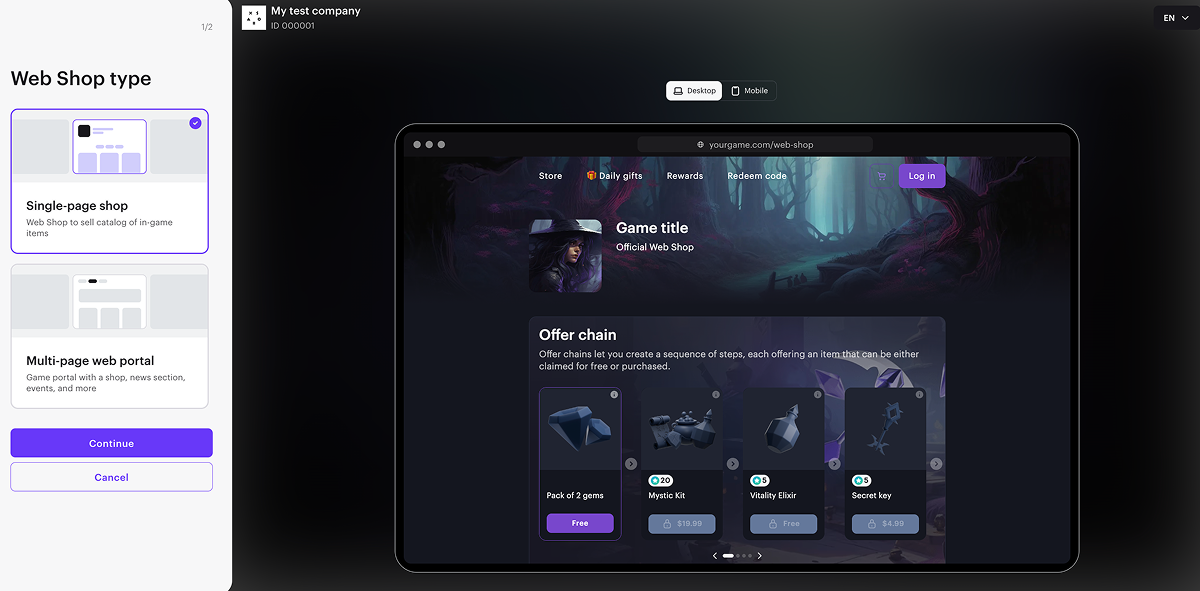
- Click Continue.
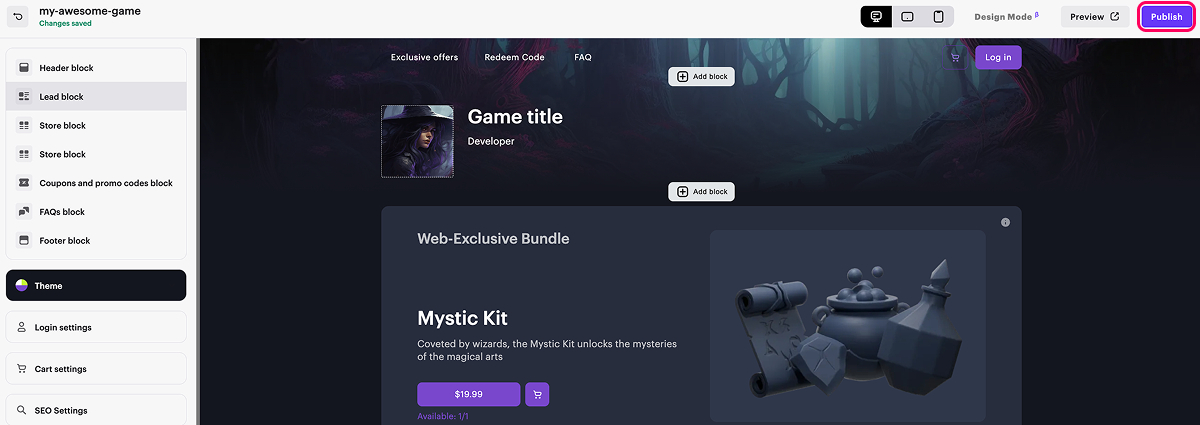
- On the Express tab, add a link to your game in App Store. This allows you to quickly create a page in the style of your game: images and the game title, developer information, and a color scheme are automatically added to the page.
- Click Create Web Shop.
Set up item catalog
On the Xsolla side, you need to create a catalog of the items you sell in your game. You can choose one of the following methods to set up your catalog:
- Import items: upload a JSON file to quickly add your catalog to Publisher Account.
- Use API calls: ideal for automated or large-scale updates.
- Import your catalog from App Store, Google Play, or PlayFab: transfer an existing catalog directly from an external platform.
- Set up the catalog manually: add and edit items directly in the Publisher Account.
Set up user authentication
To grant purchases to the user’s in-game account, configure authentication via the user ID from the game.
You also need to set up webhook handling to verify that the user exists. This webhook provides an additional validation when the Web Shop is opened via a direct link from the game, and is required for user authentication in cases when the Web Shop is accessed outside the game client.
To configure authentication:
- On your application’s side, implement handling of the user validation webhook.
When receiving a webhook, the application should do the following:
- Search for a user by their ID passed in the webhook.
- Depending on the result, send one of the following status codes:
- 200 HTTP-code with an answer from webhook if a user is found
- 404 HTTP-code if the user ID is not found
- Send user attributes for personalization.
Open your project in Publisher Account and go to the Storefronts > Websites section.
In the pane of the necessary site, click Open Site Builder.
- If your site includes multiple pages, select the one you need:
- Click the current page title at the top of the builder.
- Select the necessary page from the drop-down list.
- Go to the Login settings block.

- Select the User ID option.

- In the drop-down list, select New Login.

- Enter the URL to receive webhooks. This URL may differ from the one specified in Project settings > Webhooks.
https://. Using http:// will cause an error.
Configure webhooks to grant purchases to the user
Webhooks are notifications about events occurring in the system. When a specific event occurs, Xsolla sends an HTTP request, transmitting event data to your game server. These webhooks are essential for the game client and/or server to receive notification on successful and unsuccessful payments and user authentication attempts.
Enabling webhooks
To enable receiving webhooks:
- In the project in Publisher Account go to Project settings > Webhooks section.
- In the Webhook server field, specify the URL of your server where you want to receive webhooks in the
https://example.comformat. You can also specify the URL you find in a tool for testing webhooks.
- Generate a secret key:
- In the Secret keys section, click Add key.
- In the modal window that opens, enter the key name that would allow you to identify it in the general list.
- Click Create key.
- Click Copy secret and save the created key on your side.
- Click Done.
- Confirm that you have saved the key and click Ok, close.

Key recommendations:
- Save the generated secret key on your side. You can view the key in Publisher Account only once when it is created.
- Don’t share your secret key with anyone.
- The secret key must be stored on your server and never in binaries or on the front end.
- Click Enable webhooks.
Secret key rotation
You can create up to 5 secret keys in your project to enable their rotation.
There can be only one active secret key per project. If you want to change it, click Set as active in the row of another key and confirm the action. Once you successfully migrate to a new key, we recommend deleting deactivated keys.

Testing webhooks
In the Payments and Store tab, you can test the following webhooks:
User validation (“notification_type”:“user_validation”):
- curl
 1curl -v 'https://your.hostname/your/uri' \
 2-X POST \
 3-H 'Accept: application/json' \
 4-H 'Content-Type: application/json' \
 5-H 'Authorization: Signature 13342703ccaca5064ad33ba451d800c5e823db8f' \
 6-d '{
 7    "notification_type":"user_validation",
 8    "settings": {
 9      "project_id": 18404,
10      "merchant_id": 2340
11    },
12    "user": {
13        "ip": "127.0.0.1",
14        "phone": "18777976552",
15        "email": "email@example.com",
16        "id": "1234567",
17        "name": "John Smith",
18        "country": "US"
19    }
20}'
Successful payment for order (“notification_type”: “order_paid”):
- curl
  1curl -v 'https://your.hostname/your/uri' \
  2-X POST \
  3-H 'Accept: application/json' \
  4-H 'Content-Type: application/json' \
  5-H 'Authorization: Signature d09695066c52c1b8bdae92f2d6eb59f5b5f89843' \
  6-d '{
  7    "notification_type": "order_paid",
  8    "items": [
  9      {
 10        "sku": "com.xsolla.item_1",
 11        "type": "virtual_good",
 12        "is_pre_order": false,
 13        "quantity": 3,
 14        "amount": "1000",
 15        "promotions": [
 16          {
 17            "amount_without_discount": "6000",
 18            "amount_with_discount": "5000",
 19            "sequence": 1
 20          },
 21          {
 22            "amount_without_discount": "5000",
 23            "amount_with_discount": "4000",
 24            "sequence": 2
 25          }
 26        ],
 27        "custom_attributes":
 28          {
 29            "purchased": 0,
 30            "attr": "value"
 31          }
 32      },
 33      {
 34        "sku": "com.xsolla.item_new_1",
 35        "type": "bundle",
 36        "is_pre_order": false,
 37        "quantity": 1,
 38        "amount": "1000",
 39        "promotions": []
 40      },
 41      {
 42        "sku": "com.xsolla.gold_1",
 43        "type": "virtual_currency",
 44        "is_pre_order": false,
 45        "quantity": 1500,
 46        "amount": null,
 47        "promotions": []
 48      }
 49    ],
 50    "order": {
 51      "id": 1,
 52      "mode": "default",
 53      "currency_type": "virtual",
 54      "currency": "sku_currency",
 55      "amount": "2000",
 56      "status": "paid",
 57      "platform": "xsolla",
 58      "comment": null,
 59      "invoice_id": "1",
 60      "promotions": [
 61        {
 62          "amount_without_discount": "4000",
 63          "amount_with_discount": "2000",
 64          "sequence": 1
 65        }
 66      ],
 67      "promocodes": [
 68        {
 69          "code": "promocode_some_code",
 70          "external_id": "promocode_sku"
 71        }
 72      ],
 73      "coupons": [
 74        {
 75          "code": "WINTER2021",
 76          "external_id": "coupon_sku"
 77        }
 78      ]
 79    },
 80    "user": {
 81      "external_id": "id_xsolla_login_1",
 82      "email": "gc_user@xsolla.com"
 83    },
 84    "billing": {
 85      "notification_type": "payment",
 86      "settings": {
 87        "project_id": 18404,
 88        "merchant_id": 2340
 89      },
 90      "purchase": {
 91          "subscription": {
 92              "plan_id": "b5dac9c8",
 93              "subscription_id": "10",
 94              "product_id": "Demo Product",
 95              "date_create": "2014-09-22T19:25:25+04:00",
 96              "date_next_charge": "2014-10-22T19:25:25+04:00",
 97              "currency": "USD",
 98              "amount": 9.99
 99          },
100          "total": {
101              "currency": "USD",
102              "amount": 200
103          },
104          "promotions": [{
105              "technical_name": "Demo Promotion",
106              "id": 853
107          }],
108          "coupon": {
109              "coupon_code": "ICvj45S4FUOyy",
110              "campaign_code": "1507"
111          }
112        },
113      "transaction": {
114          "id": 1,
115          "external_id": 1,
116          "payment_date": "2014-09-24T20:38:16+04:00",
117          "payment_method": 1,
118          "payment_method_name": "PayPal",
119          "payment_method_order_id": 1234567890123456789,
120          "dry_run": 1,
121          "agreement": 1
122      },
123      "payment_details": {
124          "payment": {
125              "currency": "USD",
126              "amount": 230
127          },
128          "vat": {
129              "currency": "USD",
130              "amount": 0,
131              "percent": 20
132          },
133          "sales_tax": {
134              "currency": "USD",
135              "amount": 0,
136              "percent": 0
137          },
138          "direct_wht": {
139              "currency": "USD",
140              "amount": 0,
141              "percent": 0
142          },
143          "payout_currency_rate": "1",
144          "payout": {
145              "currency": "USD",
146              "amount": 200
147          },
148          "country_wht": {
149              "currency": "USD",
150              "amount": 2,
151              "percent": 10
152          },
153          "user_acquisition_fee": {
154              "currency": "USD",
155              "amount": 2,
156              "percent": 1
157          },
158          "xsolla_fee": {
159              "currency": "USD",
160              "amount": 10
161          },
162          "payment_method_fee": {
163              "currency": "USD",
164              "amount": 20
165          },
166          "repatriation_commission": {
167              "currency": "USD",
168              "amount": 10
169          }
170      }
171    }
172 ,
173  "custom_parameters": {
174    "parameter1": "value1",
175    "parameter2": "value2"
176  }
177}'
Test site in sandbox mode
To test the site work in sandbox mode:
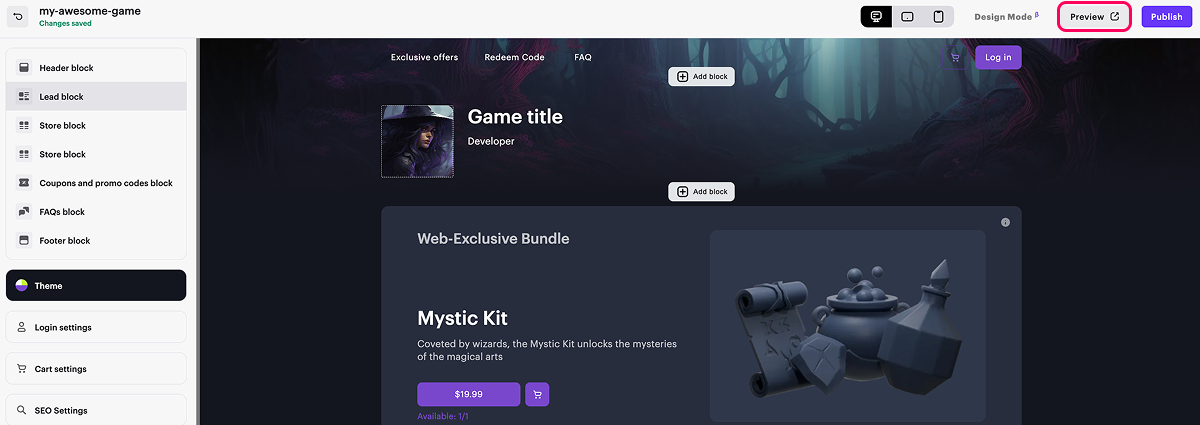
- Open your project in Publisher Account and go to the Storefronts > Websites section.
- Click Open Site Builder in the pane of the necessary site.
- Click Preview.
- Select an item and click the purchase button.
- Choose the Card group of payment methods.
- Enter the test bank card details. Enter any values in the remaining fields. You can also specify incorrect details (card number, expiration date, or CVV) in order to generate an error.
Publish site
- To improve your site performance:
a. In the SEO Settings block, set the parameters that will be used by search engines and for page preview in social networks: upload a favicon, specify the store title and description, add a preview image.
b. Configure site localization.
c. Make changes to the domain (optional). To do this, go the Storefronts > Websites section and click Configure in your site pane. In the Domain section, edit the Xsolla domain value, or set up your own domain.
- After you made all necessary changes and your web store is ready for launch, in the upper-right corner of the site builder, click Publish.
- There are no empty sections in the builder (marked with a red indicator).
- The licensing agreement with Xsolla has been signed.
- The main page is published or selected for publication. You cannot publish child pages before the main page.
Add button with purchase link to your game
Add a button to your game that redirects the user to the Web Shop to pay for the selected item. The button must contain a link in the following format: https://yourwebshop.xsolla.site/?user-id=<USER_ID>&purchase-sku=<ITEM_SKU>&purchase-country=<COUNTRY_CODE>&redirect-url=<RETURN_TO_GAME_URL>&utm_content=buy_button, where:
yourwebshop.xsolla.siteis a link to your Web Shop site.<USER_ID>is the user ID in your system.<ITEM_SKU>is the SKU of the desired item from the Web Shop catalog.
- To find the item SKU (using a virtual item as an example):
- Open your project in Publisher Account and go to the Items catalog > Virtual Items section.
- Navigate to the group of items where the item is located.
- Copy the SKU from the line of the specific item below its name.
<COUNTRY_CODE>— a two-letter country code in ISO 3166-1 alpha-2 format that is passed to explicitly specify the user’s country during checkout, regardless of the country automatically detected by IP address. This parameter affects the currency, taxes, and available payment methods.<RETURN_TO_GAME_URL>is the URL address of a web page (e.g.,https://example.com/success) or a deep link (e.g.,mygame://open) to which the user is redirected after making a payment. When using a deep link, make sure that:- you use the correct format, including both the scheme and the path (e.g.,
mygame://open), and not just the scheme (mygame://) - the deep link is handled inside your game mobile application.
- you use the correct format, including both the scheme and the path (e.g.,
utm_content = buy_buttonis a UTM tag used for collecting analytics related to Web Shop entry points. It helps track purchases more accurately based on the traffic source. Usebuy_buttonvalue if tapping the Buy Button in the game opens the Web Shop checkout for a specific item.
utm_content = direct_link if the catalog in your Web Shop is opened from the game or your website without triggering a specific item’s checkout.If you change any parameters in the URL (for example, by adding utm_content), you must re-publish your Web Shop in the Storefronts > Websites section for the changes to take effect.
Detect iOS storefront
To determine whether you can show “USA”, enable the functionality to display the
Ensure your implementation is flexible enough to support additional countries in the future, as regulatory conditions and platform policies may change.
Note that the storefront value on the device does not change unless the user explicitly updates their Apple ID region in system settings.
- swift
1let countryCode = await Storefront.current?.countryCode
2let showBuyButton = countryCode == "USA"
Additional features
You can provide users with quick access to Web Shop features by using query parameters in the site URL. For more details, refer to the instruction on using query parameters.
Advanced analytics in AppsFlyer
When you use link-outs to allow users to make purchases in the web payment UI directly from the game, you can still track their purchases and measure lifetime value (LTV) with a Mobile Measurement Partner (MMP), such as AppsFlyer. Xsolla supports two integration types to enable seamless tracking of user acquisition, retargeting, and purchase activity across both mobile and web platforms.
Choose a type that best fits your setup to keep full visibility into your campaigns and revenue:
| Integration type | How it works |
|---|---|
| Mobile app S2S integration — allows completion of full LTV and return on advertising spend (ROAS) measurement for the purchases within the application and on Web Shop. |
|
| Web SDK integration — allows you to measure and evaluate the effectiveness of user acquisition and retargeting campaigns for attracting traffic to the Web Shop. |
|
Found a typo or other text error? Select the text and press Ctrl+Enter.
