
Social quests
Overview
Social quests are gamified Web Shop activities that reward users for social engagement, helping increase loyalty and drive community growth.
Users complete simple tasks — such as watching a YouTube video, joining a Discord server, or visiting a game page — and receive loyalty points as rewards.
Rewards are granted automatically and appear in the user’s account balance in Web Shop and checkout after a quest is completed.
The feature is integrated through Xsolla Site Builder and requires no additional development — simply add the Social quests block and configure the quest types and rewards.
Social quests help you boost engagement, strengthen user loyalty, and grow your community by turning social actions into actual rewards.
Benefits
- Audience growth
- Quests drive users from social platforms such as Discord and YouTube directly to your Web Shop or social channels, generating free, organic traffic.
- Support for additional platforms including Reddit, Steam, X, and TikTok will be available soon.
- Higher conversion and average order value
- Users spend their earned points during checkout, which encourages repeat purchases and increases the average cart value.
- Automation and simple integration
- Rewards are granted automatically once a quest is completed — no additional API calls or server configuration are required.
- Quick setup
- The Social quests block can be added to your Web Shop via Xsolla Site Builder and configured with no coding required.
- Full customization
- The Social quests block can be fully customized to match your brand — update images, text, and visuals to align with your Web Shop design.
Requirements
To use Social quests, make sure:
- You created Web Shop using Xsolla Site Builder.
- You configured a loyalty program in advance to award points to users.
For an enhanced experience and access to additional quest types, connect a Discord Bot in Publisher Account in the Storefronts > Discord Bot section.
User flow
- The user opens Web Shop and sees the Social quests block.
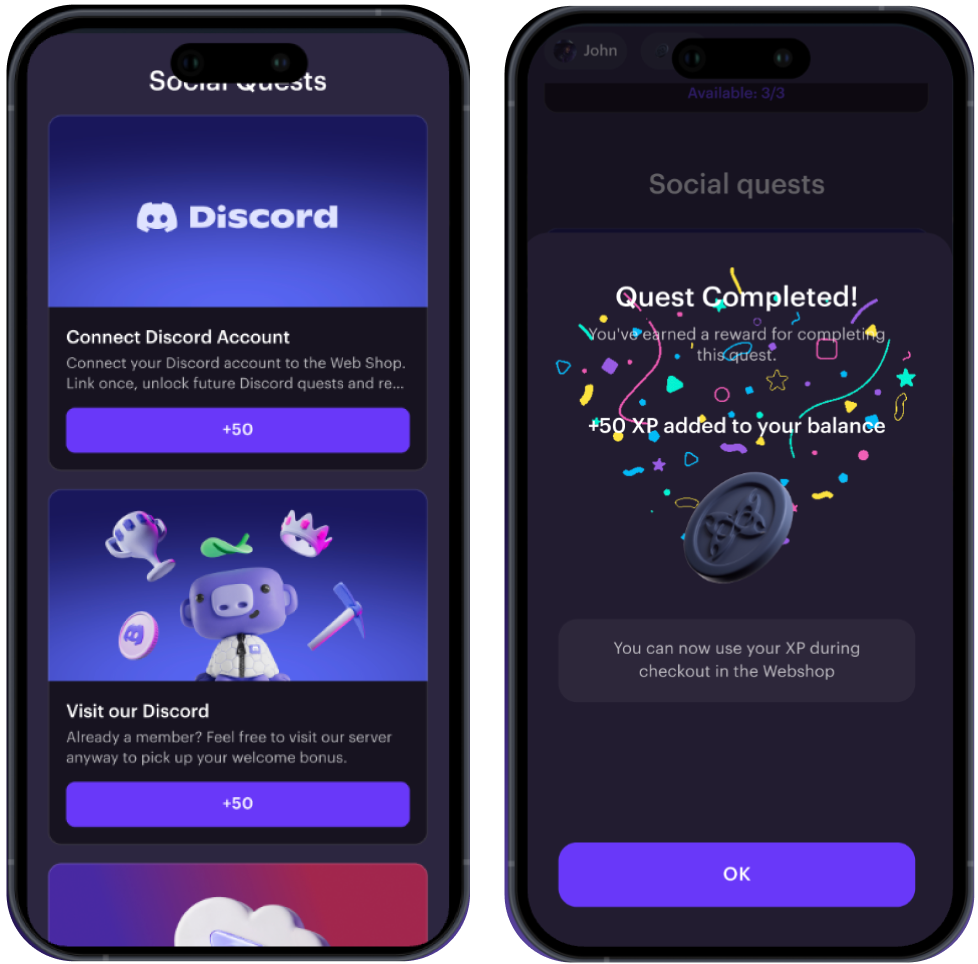
- The user selects a quest, for example, Connect Discord — 100 XP.
- The user completes the action — connects their Discord account, watches a YouTube video, or visits the game page.
- After completing the quest, the user sees a notification about the loyalty points they have earned (for example, +100 XP added!).
- The user returns to Web Shop to spend the earned loyalty points.
- On the Web Shop balance, the user can see the awarded loyalty points that can be used to pay for purchases in Web Shop.
How to set it up
To add the Social quests block:
- Open your project in Publisher Account and go to the Storefronts > Websites section.
- On the Sites tab, select your site and click Open Site Builder.
- Click Add block.
- Choose Social quests block.
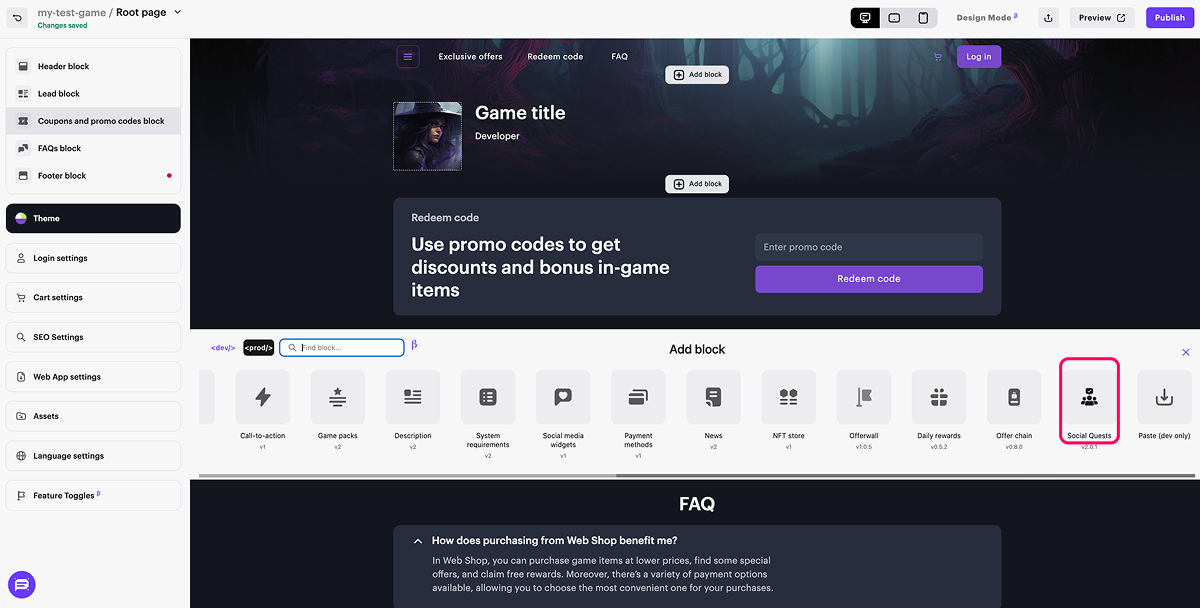
- In the block settings panel, configure the available fields:
Activate quest — enabling or disabling the quest. Only activated quests are shown to users in Web Shop.
Quest type — select the type depending on the platform:
- Discord quests:
- сonnect an account
- join a Discord server
- visit a Discord server
- Discord quests:
- YouTube quests:
- connect a YouTube account
- visit a YouTube channel
- watch a YouTube video
- YouTube quests:
Quest title — the name of the quest displayed in Web Shop, for example, Connect your Discord account.
Description — short text describing what the user should do, for example, Authorize via Discord to earn bonus points and unlock new perks.
Loyalty point type — type of reward the user receives after completing the quest.
Reward amount — amount of points granted for completing the quest.
- Links depending on the platform:
- Discord URL — Discord invite links or server links.
- YouTube URL — link to a video or channel on YouTube.
- Links depending on the platform:
Quest image — a custom image or the default one, for example, a banner or background.
Success modal — settings for the success window displayed after a quest is completed:- Header — the modal window title displayed after a quest is completed, for example, Quest completed.
- Description — the message text shown in the modal window, for example, 10 XP added to your balance.
- Quest image — image displayed in the window after successful quest completion, for example, a congratulatory banner or reward icon.
- To apply the configured settings, click
Save .
- To apply the configured settings, click
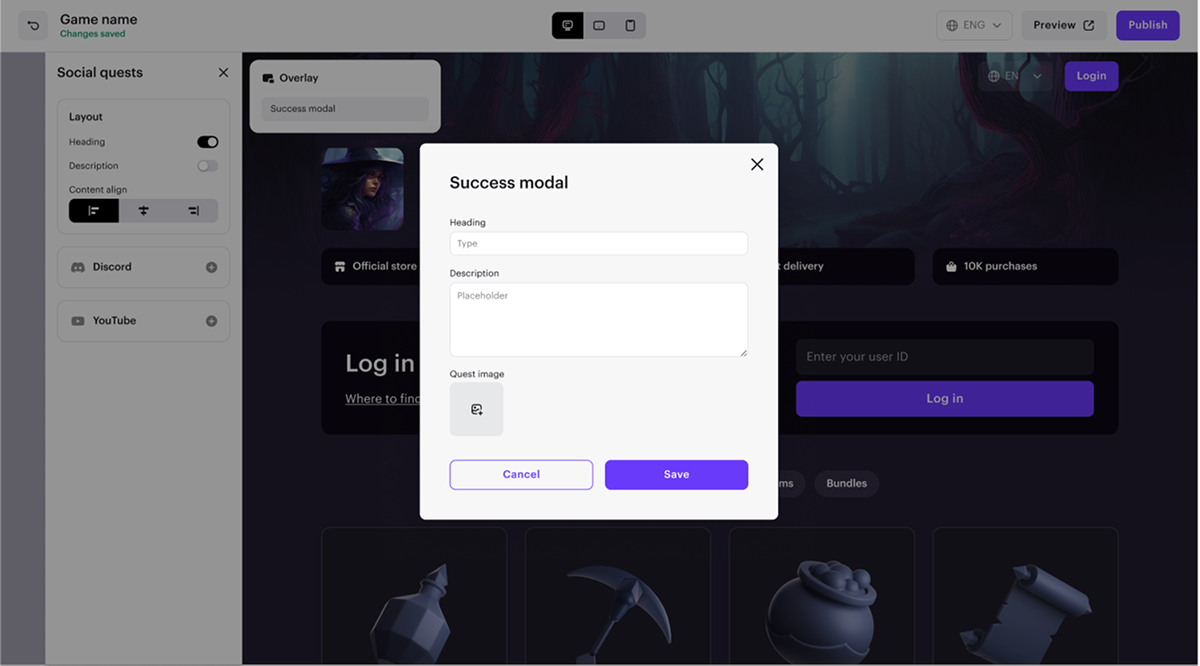
- Click Preview in the upper-right corner to review your changes.
- To apply the changes, publish your site:
- In the upper-right corner of the site builder, click Publish.
- Check the boxes next to the pages you want to publish.
- Click Publish.
Found a typo or other text error? Select the text and press Ctrl+Enter.
