Publish Web Shop
Set up site publishing
- After you create and set up your site in site builder, in the upper-right corner of the site builder, click Publish.
- Check the boxes next to the pages you want to publish.
- Click Publish.
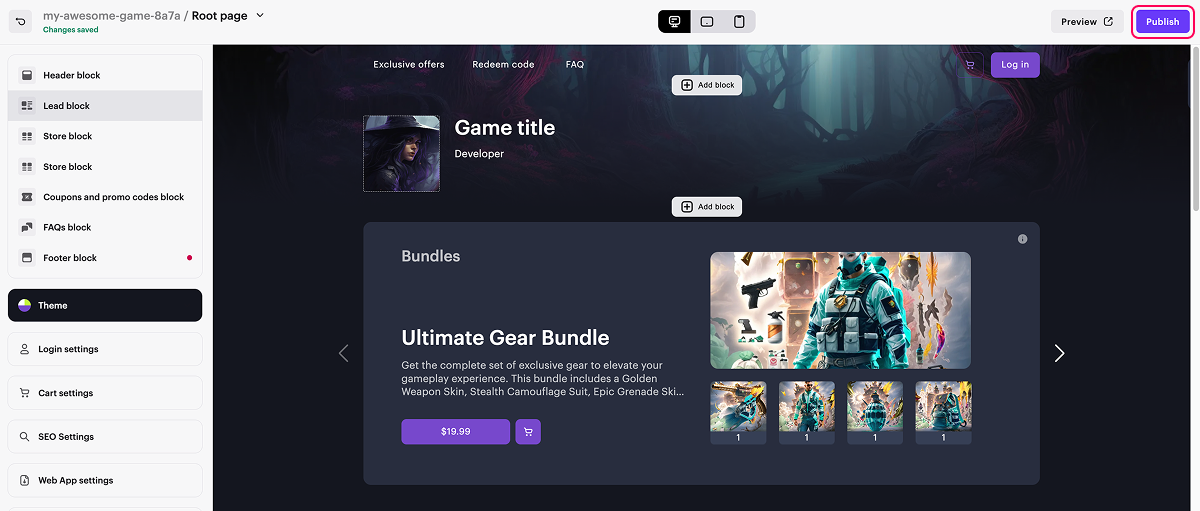
- There are no empty sections in Builder (marked with a red dot).
- The licensing agreement with Xsolla has been signed.
- The main page is published or selected for publication. You cannot publish child pages before the main page.
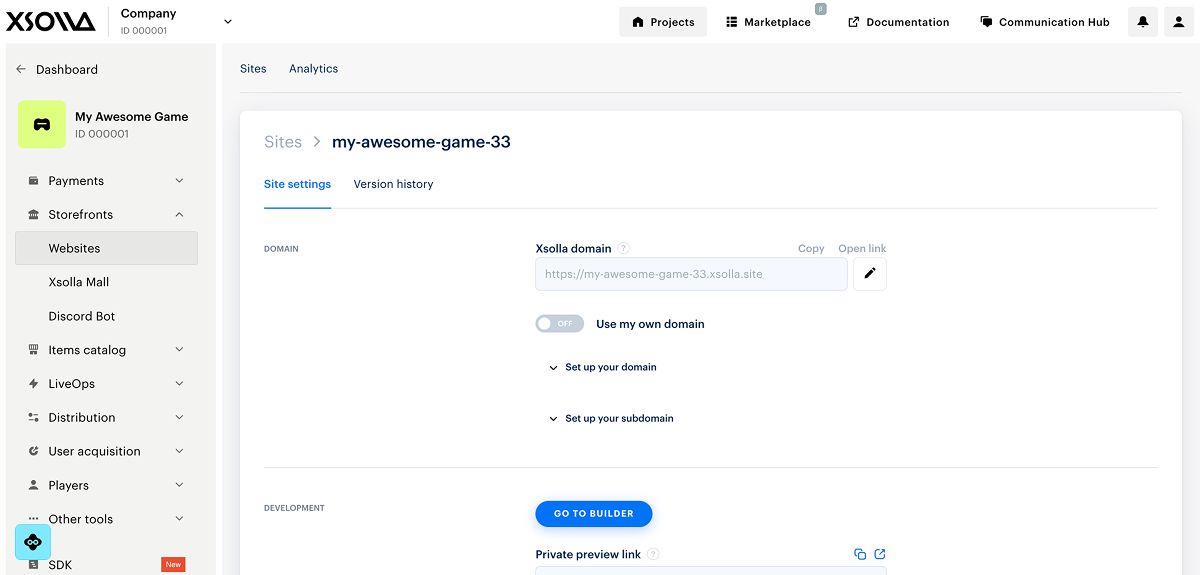
- Make changes to the domain (optional):
- Open your project in Publisher Account and go to the Storefronts > Websites section.
- Click Configure in the pane of your site.
- In the Domain section, edit the Xsolla domain value, or set up your own domain.
Set up your custom domain
You can set up only one custom domain and one subdomain.
A site like www.example.com is set up as a subdomain. You need to strongly follow the order: first set up the domain (example.com), then the subdomain (www.example.com). If you set up a subdomain first, then you can’t set up custom domain.
If you change anything in the settings (both on Site Builder and on your side) in after setting up custom domain, Xsolla will not be able to guarantee the availability of your site at the domain address.
To set up custom domain (e.g., example.com):
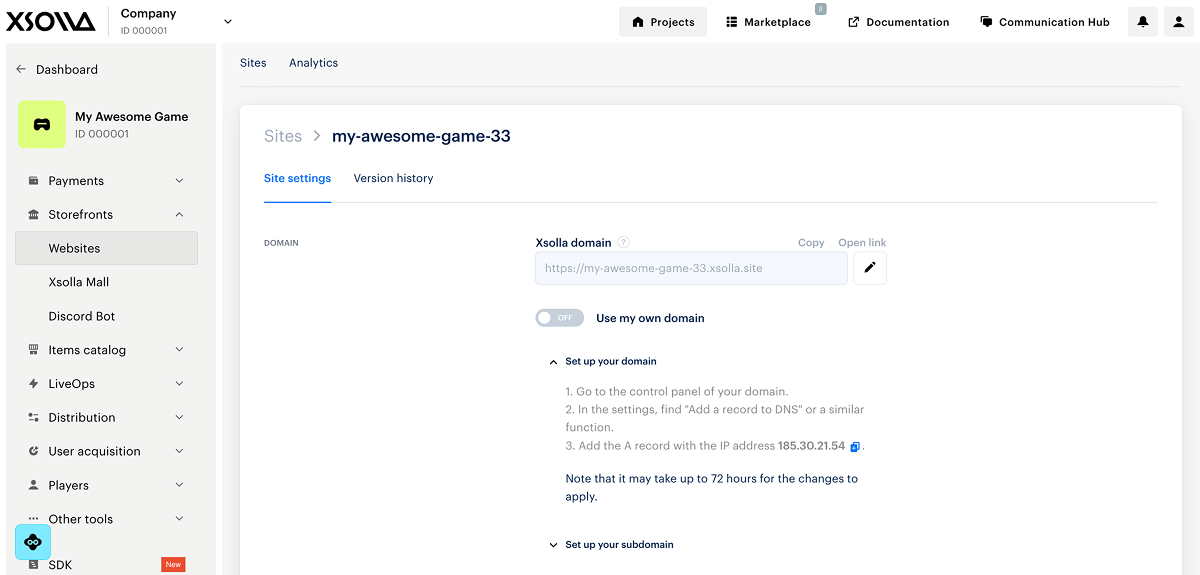
- Get IP address of your published site (you will use it on the step 5):
- Open project in Publisher Account and go to the Storefronts > Websites section.
- Click Configure in the pane of your site.
- In the Domain section, expand the block Set up your domain and copy the IP-address.
- Create your custom domain or use the existing one.
There are no technical restrictions for the domain level, but we recommend you use up to a third-level domain. You can set it up in the DNS settings of your domain.
- Go to your DNS provider admin pane.
- Choose your domain and add an A record.
- Add the A record with the IP address of your site as the value and save changes.
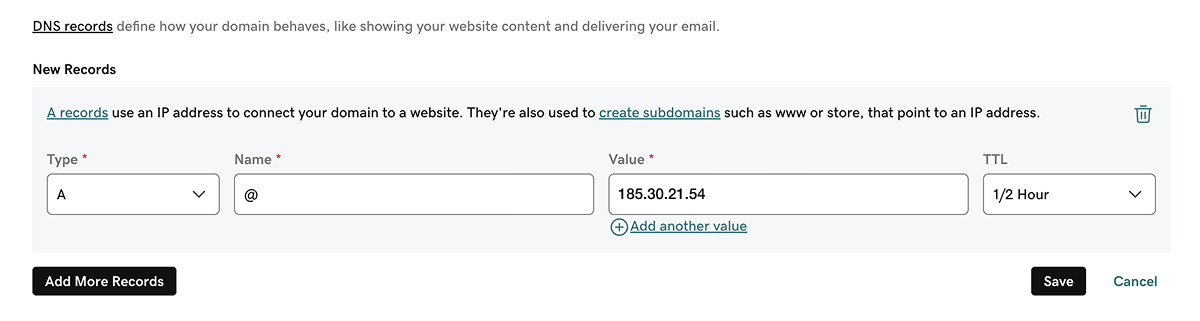
Depending on your DNS provider, it may take up to 72 hours for the changes to apply.
- Open project in Publisher Account and go to the Storefronts > Websites section.
- Click Configure in the pane of your site.
- In the Domain section, set the Use my own domain toggle to On.
- In the modal window, in the Your domain field specify custom domain name and click Save domain.
Site publishing may take up to an hour on the Xsolla side and a SSL certificate is obtained at the same time.
You can add a www domain to an existing domain by clicking Add a “www” domain after setting it up as a subdomain.
To set up a subdomain (e.g., store.example.com):
- Go to your DNS provider admin pane.
- Choose your domain and add a CNAME record.
- Add the CNAME record with the address of your site in Site Builder as the value and save changes.
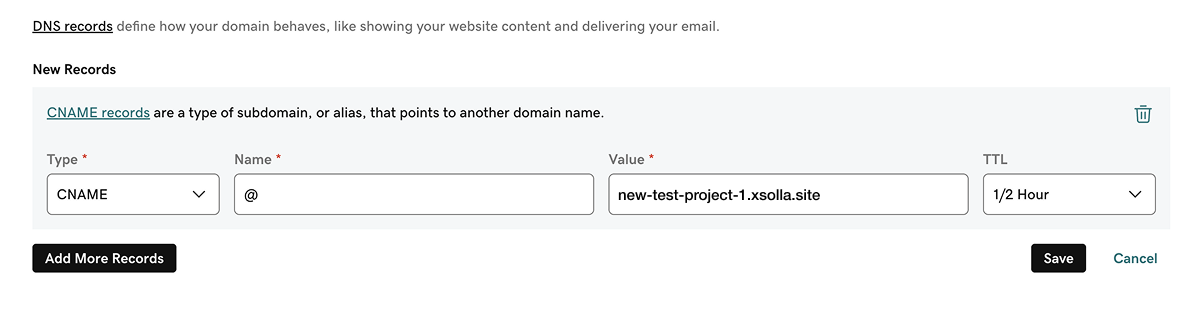

Depending on your DNS provider, it may take up to 72 hours for the changes to apply.
- Open project in Publisher Account and go to the Storefronts > Websites section.
- Click Configure in the pane of your site.
- In the Domain section, set the Use my own domain toggle to On.
- In the modal window, in the Your domain field specify subdomain name and click Save domain.
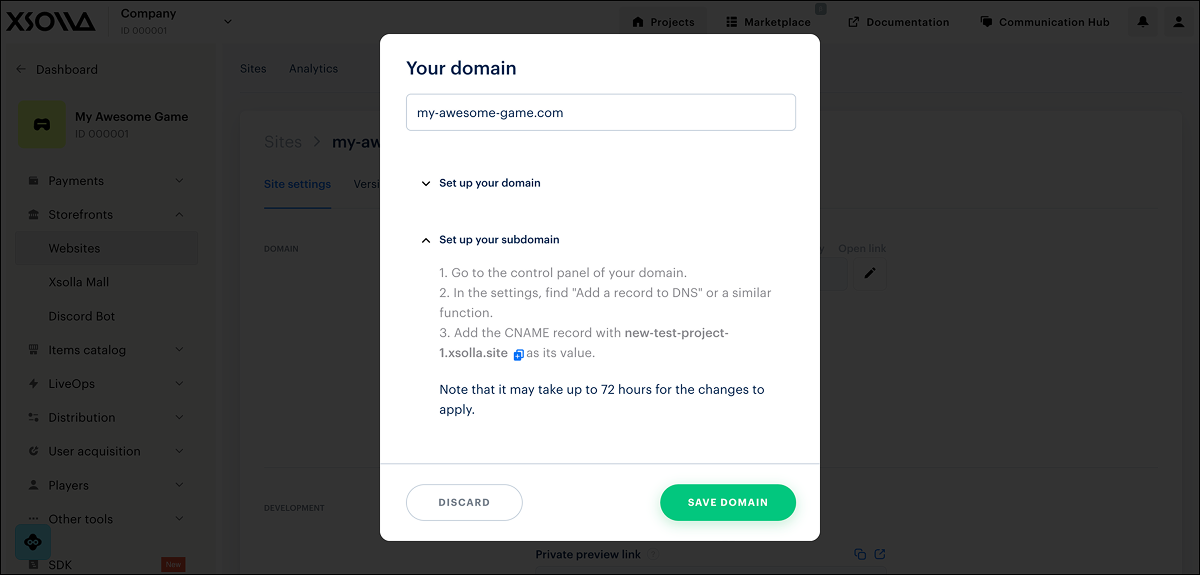
Depending on your DNS provider, it may take up to an hour for the changes to apply.
You can add a www domain to an existing domain by clicking Add a “www” domain after setting it up as a subdomain.
The SSL certificates are obtained and updated on the Xsolla side. Changes take up to 30 minutes to apply, during which time the site may be unavailable or the connection may be shown as unsecured. If for some reason, the update did not happen and you can’t open your site, contact your Customer Success Manager or email to [email protected] and report the problem.
Found a typo or other text error? Select the text and press Ctrl+Enter.
