Create and launch campaign
Partner Network allows you to promote your game through creators by creating campaigns in Publisher Account.
Minimum requirements to launch a campaign:
- Xsolla payment UI is used.
- Xsolla is the exclusive payment provider on the website or, if revenue share model applies to in‑game purchases, within the game UI.
- Payment attribution is configured.
- The game version should allow creators to produce video content.
Campaigns are primarily designed for games available on PC and web platforms. If you have a mobile game, you can direct users to a Web Shop or integrate the Xsolla SDK. Integration options depend on your project’s architecture and platform requirements.
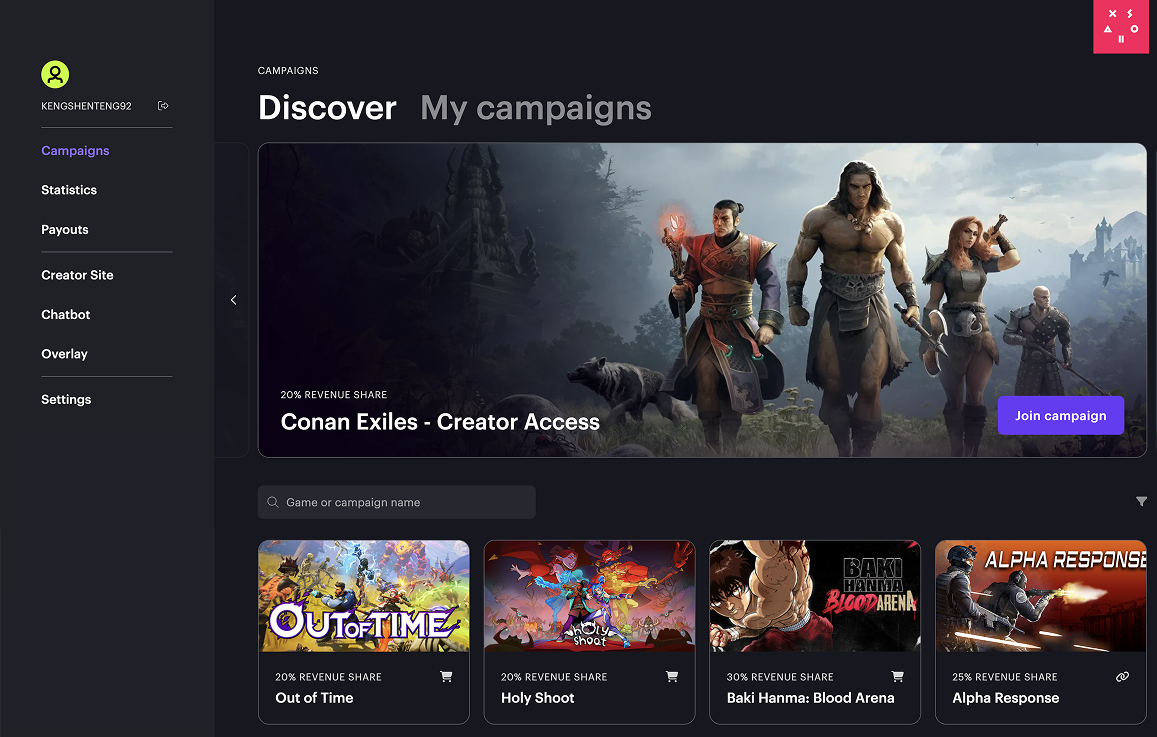
- Open your project in Publisher Account, go to the User acquisition > Creator marketing > Campaigns section and click Create campaign.
- On the Campaign info step:
- Select the project you want to promote.
- Enter the campaign name.
- Click Next.
- On the Game profile step:
- Select the project type: Game or Other.
- Provide the following game details:
- name
- campaign image
- promotional key art (optional)
- genre
- developer
- publisher
- official website URL
- description (optional)
- Steam App ID (optional)
- business model: premium or free-to-play
- one or more release platforms
- link to promo materials (optional)
- release date (optional)
- Click Next.
- On the Campaign settings step:
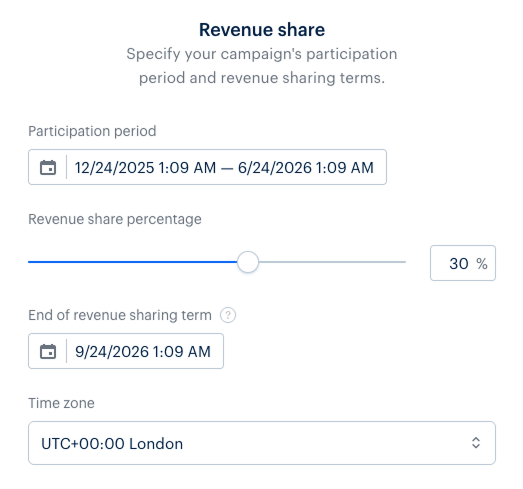
- In the Revenue share section, specify:
- participation period
- revenue share percentage
- end of revenue sharing term
- time zone
- In the Revenue share section, specify:
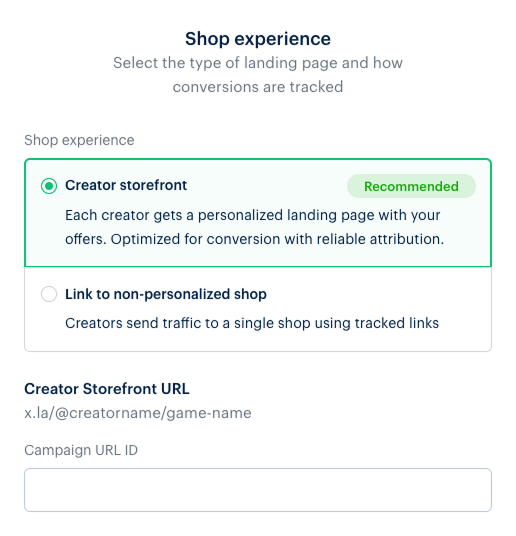
- In the Shop experience section, select the type of landing:
- Creator storefront:
- Enter the Campaign URL ID. It will be automatically converted into a personalized storefront URL for each creator who joins the campaign.
- Select the items from your catalog that will be available for sale in the creator’s store.
- Select the authorization method: Xsolla Login or User ID.
- Select a reward chain (optional).
- Enter the copyright notice (optional).
- Link to non-personalized shop:
- Enter the website name.
- Enter the landing page URL that will be automatically converted to the unique tracking link. Each creator who joins the campaign receives this link.
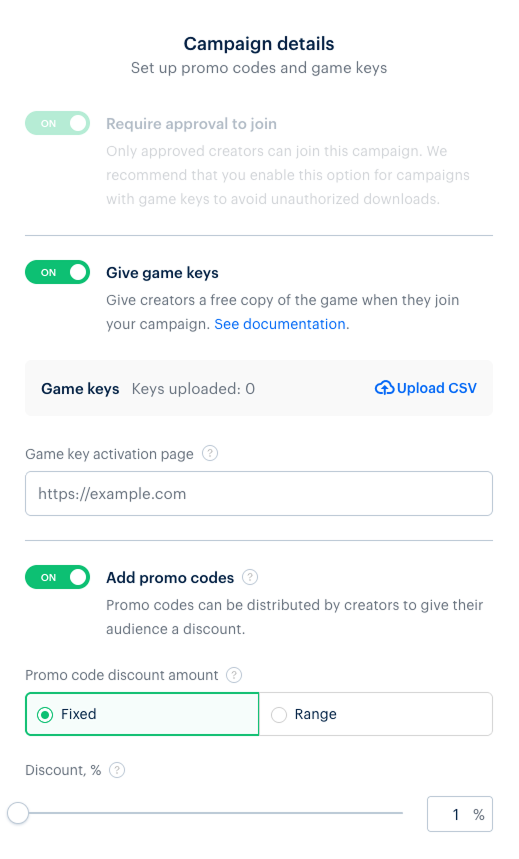
- In the Campaign details section, configure game keys and promo codes distribution:
- Application moderation is enabled by default. This means that a creator can apply to join the campaign, and their application can be approved or rejected. You can disable moderation requests. To do this, in the Exceptions section:
- In the White list field, check the Private campaign box.
- Add creator accounts that can join your campaign without additional moderation. In this case, your campaign won’t be available to other creators.
- To grant creators a free copy of your game when they join the campaign:
- Turn on the Give game keys toggle.
- Upload game keys by importing a CSV file.
- Specify the URL for the page where keys can be activated.
- To allow creators to offer discounts to their audience:
- Turn on the Add promo codes toggle.
- Choose the discount type:
- Fixed – specify the discount percentage.
- Range – set a range within which creators can offer discount.
- In the Audience requirements section, specify the minimum and maximum number of followers in the relevant platform (optional).
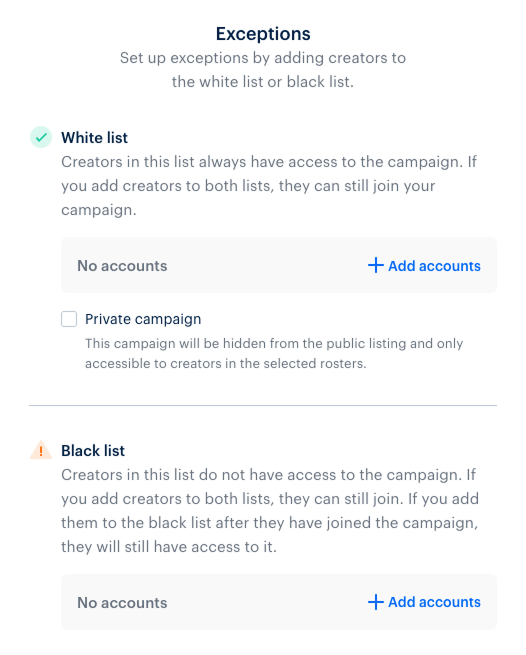
- In the Exceptions section, add creators to the blocklist or allowlist to control access to your campaign (optional):
- White list. Creators in this list always have access to the campaign.
- Black list. Creators in this list don’t have access to the campaign. If you add them to the blocklist after they have joined the campaign, they will still have access to it.
- In the Target audience section, configure targeting by region, language, gender and age (optional).
- In the Special terms section, add any additional comments or participation requirements (optional).
- Click Next to complete campaign creation.
- You can edit a campaign before it launches, including during the moderation period.
- After launch some fields become unavailable for editing.
- Editing a launched campaign doesn’t affect its status – it won’t return to moderation or be paused.
Approval can take up to three business days. If any inconsistencies are found during this period, your Customer Success Manager will get in touch with you. The campaign launch will be suspended until approval.
If more than three business days have passed since you submitted the campaign and you haven’t received a response, contact your Customer Success Manager or reach out to our support team.
Useful links
Last updated: March 5, 2026Found a typo or other text error? Select the text and press Ctrl+Enter.
