Set up project in Publisher Account
Set up project in account
Set up project in account
Set up project in account
Set up project in account
Set up user authentication
Xsolla allows you to configure various ways to authenticate users. This guide contains instructions on the fastest way to integrate and configure it — using a ready-made widget to authenticate the user via a one-time code or via a social network.
Later, you can change the user authentication method or use a different integration option.
Xsolla provides standard widget templates. Their appearance and content is determined by the Login method chosen for your project and widget customization settings from Publisher Account.
Xsolla provides standard widget templates. Their appearance and content is determined by the Login method chosen for your project and widget customization settings from the account.

Standard widget view for authentication using a one-time code or via social networks:
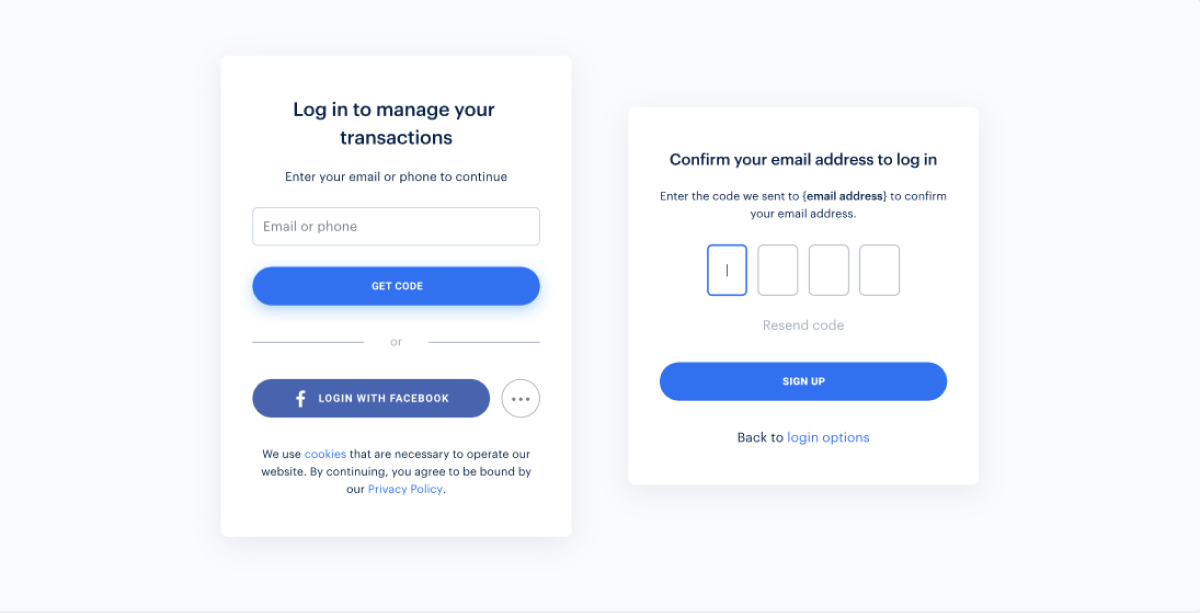
To set up user authentication in Publisher Account:
To set up user authentication in your account:
Open your project in Publisher Account.
In the side menu, click Players > Login.
Open your project in the account.
In the side menu, click Players > Login.
Open your project in the account.
In the side menu, click Players > Login.
Open your project in the account.
In the side menu, click Players > Login.
Open your project in the account.
In the side menu, click Other tools > Login.
- Click Create Login project.
- Select Standard Login project and click Create and set up. Wait until your new Login project is created. You will then see the Login project page.
- In the Login methods block, select Passwordless login.
- Click Configure.
- Set up authorization using a one-time code:
- In the Passwordless login block, select Callback URLs.
- In the Callback URL field, add the URL the user is redirected to after successful authentication.
- Click Save changes.
- Set up OAuth 2.0 client:
- Click the name of your Login project in the breadcrumb trail to return to the Login project page.
- Go to the Security block and select the OAuth 2.0 section.
- Click Add OAuth 2.0 client.
- Choose Public authentication type.
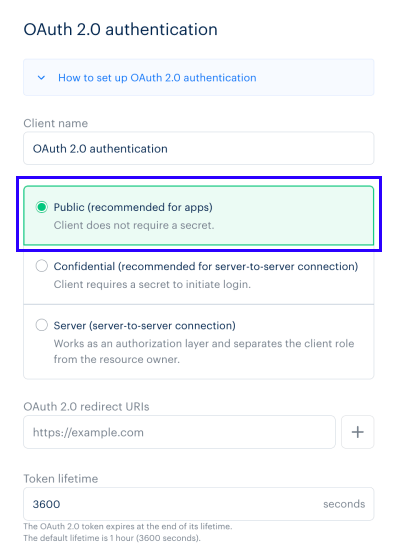
- Specify OAuth 2.0 redirect URIs (paths in the application the user is redirected to after successful authentication, email confirmation, or password reset). You can specify multiple valid URIs.
- For desktop or web applications, the URI must start with
https://. By default, the SDK useshttps://login.xsolla.com/api/blank. Specify this URI or use your own. - For Android applications, specify the path as
app://xlogin.<ANDROID_PACKAGE_NAME>, where<ANDROID_PACKAGE_NAME>is the package name of the Android application. - For iOS applications, specify the path as
app://xlogin.<BUNDLE_ID>, where<BUNDLE_ID>is the iOS application identifier.
- Click Connect.
- Set up authentication via social networks (optional):
- Click the name of your Login project in breadcrumb trail to return to the Login project page.
- Go to Authentication block and select Social login.
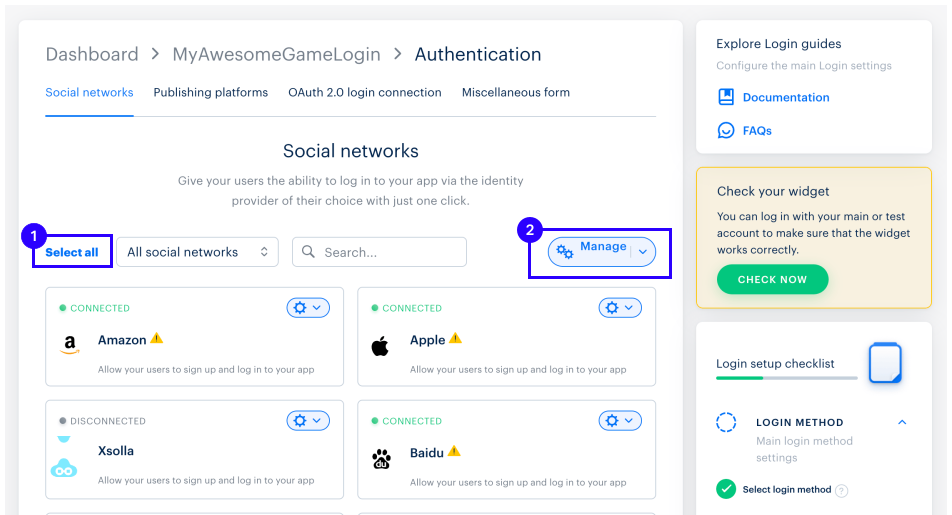
- Connect social networks that users will be able to use to sign up and log into the application:
- To connect the desired social network, click the ⚙ icon and select Connect.
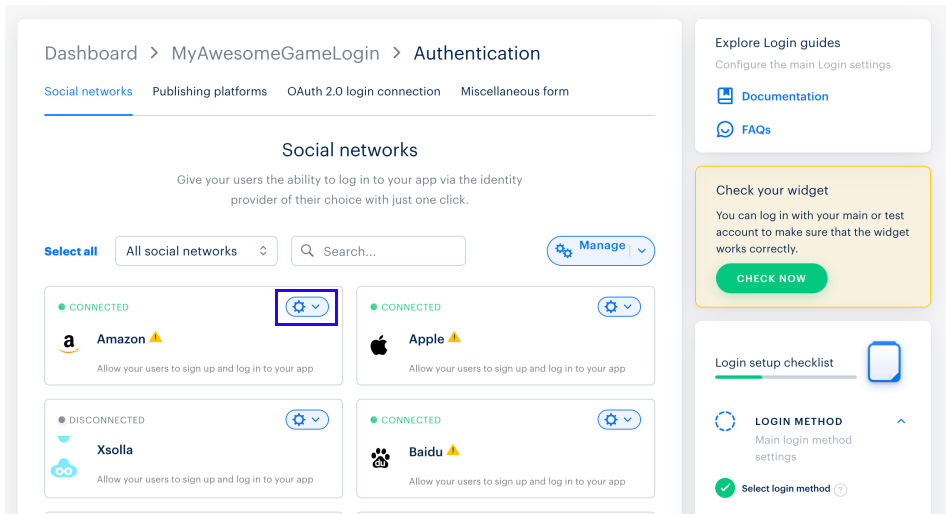
- To connect several social networks at once, select the required panes (their borders will turn green). Then, from the Manage drop-down menu, select Connect.
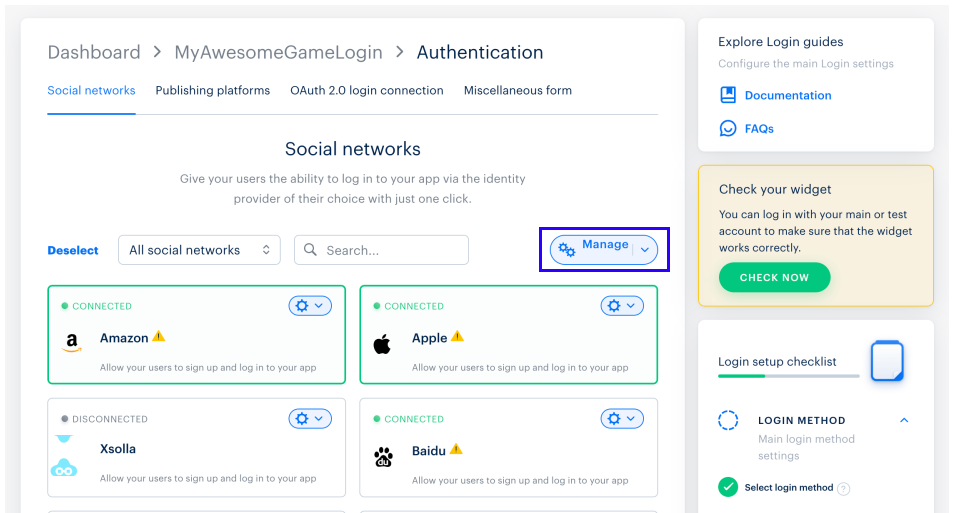
- To connect all available social networks at once, click Select all. Then, from the Manage drop-down menu, select Connect.
- Click Save changes.
You can test the widget settings. To do this, click Check now on the left side of the screen and authorize.
During the integration process, you will need:
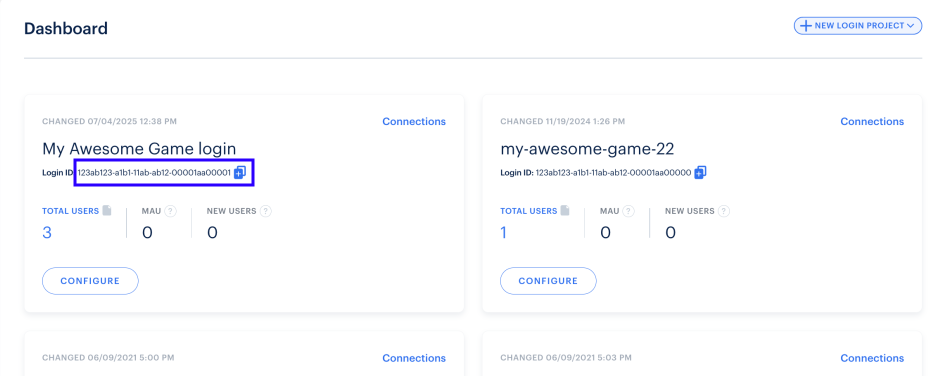
- Login project ID. You can find it in your project in Publisher Account, in the Players > Login > Dashboard section.
- Login project ID. You can find it in your project in the account, in the Players > Login > Dashboard section.
- Login project ID. You can find it in your project in the account, in the Players > Login > Dashboard section.
- Login project ID. You can find it in your project in the account, in the Players > Login > Dashboard section.
- Login project ID. You can find it in your project in the account, in the Other tools > Login > Dashboard section.
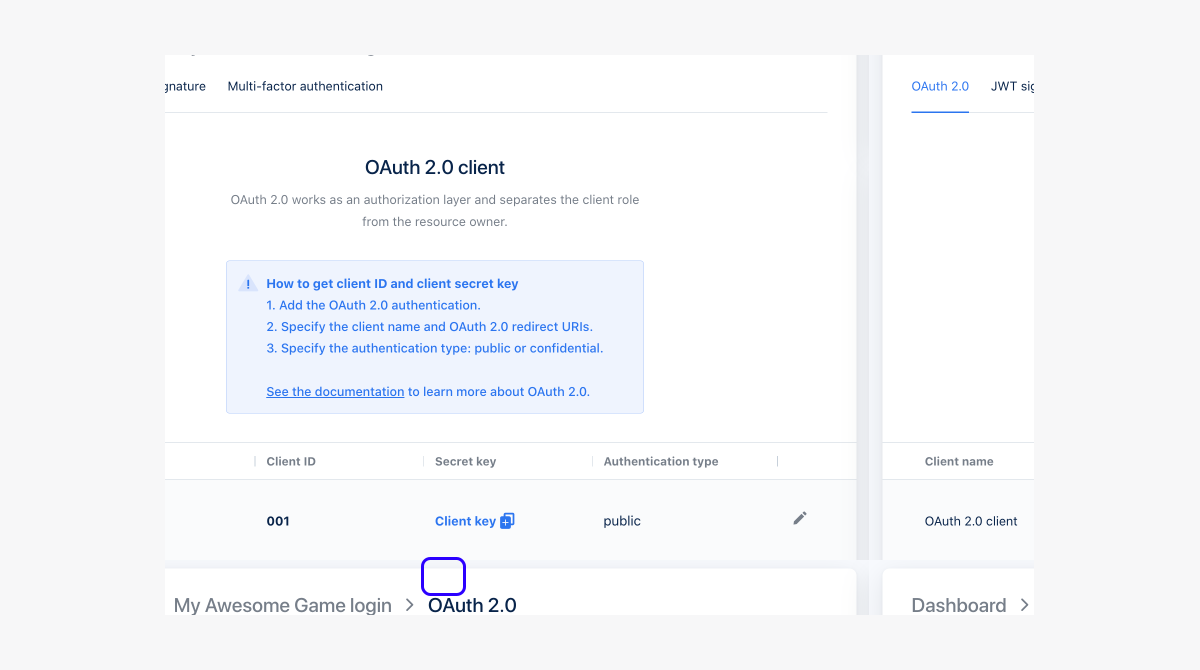
- OAuth 2.0 client ID. You can find it in your project in Publisher Account, in the Players > Login > your Login project > Security > OAuth 2.0 section.
- OAuth 2.0 client ID. You can find it in your project in the account, in the Players > Login > your Login project > Security > OAuth 2.0 section.
- OAuth 2.0 client ID. You can find it in your project in the account, in the Players > Login > your Login project > Security > OAuth 2.0 section.
- OAuth 2.0 client ID. You can find it in your project in the account, in the Players > Login > your Login project > Security > OAuth 2.0 section.
- OAuth 2.0 client ID. You can find it in your project in the account, in the Other tools > Login > your Login project > Security > OAuth 2.0 section.
Create items in Publisher Account
Create items in your account
You need to create a catalog on Xsolla side. You can add items manually or import them from App Store, Google Play, or PlayFab. When importing from Google Play, you can import a maximum of 100 items at a time.
These instructions provide steps for basic setup of a virtual item. Later, you can add other items to your catalog (virtual currency, bundles, game keys), create item groups, set up promotional campaigns, regional prices, etc.
To add a virtual item with basic settings to the catalog:
- Open your project in Publisher Account and go to the Items catalog > All items > Virtual items section.
- Open the project in your account and go to the Items catalog > All items > Virtual items section.
- Open the project in your account and go to the Items catalog > All items > Virtual items section.
- Open the project in your account and go to the Items catalog > All items > Virtual items section.
- Open your project in the account for mobile games and go to the Catalog section.
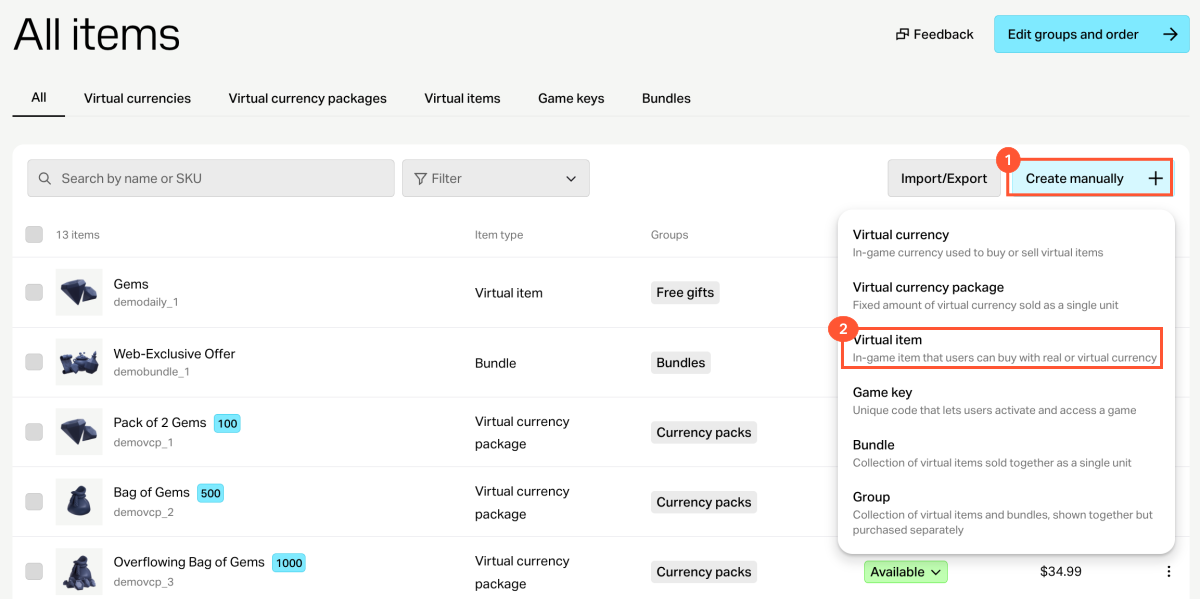
- Click Create manually and select Virtual item from the drop-down list.
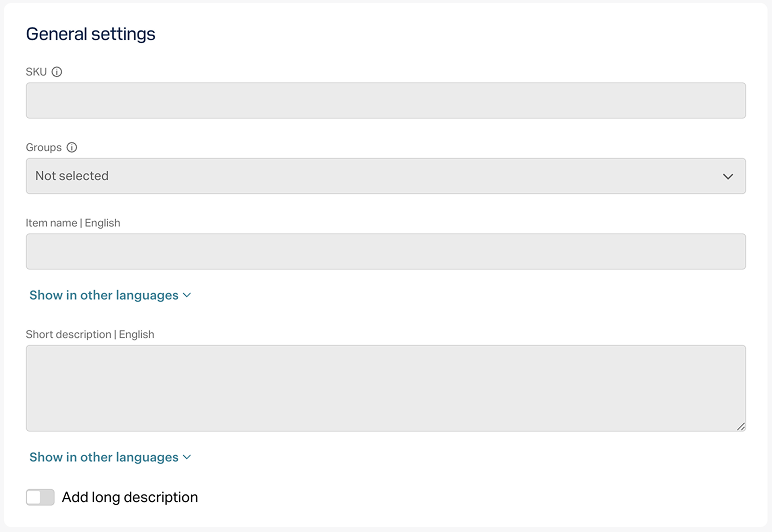
- In the General settings section, specify the following:
- SKU
- name
- short description
- extended description — to add it, turn on the corresponding toggle (optional)
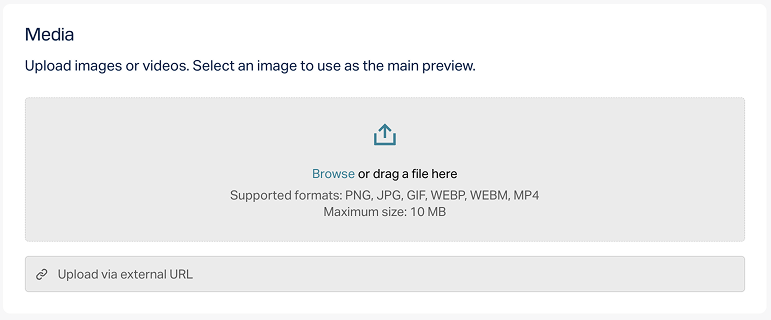
- In the Media section, upload one or more images or videos (optional) — from your device or via a link. In the store created with the Xsolla site editor, all item cards display the file marked as Main, while the remaining files are available only in item cards with a media gallery. The file marked as Main is also returned in the responses of the catalog retrieval API calls.
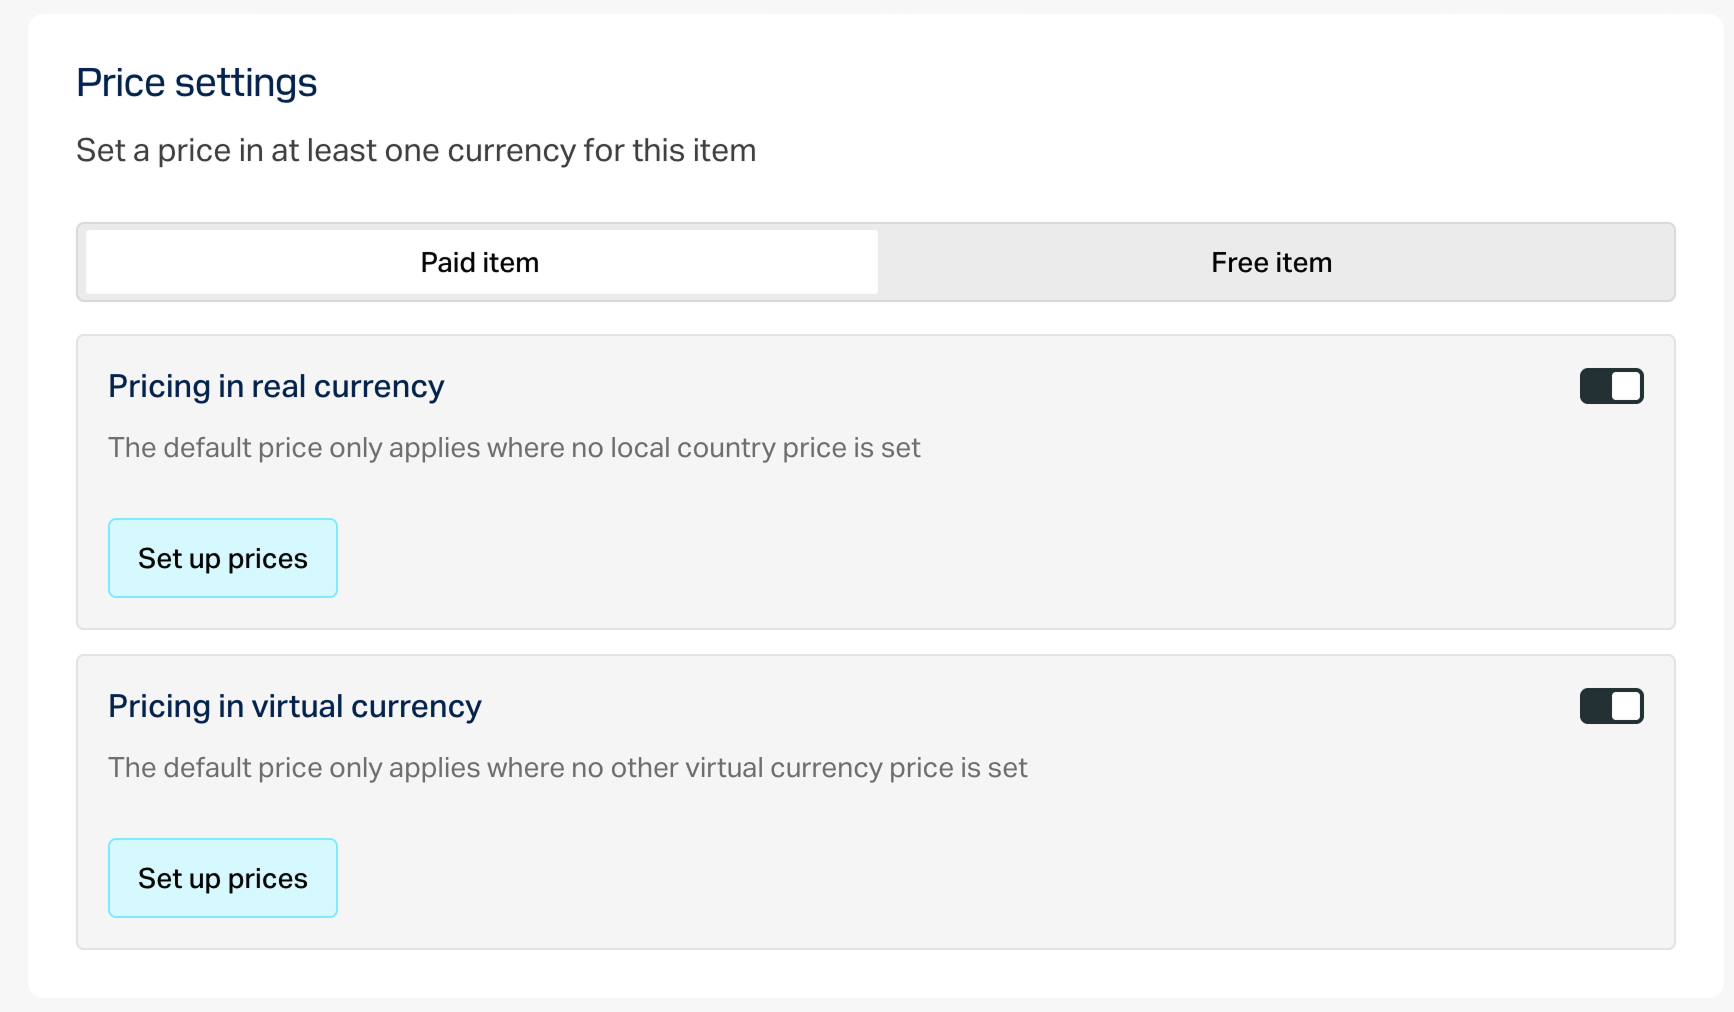
- In the Price settings section, set prices:
- Select the Paid item type.
- Turn on the Real currency prices and/or Virtual currency prices toggle and specify the price.
Click Create.
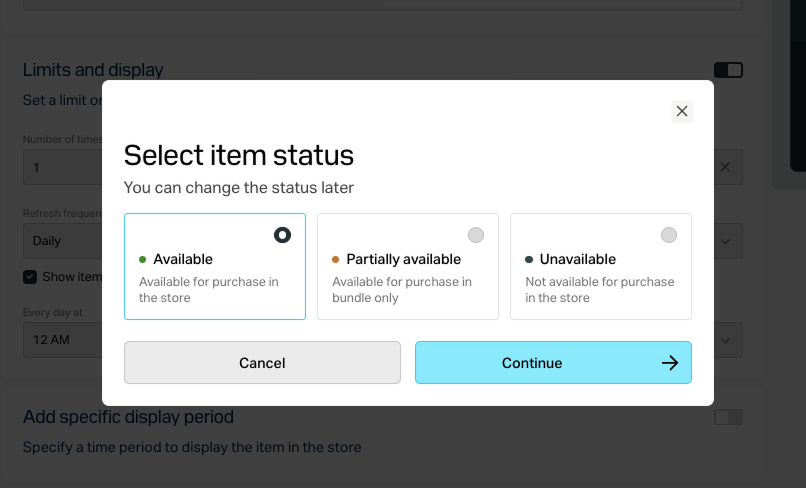
In the window that opens, select the item status and click Continue.
The created item will appear in the All items section.
Found a typo or other text error? Select the text and press Ctrl+Enter.
