Set up publishing platform using headless CMS
You can set up a platform for publishing and promoting games using a headless content management system (CMS) where the editing UI is separate from the site UI.
Once the structure and design are approved, the Xsolla team implements the frontend of your platform and configures the CMS.
The CMS allows you independently manage site content (e.g., news, game cards, special offers) without changing the code. This simplifies site management after launch while keeping visual appearance and display logic under Xsolla’s control.
CMS walkthrough
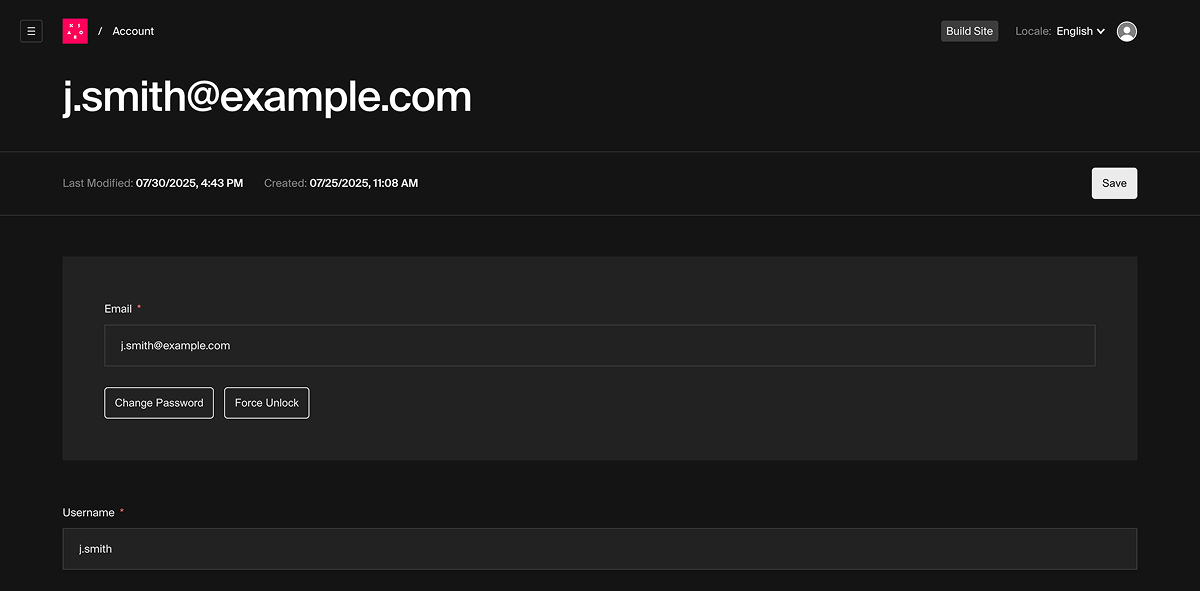
Log in to CMS and change your password
After the frontend implementation and initial site setup, the Xsolla team provides you with a link to the CMS and login credentials.
For security reasons, we recommend changing your account password upon first login. To do this:
- Click the user profile icon in the top-right corner of the screen.
- Click
Change Password . - Enter your new password in the
New Password field and re-enter it in theConfirm Password field. - Click
Save .
In this section, you can also choose the CMS theme and language.

Dashboard
The

On the dashboard, you can:
- Sync site data with data from connected app stores or platforms, if configured for your project.
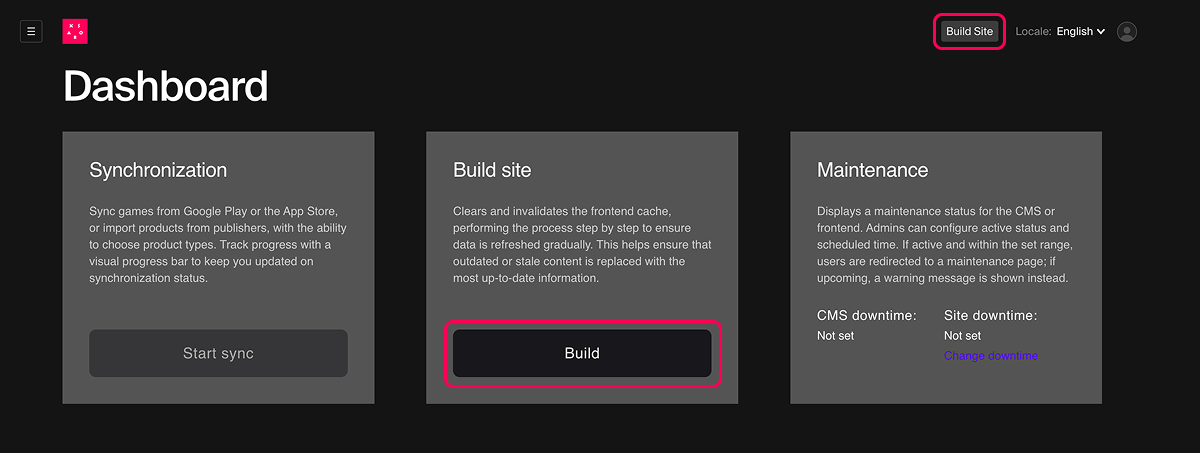
- Publish site settings changes.
- View information about scheduled site maintenance.
- Go to global configurations to set site maintenance periods.
Collections
Collections are structured sections in the CMS where different types of site content are stored and configured, such as articles, slides, FAQs, and more.
Since the platform is developed specifically for your needs, the functionality of collections in the CMS may vary from project to project.
Changes made through the CMS will appear on the site only if the corresponding functionality is supported in the current platform configuration.
Each object in a collection has the following parameters:
- Unique ID — in the CMS interface, it is replaced by the object name, if specified.
- Object status:
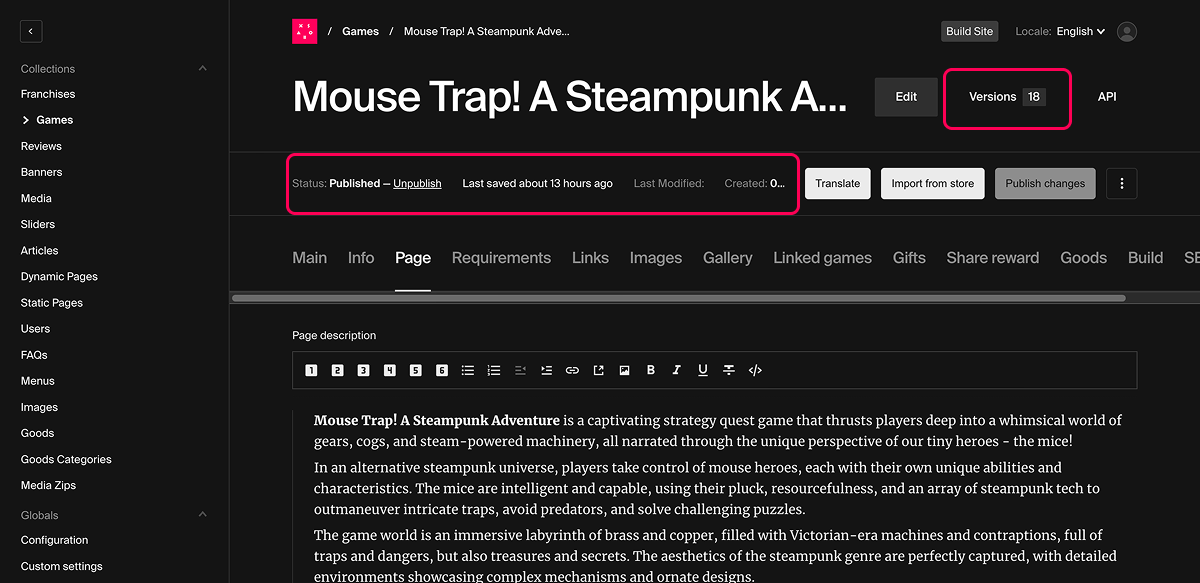
Draft — assigned automatically when changes are made, but not manually saved. Required fields may be incomplete in this status. Draft changes won’t be published to the site.Published — assigned when changes are made and manually saved. Changes can’t be saved unless all required fields are filled.
- Timestamps for creation, last save, and last modification.
- Change history.
Collection object versions
The CMS supports versioning for objects in collections. This means that each time changes are made, the system creates a new version of the object. You can view the change history by clicking the object’s version number.
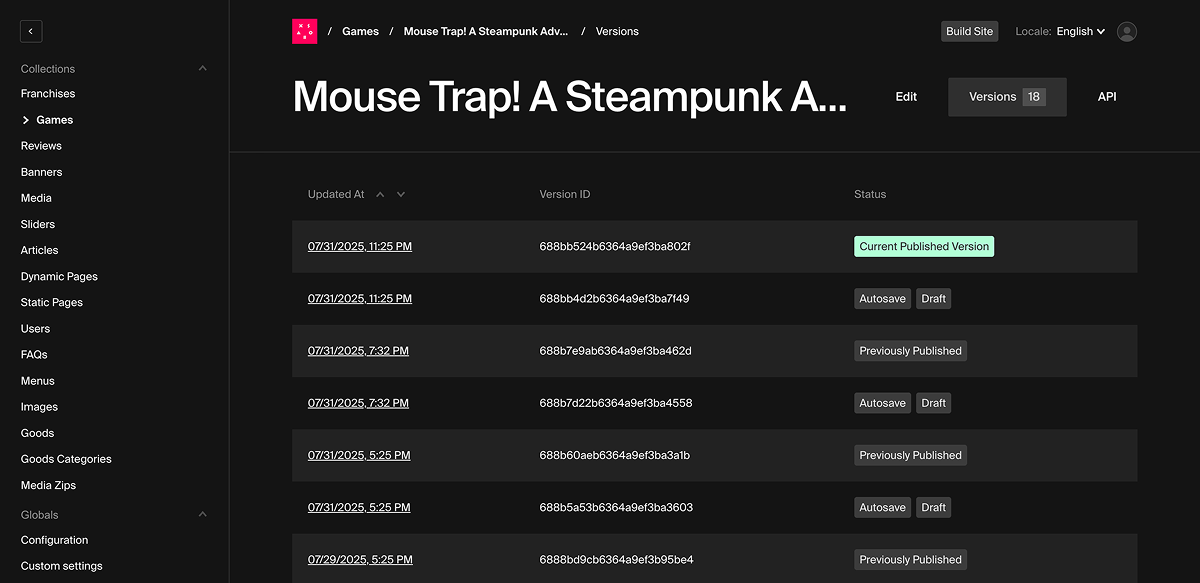
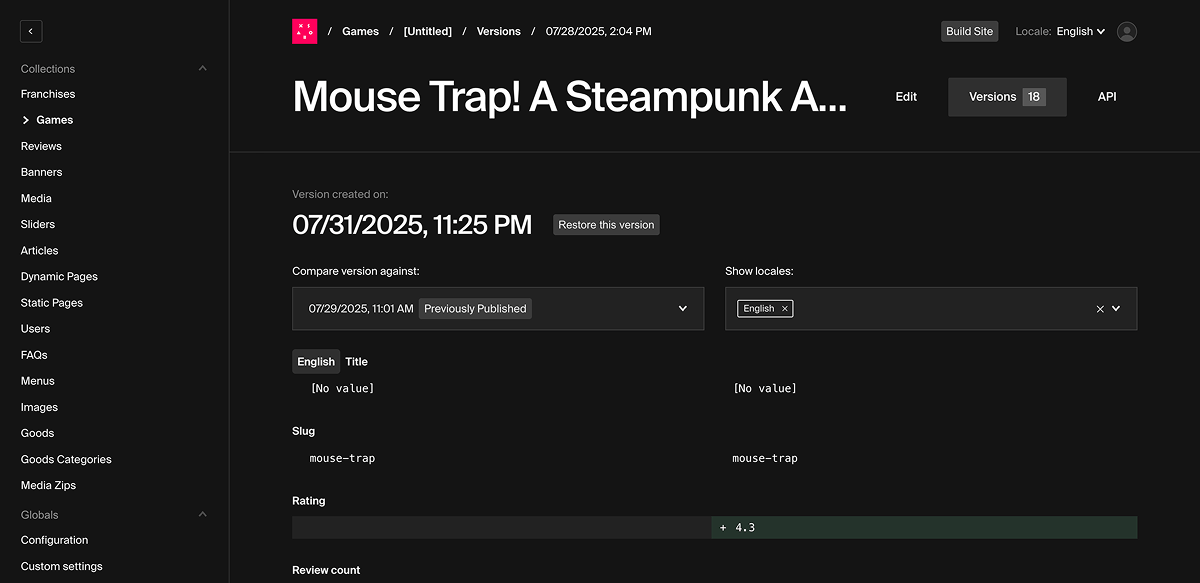
To view detailed information about the changes, click the date in the row of the desired version. On the details page, you can also compare versions or restore a selected one.
Global configurations
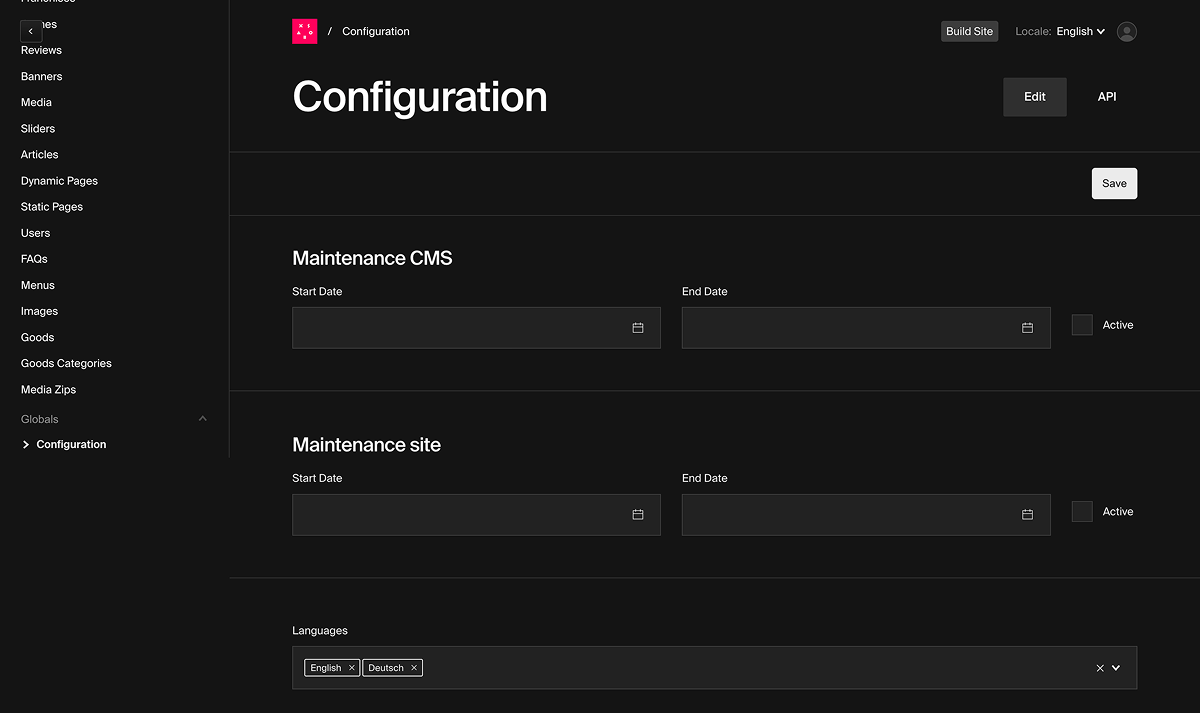
Global site configurations are available in the
- maintenance period settings
- site locale settings
- site favicon settings

Add game information to site
With the CMS, you can fill in all the necessary data to be displayed on both the game card on the homepage and the individual game page.
When adding a game in the
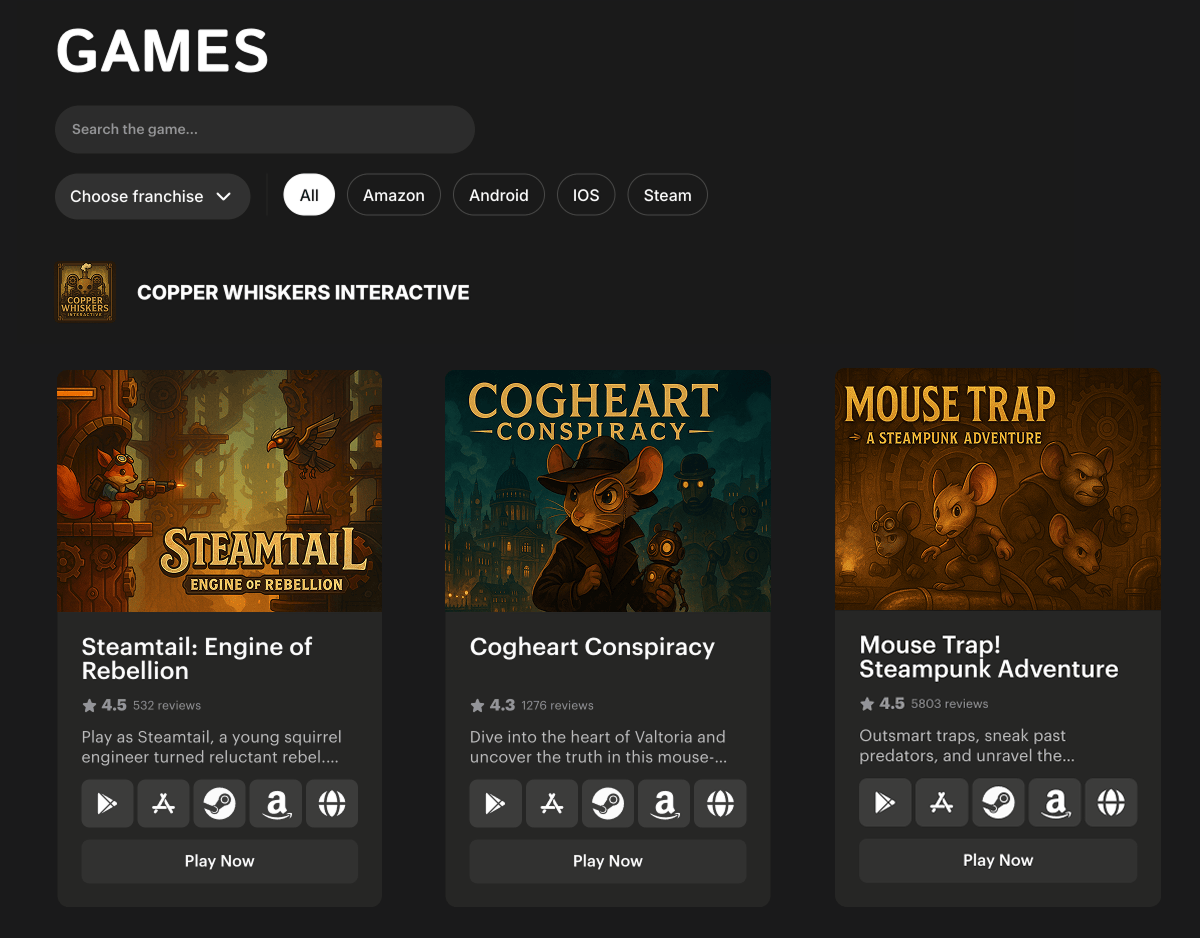
- A game card displayed on the homepage. The card includes the title, short description, image, and links to the game in the app stores.
- Example of game cards on the homepage:
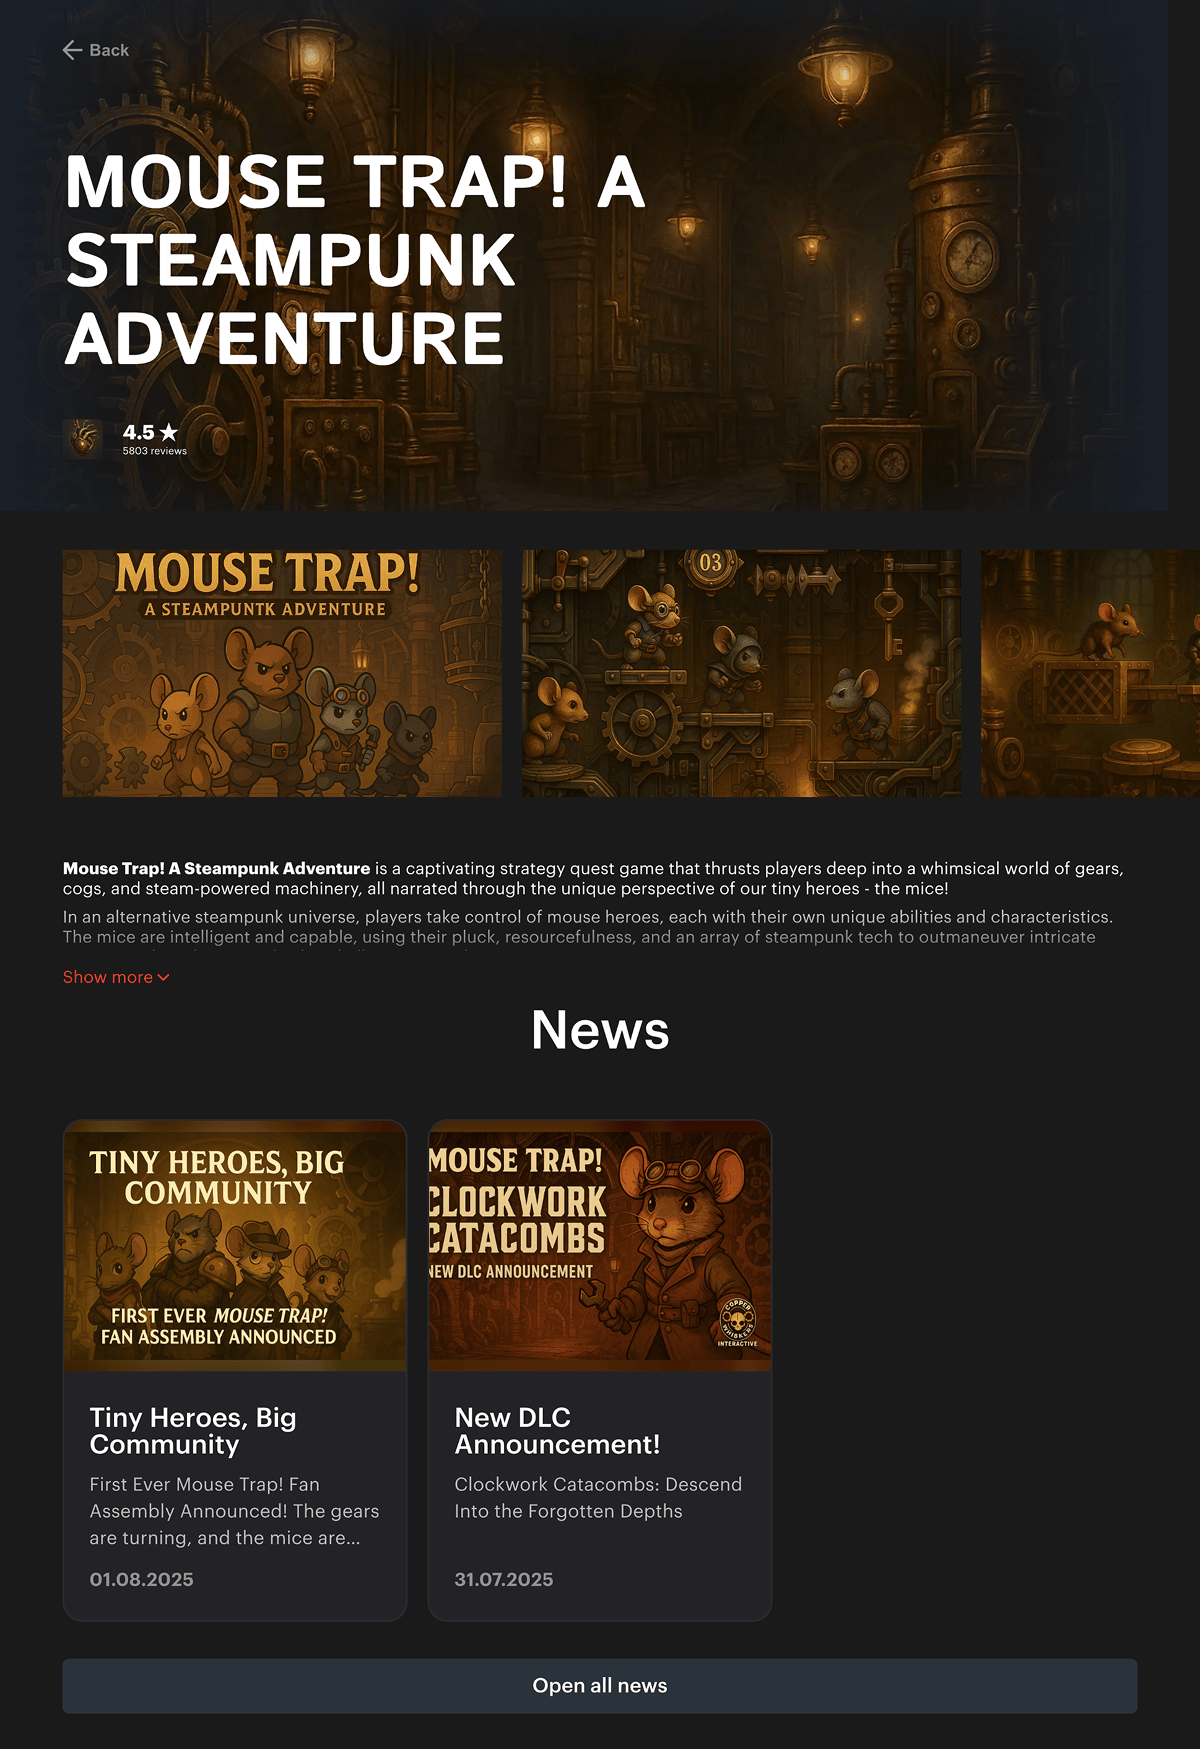
- A full game page, which opens when the game card is selected on the homepage. This page can include a detailed description, screenshots, videos, app store links, download statistics, background images, and other assets.
- Example of a game page:
Additionally, you can add a game to the header menu. To do this, contact your Customer Success Manager or email to csm@xsolla.com.
To add game information and configure basic settings:
- Go to the
Collections > Games section. - Click
Create New . - On the
Main tab, fill in the required fields:
Title — the game name displayed on the site.
Slug — the URL identifier for the game page. It can contain lowercase Latin letters, numbers, and hyphens (-).
- Example:
- If the
Slug field containscool-action-game, the game page will be available at a URL likehttp://my-awesome-game-store.com/en/game/cool-action-game.
Short Description — a short game description displayed on the game card on the homepage.
- Add the game to a franchise (optional). In the
Franchise drop-down list, select an existing franchise or click+ and create a new one. - On the
Page tab, fill in thePage description field — this content will appear on the game page. - Add answers to frequently asked questions (optional). In the
FAQs field, select existing answers or click+ and create a new one. - On the
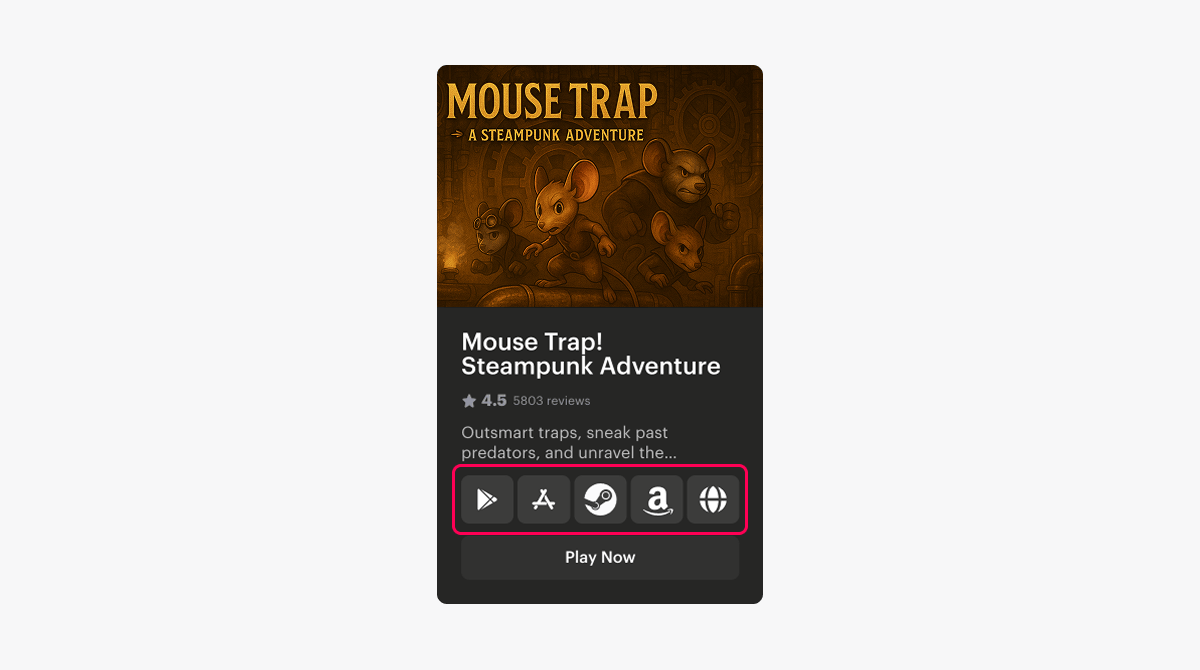
Links tab, add links to the game in the app stores (Google Play, App Store, Steam, etc.). To add a link:
- Click
Add Store_link . - In the
Platform drop-down list, select the app store. If you selectOther , enter the store name manually in theCustom Platform Name field. - In the
Icon field, upload or select a link icon (optional). If no icon is uploaded, the default icon will be used.
- Click
- In the
Link field, enter the URL of the game in the app store. - In the
Downloads count field, enter the total number of downloads from app stores (optional). This helps users evaluate the game’s popularity.
- In the
- On the
Images tab, upload or select images for the game card and game page:
| Field | Description | Recommended size |
|---|---|---|
| Main Image | Banner image for the game page. | Aspect ratio: 2.1:1.Size: 1216 × 577 px. |
| Card Image | Image for the homepage game card. | Aspect ratio: 2:1.Size: 490 × 243 px. |
| Logo Image | Icon for the game page banner. | Aspect ratio: 1:1.Size: 58 × 58 px. |
| Icon Image | Icon displayed in the game list in the header menu. | Aspect ratio: 1:1.Size: 58 × 58 px. |
| Bg Main Image | Background image for the game page on desktop. | Aspect ratio: 16:10.Size: 1476 × 923 px. |
| Bg Mobile Image | Background image for the game page on mobile. | Aspect ratio: 16:10.Size: 1476 × 923 px. |
- On the
Gallery tab, add assets to display on the game page (optional):
- To add a screenshot, in the
Images section, clickAdd Image , then upload or select an image.
- To add a screenshot, in the
- Recommendations:
- Aspect ratio: 16:9.
- Size: 526 × 296 px.
- Recommendations:
- To add a video, in the
Videos section, clickAdd Video , then upload or select a video.
- To add a video, in the
Images and videos on the game page appear in the same order as listed on the

- To validate required fields and save your changes, click
Publish changes .
Create franchise
A franchise is a logical grouping of multiple games that helps filter and organize content on the site. Each franchise in the game list displays an image and title.
Example of a franchise displayed on the homepage:
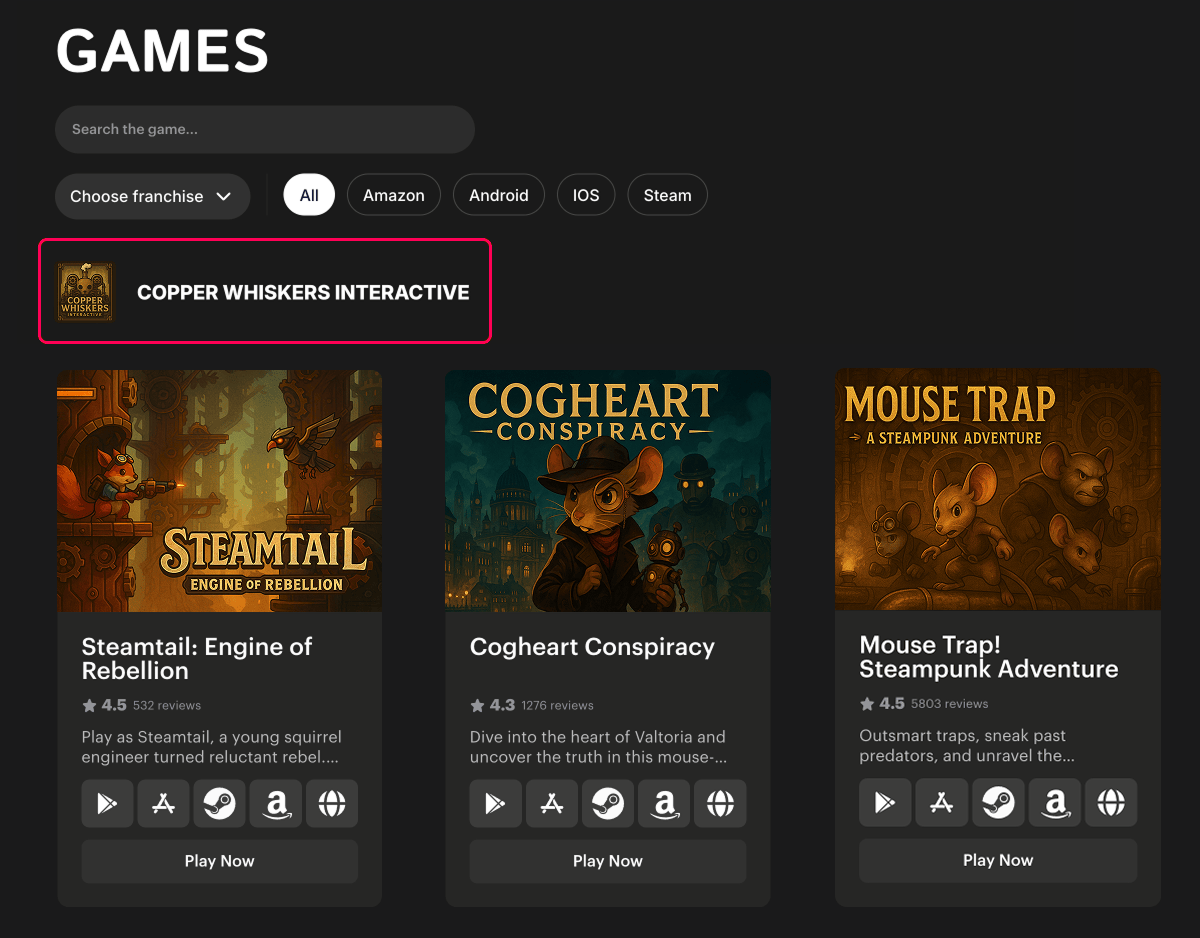
To create a new franchise:
- Go to the
Collections > Franchises section. - Click
Create New . - In the
Title field, enter the franchise name to be displayed on the site. - In the
Image section, clickAdd Image , then upload or select the image to display for the franchise.
- Recommendations:
- Aspect ratio: 1:1.
- Size: 512 × 512 px.
- To validate required fields and save your changes, click
Publish changes .
To add a game to a franchise:
- Go to the
Collections > Games section and select an existing game from the list or create a new one. - On the
Main tab, in theFranchise drop-down list, select an existing franchise or click + and create a new one. - To validate required fields and save your changes, click
Publish changes .
Create article
In the CMS, you can create articles such as news, announcements, reviews, and other materials related to your games or platform.
When adding an article in the
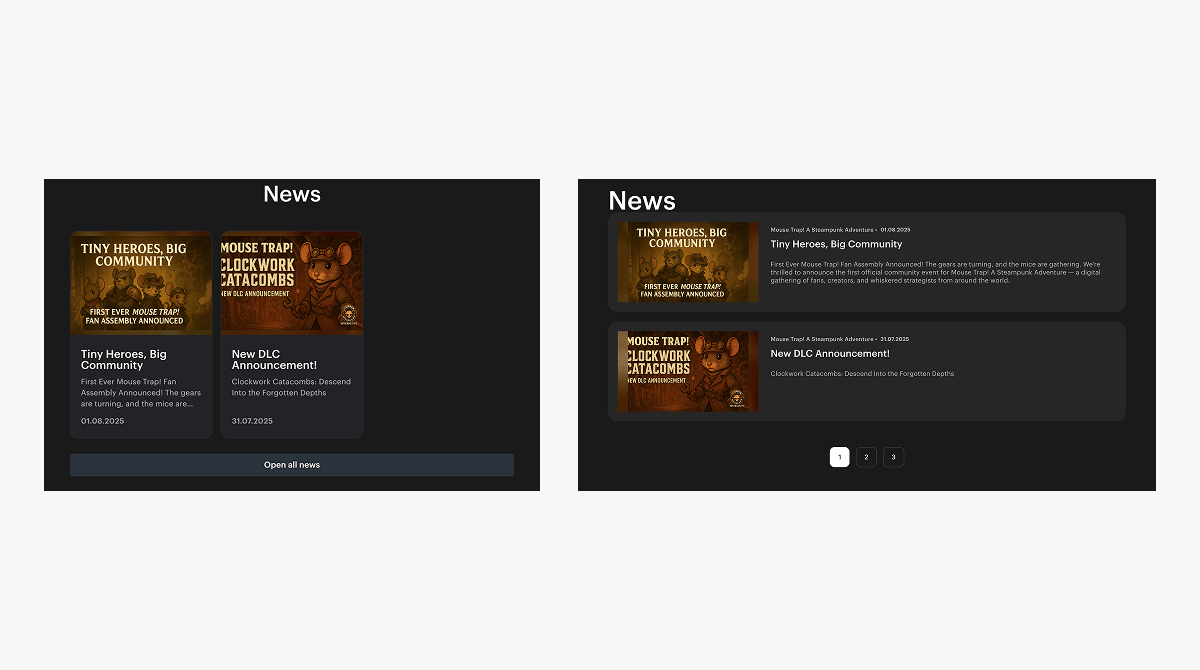
- Article preview card — can be displayed on the homepage, on the full article list page, or on a game page if the article is linked to a game.
- Article page — contains the full content of the article and opens when a preview card is clicked.
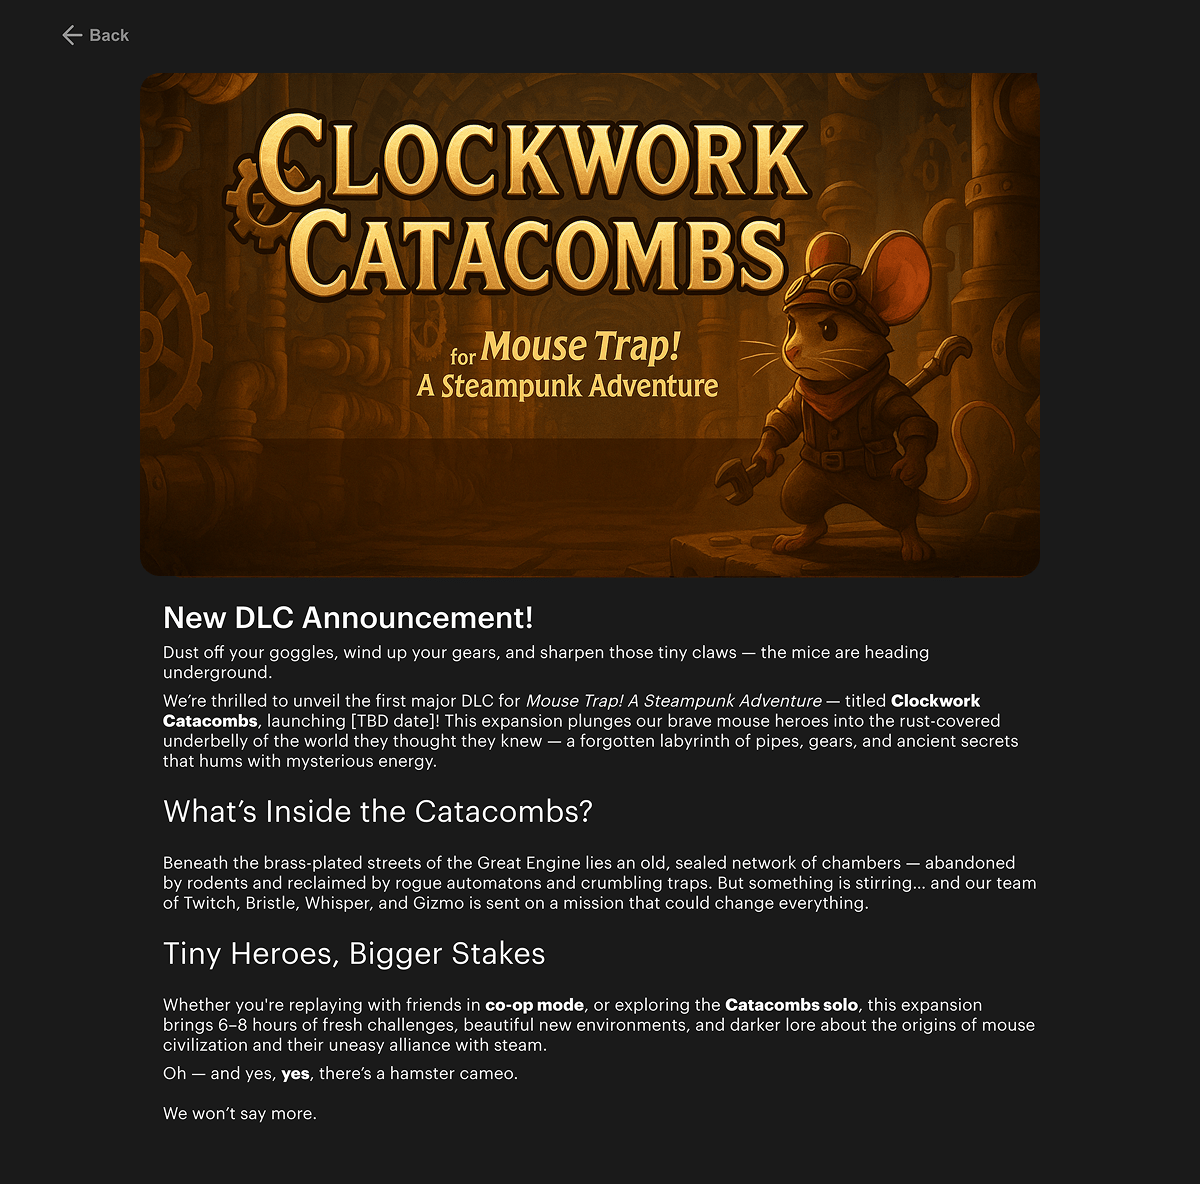
The appearance and number of article cards displayed on the homepage depend on your site’s UI.
To add an article to the site:
- Go to the
Collections > Article section. - Click
Create New . - Fill in the following fields:
Article Title — the article title displayed on the site.
Slug — the URL identifier for the article page. It can contain lowercase Latin letters, numbers, and hyphens (-).
- Example:
- If the
Slug field containsgame-news, the article page will be available at a URL likehttp://my-awesome-game-store.com/en/article/game-news.
Game — the game associated with the article (optional). Select a game from the drop-down list or click + and create a new one. The game name appears as a tag on the article preview card. Articles linked to a specific game also appear on that game’s page.
Description — a short summary of the article shown in the preview card and used for SEO (optional).
Header Image — the image displayed in the preview card and as a banner on the article page.
Start Date — the publication date of the article shown on the site.
Finish Date — the date after which the article is no longer displayed (optional).
Text — the full article content.
- To display the article preview card on the homepage, check the
Main Article box (optional).
- Add answers to frequently asked questions (optional). In the
FAQs field, select existing answers or click + and create a new one. - To mark the article as active check the
Active article box. If not checked, the article won’t be displayed on the site. - To validate required fields and save your changes, click
Publish changes .
To apply the changes, publish the site.
After publication, the article will appear on the site if all the following conditions are met:
- The
Active article box is checked. - The current date is on or after the
Start Date . - The current date is not later than the
Finish Date , or theFinish Date field is empty.
Add slide to homepage carousel
The homepage can include a carousel below the header — a block of rotating slides used to highlight key games, promotions, news, and more.
Each slide is a visual banner. Slides rotate automatically or can be switched manually.
Example of a homepage carousel with slides:

To add a new slide to the homepage carousel:
- Go to the
Collections > Sliders section. - Click
Create New . - Fill in the following fields:
Slider Name — internal slide name (not displayed on the site).
Slider Title — the slide title displayed on the site.
State — the slide status. To display the slide in the homepage carousel after publishing the site, selectActive .
Slider Description — slide text (optional).
- In the
Image field, upload or select a slide image.
- Recommendations:
- Aspect ratio: ~2:1.
- Size: 1920 × 980 px.
- Add links to external resources or other site pages (optional). To add a link:
- In the
Links section, clickAdd Link . - In the
Text field, enter the link text to display on the slide. - In the
Link field, enter the URL. - In the
Icon field, select or upload an icon for the link.
- In the
- To validate required fields and save your changes, click
Save .
Create game review
Game reviews (user feedback about a game) appear on the corresponding game page and help visitors understand what other players think. Reviews are a key element in building trust and user engagement.
Example of reviews on a game page:

You can manually add a review through the CMS or configure automatic review imports from the app store where the game is published. To set up automatic review imports, contact your Customer Success Manager or email to csm@xsolla.com.
To manually add a game review:
- Go to the
Collections > Reviews section. - Click
Create New . - Fill in the following fields:
User name — the name or nickname of the user who wrote the review.
Game — the game the review is associated with. Select from the drop-down list or click + and create a new game.
Rating — the user rating for the game.
Date — the date the review was created.
Likes — number of likes the review received (optional).
Dislikes — number of dislikes the review received (optional).
Locale — the language of the review.
Text — the review content.
- To publish the review anonymously (without showing the
User name ), check theAnonymous box. - To validate required fields and save your changes, click
Save .
Create FAQ
FAQs help users quickly access key information and reduce common support requests. In CMS, you can add an FAQ block to the following site pages:
- game page
- article
- dynamic page

To add an FAQ in the CMS:
- Go to the
Collections > FAQs section. - Click
Create New . - Fill in the following fields:
Title — internal name of the FAQ, not displayed on the site.Question — the question text.Answer — the answer text.
- To validate required fields and save your changes, click
Save .
Create dynamic page
Dynamic pages are used to display textual and visual content on the site that isn’t directly linked to a specific game. These pages can include custom content such as:
- Privacy policy
- Terms of use
- Informational or help sections
Dynamic pages aren’t connected to game cards or news but can be added to the site menu or accessed via links from other sections.
To add a dynamic page to the site:
- Go to the
Collections > Dynamic Pages section. - Click
Create New . - Fill in the following fields:
Title — the page title displayed on the site.
Slug — the URL identifier for the page. It can contain lowercase Latin letters, numbers, and hyphens (-).
- Example:
- If the
Slug field containsterms, the page will be available at a URL likehttp://my-awesome-game-store.com/en/terms.
Publish Date — the date the page is published (not shown on the site).
Expiry Date — the date after which the page is no longer displayed (optional).
Content — the page content.
- Add answers to frequently asked questions (optional). In the
FAQs field, select existing answers or click + and create a new one. - To validate required fields and save your changes, click
Publish changes .
Set up localization
The languages available on the site are defined by a set of locales in the global settings
Content must be provided separately for each locale.
If no content is specified for a particular locale, the content is used from the English (default) locale. To change the default locale, contact your Customer Success Manager or email to csm@xsolla.com.
Example:
The site supports two locales — English (default) and German.
If specific game settings are not provided for the German locale, users viewing the site in German will see the English content provided for the default locale.
Configure site locales
- Go to the
Globals > Configuration section. - In the
Languages drop-down list, select the required locales. - Click
Save .
To apply the changes, publish the site.
Make sure your site includes a UI element for switching locales. To add this element, contact your Customer Success Manager or email to csm@xsolla.com.
Localize content manually
- In the
Locale field in the top-right corner of the screen, select the desired locale. - Go to the relevant section under
Collections . For example, to localize an article, go to theCollections > Articles section. - Select the entry in the table.
- Fill in the text fields in the selected locale and save your changes.
You can also add game descriptions, articles, franchises, or other objects in a specific locale. These objects will be visible on the site only when the user selects the matching locale.
Localize content automatically
Automatic content localization is available only for the following collections:
Games Articles Dynamic Pages
To automatically localize content:
- Go to the
Collections > Games ,Articles orDynamic Pages section. - Select the desired entry in the table.
- Click
Translate . - In the
Languages modal window, select the locales you want to translate the content into. To select all site locales, clickChoose All . - Click
Translate and wait for the content translation to complete. - Edit translations if needed.
- To validate required fields and save your changes, click
Publish changes .
Publish changes
Any changes made to site settings or collections will not appear on the live site until they are published.
To publish site changes, click the
Set up domain for publishing platform
All sites are hosted on Amazon Web Services (AWS) infrastructure and served via Amazon CloudFront — a CDN service that delivers content quickly and securely to users around the world.
Once setup and publishing are complete, the Xsolla team will provide you with a site URL in the following format: https://your-cloudfront-id.cloudfront.net.
You can connect a custom domain (or subdomain) for your publishing platform — for example, games.example.com. This allows you to use your company or project name in the site address, making it more recognizable to users.
To configure a custom domain for your publishing platform:
- Choose the domain or subdomain where your platform will be hosted.
There are no technical restrictions for the domain level, but for convenience we recommend you use a third-level domain. You can set it up in the DNS settings of your domain.
Refer to AWS requirements for alternate domain names (CNAMEs) for CloudFront to avoid errors and ensure your domain is eligible for Xsolla infrastructure.
- Create a CNAME record:
- Log in to your DNS provider’s admin panel.
- Go to the DNS records section.
- Create a new record with the following parameters:
| Parameter | Value |
|---|---|
| Type | CNAME. |
| Name | Your domain or subdomain, e.g., games.example.com. |
| Value | CloudFront address provided by Xsolla (https://your-cloudfront-id.cloudfront.net). |
| Time To Live (TTL, cache storage time) | Leave the default value or set to 300 (which equals 5 minutes and is suitable for most setups). |
https://your-cloudfront-id.cloudfront.net as the origin server.- Send a domain connection request to your Customer Success Manager or email to csm@xsolla.com. Include the following details in your request:
- desired domain or subdomain
- any additional requirements (e.g., default language, redirect rules, localization settings)
Found a typo or other text error? Select the text and press Ctrl+Enter.
