Use F2P template
Overview
This use case and ready-to-use Xsolla tools enable free-to-play (F2P) game monetization through your own web store. In this store, you can sell virtual items, virtual currency, and bundles on an external website — regardless of whether your game is for PC, consoles, or cross-platform.
Key features:
- The flexible and secure Xsolla payment UI that supports over 1,000 payment methods worldwide.
- The store UI which is easy to customize using the site builder without the need to develop it from scratch.
- Full control over your item catalog, pricing, and promotions.
- A wide range of LiveOps tools, for example, discount promotions, upsells, and reward systems.
This guide describes a quick setup and launch of a web store for your F2P game using Xsolla tools.
Who can use it
This use case is ideal for you if you:
- develop or publish games for PC, consoles, or cross-platform
- want to sell in-game goods and virtual currency through your own website
- are looking to reduce platform fees
- want a full control over marketing, sales funnel, and user data
How to set it up
- Create a project in Publisher Account.
- Create an item catalog.
- Create a site.
- Set up main blocks.
- Configure user authentication.
- Configure webhooks to grant purchases to the user.
- Test the site.
- Publish the site.
Create item catalog
To create a catalog, you can:
To add a virtual item with basic settings to the catalog:
- Open your project in Publisher Account and go to the Items catalog > Virtual items section.
- In the drop-down menu, select Create item.

- Set the basic settings of the item in the following fields:
- Image (optional)
- SKU (item unique ID)
- Item name
- Description (optional)
- Specify item price:
- Set the Price in real currency toggle to On.
- In the Default currency field, change the currency (optional) and specify the item price.
- If you changed the currency in the Default currency field, select the same currency in the Price in real currency field.
- Change the item status to Available.

- Click Create item.
Create site
- Open your project in Publisher Account.
- On the project main page, click Change focus and select Sell virtual goods in-game or online.

- On the Optional: Set up a web storefront step, click Create template.

- On the Express tab, add a link to the platform where your game is available — Steam or Epic Games Store. This allows you to quickly create a site in the style of your game: images and the game title, developer information, and a color scheme are automatically added to the site.
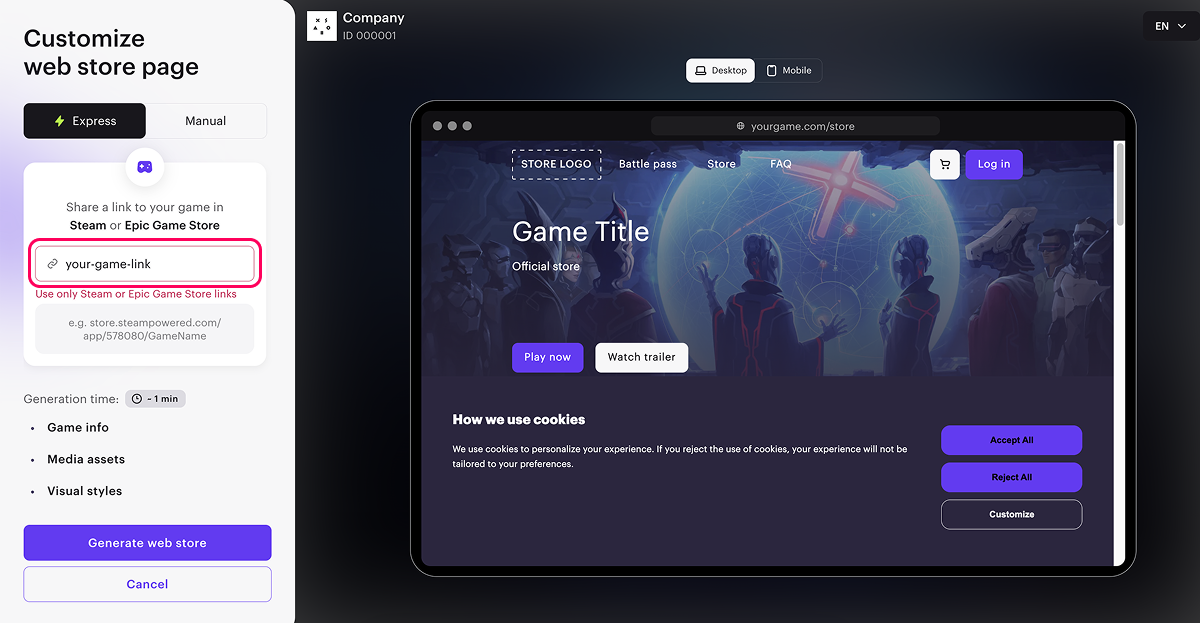
- Click Generate web store.
- Click Continue to set up.
Configure main blocks
- On the project main page, in the Sell virtual goods in-game or online focus, go to the Optional: Set up a web storefront step, and click Customize site. You will be redirected to the site builder, where you can customize the created site.

If you closed the project main page, go to the Storefronts > Websites section and click Open Site Builder in the pane of the created site. To find it, you can check its creation time displayed on the site pane.

- Configure the Header block where user information and site navigation elements are displayed:
- Add a logo of your game or studio.
- If needed, change the preset buttons.
Header block example:

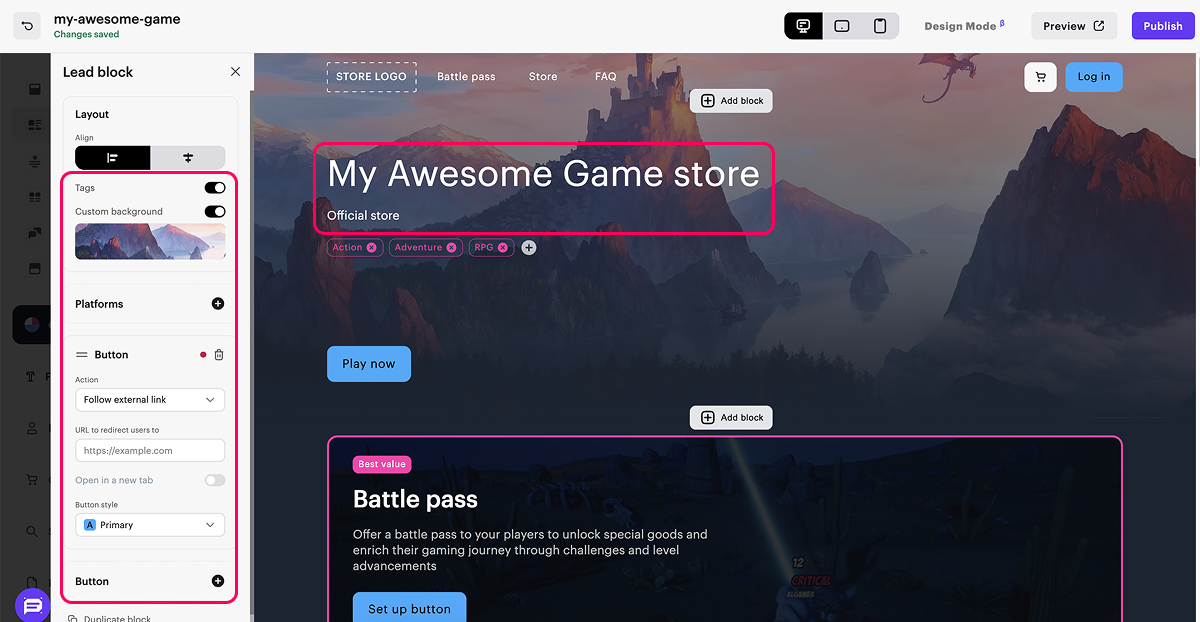
- Configure the Lead block, where the main information about your store is displayed:
- Add a store name, description, and background image if you don’t want to use the automatically uploaded ones.
- Add tags.
- Specify the platforms where the game is available.
- Edit the default buttons or add new ones if necessary.
- Configure the Battle pass block that displays a featured offer:
- Update card custom background.
- Add a name and description of the offer.
- Set up the purchase button: select the item to sell and, if needed, customize the button style.
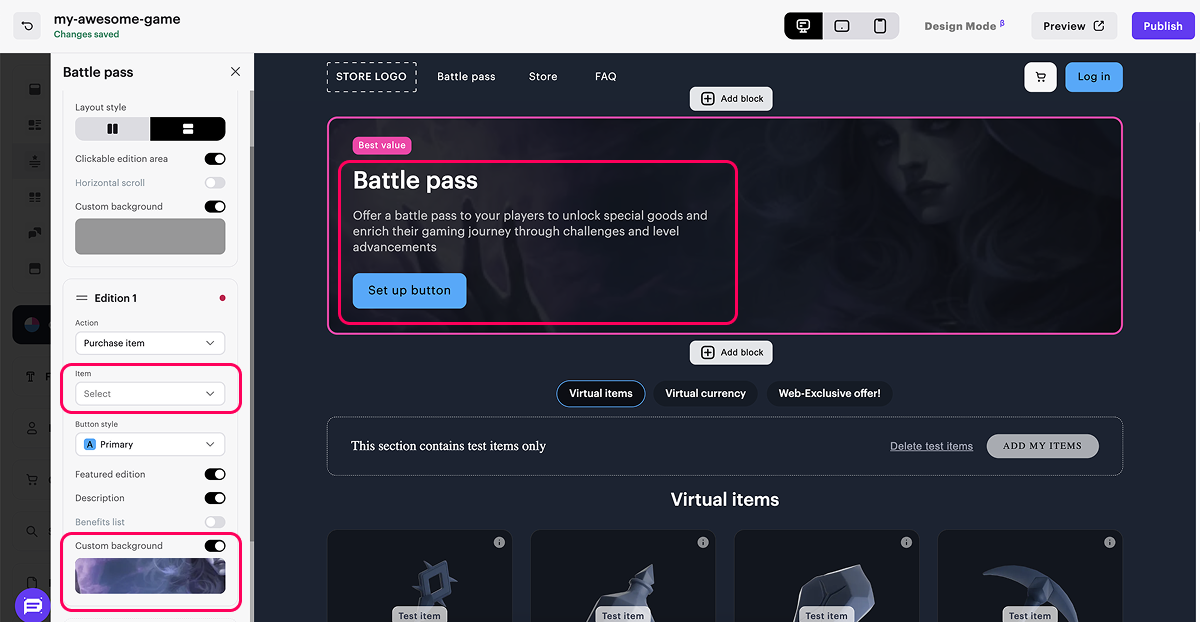
Battle pass block example:

- Configure the Store block, where virtual items, bundles and virtual currency packages available for purchase are displayed:
- If needed, remove the automatically added sections or add new ones.
- In the block for the relevant section, select the item type and group from the drop-down list to display them on the page.
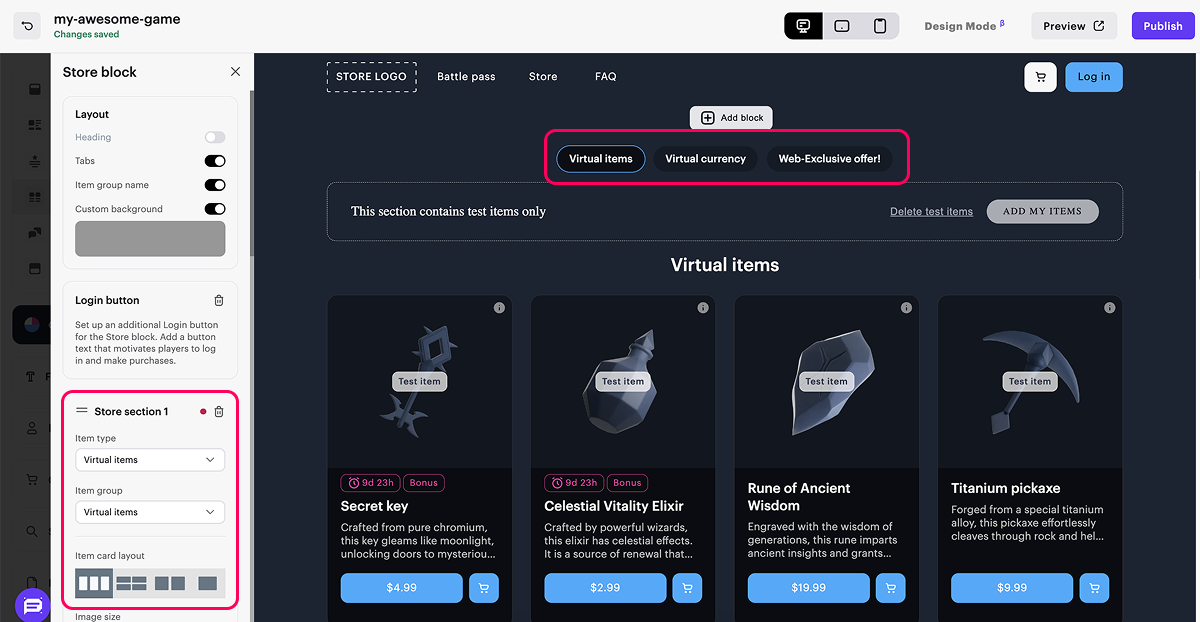
If the selected item type and group aren’t displayed in the builder, make sure the required item groups and virtual currency packages have the Enabled status, i. e. they are available for display in the store, and that items are included in those groups. To check or edit the status of the items, go to Items catalog and open a section for the necessary item type.

Store block example:

- Configure the Footer block that contains legal information and privacy settings. You can:
- Choose a layout: columns or rows.
- Add custom background.
- Add links on social networks.
- Add age restrictions.
Footer block example:

- Go to the Cart settings section to configure additional features. Set the corresponding toggles to active:
- Show promo code field — allows users to apply a promo code or coupon in the cart interface.
- Login before shopping cart — opens the login window when proceeding to the cart if the user is unauthorized.
- If needed, add additional pages to your store, e.g., with the latest game news. To do this:
- Add necessary pages by following the instructions.
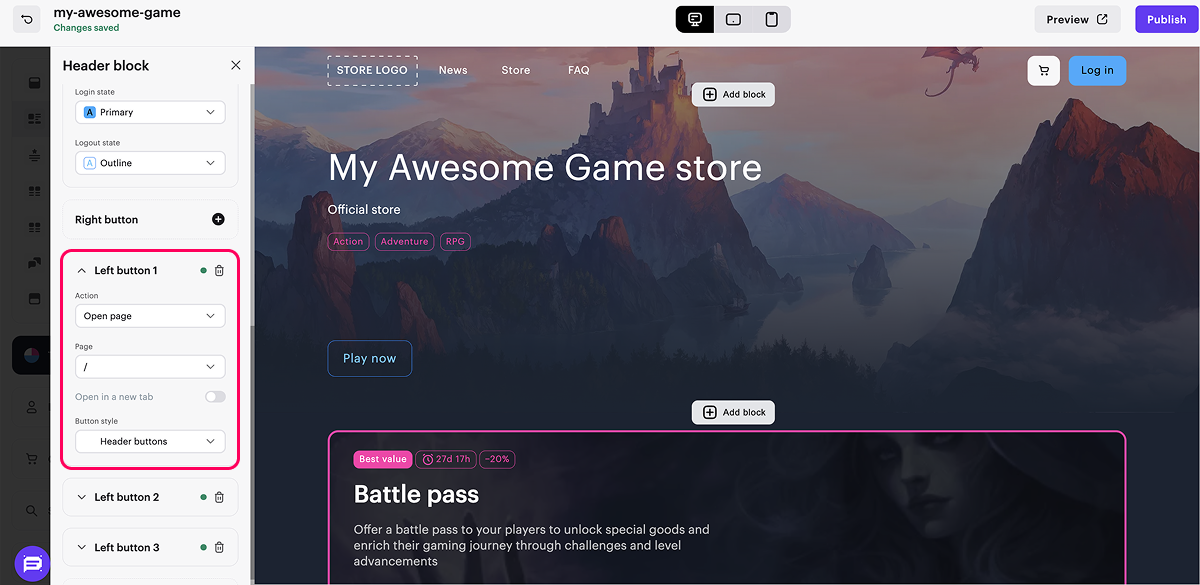
- In the block, where you want to add a link to the page, e.g., Header:
- Add a new button or go to editing an existing one.
- In the button settings section, choose a click action — Open page.
- From the drop-down list, select a page that will open when the button is clicked.
Set up user authentication
Authentication allows users to purchase items in the store and see personalized offers in the catalog. Setting up authentication via Xsolla Login gives users a wide range of authorization methods: via social networks, one-time codes or links, or by entering a login and password. You can also customize the Xsolla Login widget and set age restrictions for authentication.
To set up user authentication via Xsolla Login:
- Open your project in Publisher Account and go to the Storefronts > Websites section.
- Click Open Site Builder in the pane of the necessary site.
- In the site builder, go to the Login settings block.
- Choose Xsolla Login.
- From the drop-down list, select New Login. As a result, the Login project with user authentication by email and password will be automatically created. To set up another login method, follow the instructions.
For the created Login project, the store URL will be automatically specified as a callback URL. The user will be redirected to the store in the following cases:
- after successful authentication
- after successful email confirmation
- after password reset
- in case of authentication failure
When you change the store domain, the callback URL in the Login project settings changes automatically.
- Connect user data storage. Depending on the user data storage option, different product features are available to you (refer to the Comparison of user data storage options section).
You can also set up other user authentication methods:
- via user ID
- via user ID and deep link
- via deep link
- via Xsolla Login with linked user ID
Refer to the instructions for detailed information about setting up each method.
Grant purchase to user
Implement granting purchases to the user in your application using information about the transaction details and purchased items received in the webhooks from Xsolla. If you registered in Publisher Account after January 22, 2025, for the full operation of the store and payment management, implement the processing of the following webhooks:
| Webhook name | Description |
|---|---|
User validation > User validation (user_validation) | Is sent at different stages of the payment process to ensure the user is registered in the game. |
Game services > Combined webhooks > Successful payment for order (order_paid) | It contains payment data, transaction details, and information about purchased items. Use the data from the webhook to add items to the user. |
Game services > Combined webhooks > Order cancellation (order_canceled) | It contains data of the canceled payment, transaction details, and information about purchased items. Use the data from the webhook to remove the purchased items. |
Test site in sandbox mode
To test the site work in sandbox mode:
- Open your project in Publisher Account and go to the Storefronts > Websites section.
- Click Open Site Builder in the pane of the necessary site.
- Click Preview.

- Select an item and click the purchase button.
- Choose the Card group of payment methods.
- Enter the test bank card details. Enter any values in the remaining fields. You can also specify incorrect details (card number, expiration date, or CVV) in order to generate an error.
Publish site
- To improve your site performance:
- In the SEO Settings block, set the parameters that will be used by search engines and for page preview in social networks: upload a favicon, specify the store title and description, add a preview image.
- Configure site localization.
- Make changes to the domain (optional). To do this, go the Storefronts > Websites section and click Configure in your site pane. In the Domain section, edit the Xsolla domain value, or set up your own domain.
- After you made all necessary changes and your web store is ready for launch, in the upper-right corner of the site builder, click Publish.
- Check the boxes next to the pages you want to publish.
- Click Publish.

- There are no empty sections in the builder (marked with a red indicator).
- The licensing agreement with Xsolla has been signed.
- The main page is published or selected for publication. You cannot publish child pages before the main page.
Extended store setup
You can use the following extended features for your store:
- Set up regional pricing. Increase your sales by setting up prices for different regional price regulations.
- Set up and run promotion campaigns. Increase your sales with discounts, bonuses, promo codes, time-limited offers, and other promotions.
- Boost user loyalty and retention with features like daily rewards, a reward system, or offer chains. They encourage users to return to the game regularly, engage more deeply with the content, and receive rewards.
- Provide personalized offers for certain authorized users, for example, a welcome bundle for new users.
Found a typo or other text error? Select the text and press Ctrl+Enter.
