Set up user authentication

Authentication allows users to buy items in the Web Shop and see unique offers in the catalog.

Key features of the Web Shop with authentication:

  • Multiple authorization methods in the Web Shop.
  • Set up personalized storefronts and promo codes for authorized users.
  • Compliance with regional laws and regulations for the protection and processing of personal data.
  • Rate limit and DDoS protection.

You can choose one of the following authentication methods:

  • User ID authentication:
    • Simplifies the integration of the Web Shop with the game.
    • The authentication widget does not require registration or password entry. A user simply needs to enter the user ID from the game or use the same social network account for login as for logging in to the game.

Note
Use user ID authentication if Xsolla Login isn’t set up in your game.
  • User ID and deep link authentication:
    • Deep links can be used as an additional authentication method when logging in via User ID.
    • The User ID and deep link authentication widget does not require registration or password entry. The user simply needs to enter their User ID from the game or log in via the game using a deep link.
Note
Use User ID and deep link authentication if your game supports deep links for authentication.
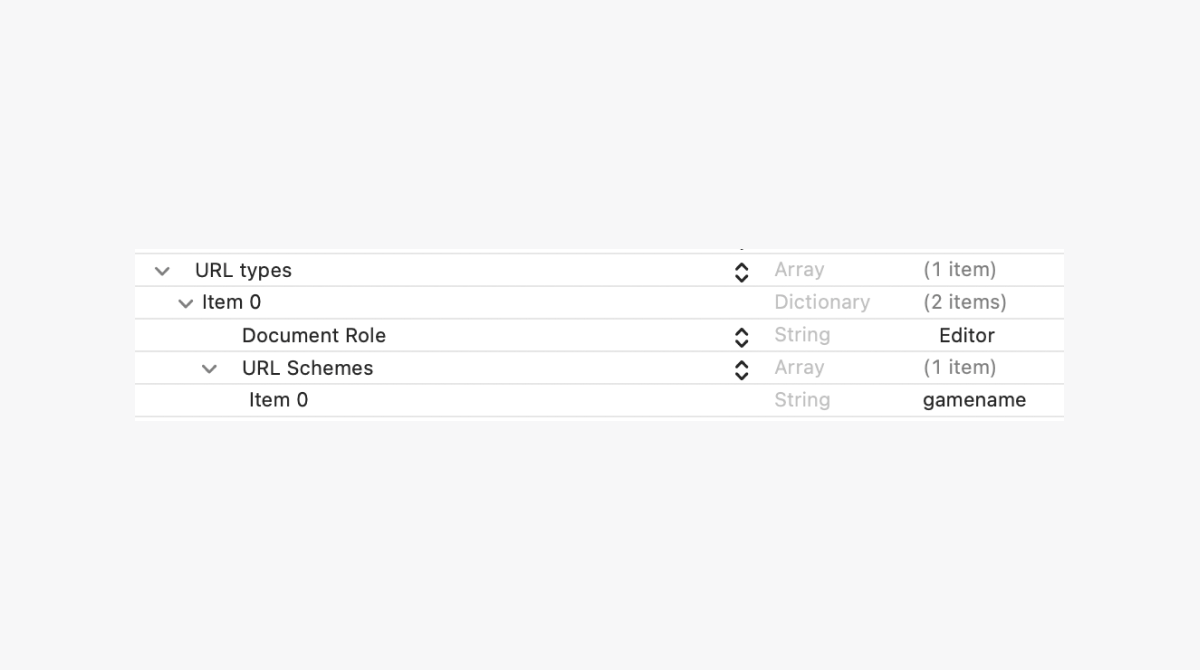
  • Deep link authentication:
      When a deep link is used as the primary login method, it allows saving payment details, which is not possible with user ID authentication.
Note
Use deep link authentication if your game supports deep links for authentication.
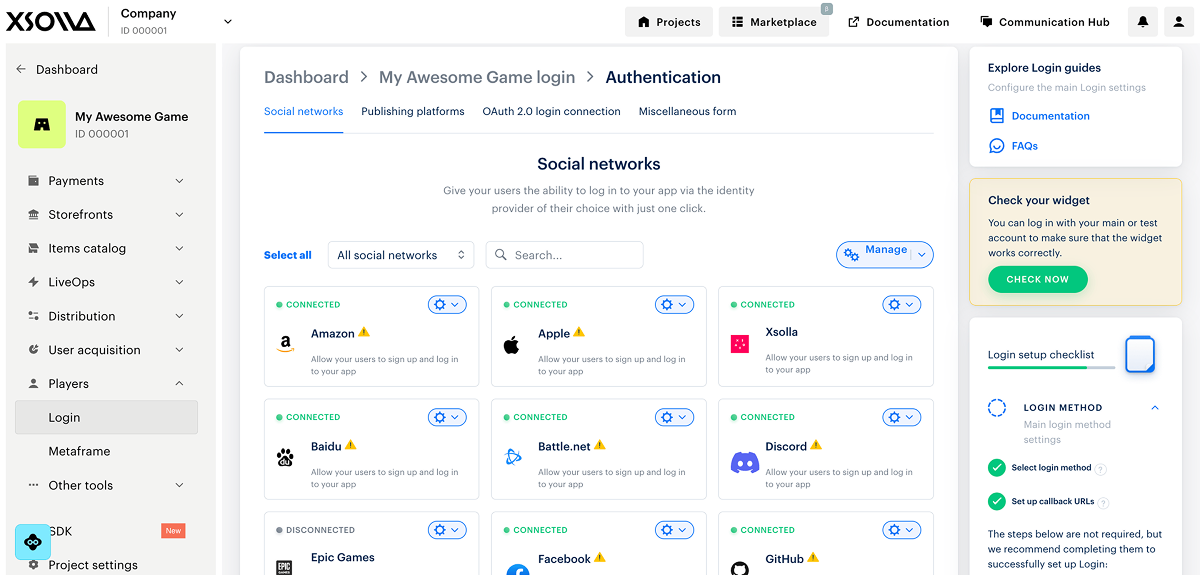
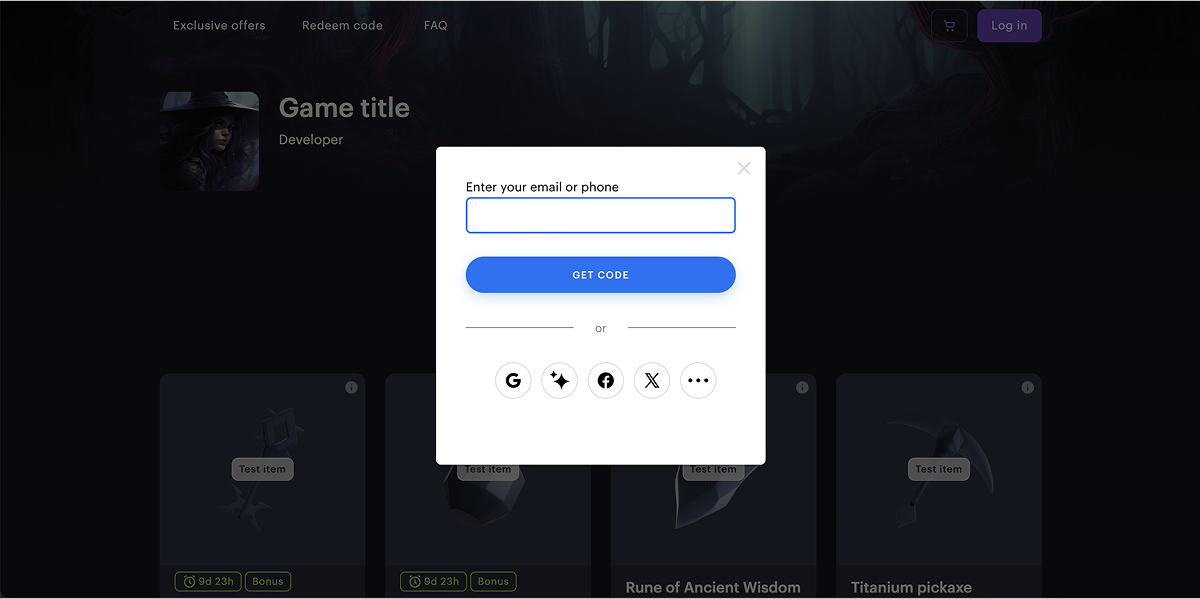
  • Authentication via Xsolla Login:
    • Provides a wide range of authorization methods: social networks, one-time codes or links, and login and password.
    • Allows you to customize the Xsolla Login widget.
    • You can impose age restrictions on authorization.
Note
Use Xsolla login authentication if this solution is already set up in your game.
For any of the authentication method, you can add a Fast Login block to your site.

User flow

  1. The user goes to Web Shop with user ID authentication configured.
  2. The user authorizes in the Web Shop in one of the following ways:
    • The user enters their ID in the Fast Login block and clicks the login button.
    • The user clicks the buy button for the selected item or the login button on the top bar:
      1. A modal window for entering the user ID or logging in through a social network opens.
      2. User enters their ID and clicks Continue or clicks on the social networks icon to choose a social network and completes authentication on the social network page.
    1. The system checks if a user exists in the game. If a user with this ID or social account exists in the game, the user is authorized in the Web Shop. Otherwise an error message is displayed.

    How to get it

    1. On your application’s side, implement handling of the user validation webhook.

    When receiving a webhook, the application should do the following:

    • Search for a user by their ID passed in the webhook.
    • Depending on the result, send one of the following status codes:
      • 200 HTTP-code with an answer from webhook if a user is found
      • 404 HTTP-code if the user ID is not found
    • Send user attributes for personalization.

    Note
    The user ID must be unique for every user.
    1. Open your project in Publisher Account.
    2. In the side bar click Site Builder.
    3. Click Open Site Builder.
    4. Go to the Login Settings block.
    1. Select the User ID option.
    Note
    Widget customization settings in the login project do not affect the user ID authentication interface.
    1. In the drop-down list, select New Login.
    1. Enter the URL to receive webhooks.
    Note
    Webhook URLs should start with https://. Using http:// will cause an error.
    Note
    Xsolla storage is used by default. We recommend that you do not change it in Publisher Account since Xsolla storage provides a wider variety of settings.
    1. Set up authorization via social networks already connected to your application (optional):
      1. Open your project in Publisher Account and go to the Login section.
      2. Click Configure in the site bar.
      3. Go to the Authentication block and select Social login.
      1. To set up a social network, go to the social network card, click the ⚙ icon to the right of the title, and select Connect.
    Note
    To use social network authorization, in the social network card settings, specify the Application ID and secret of the application in your project. The Application ID and secret are available from the developer account of the social provider. Detailed instructions for locating the Application ID and secret are available in the social network card settings in Publisher Account.

    Set up Fast Login block

    The Fast Login block provides users with an additional way to authenticate on the site.

    The appearance of the block and its features depend on the selected authentication method.

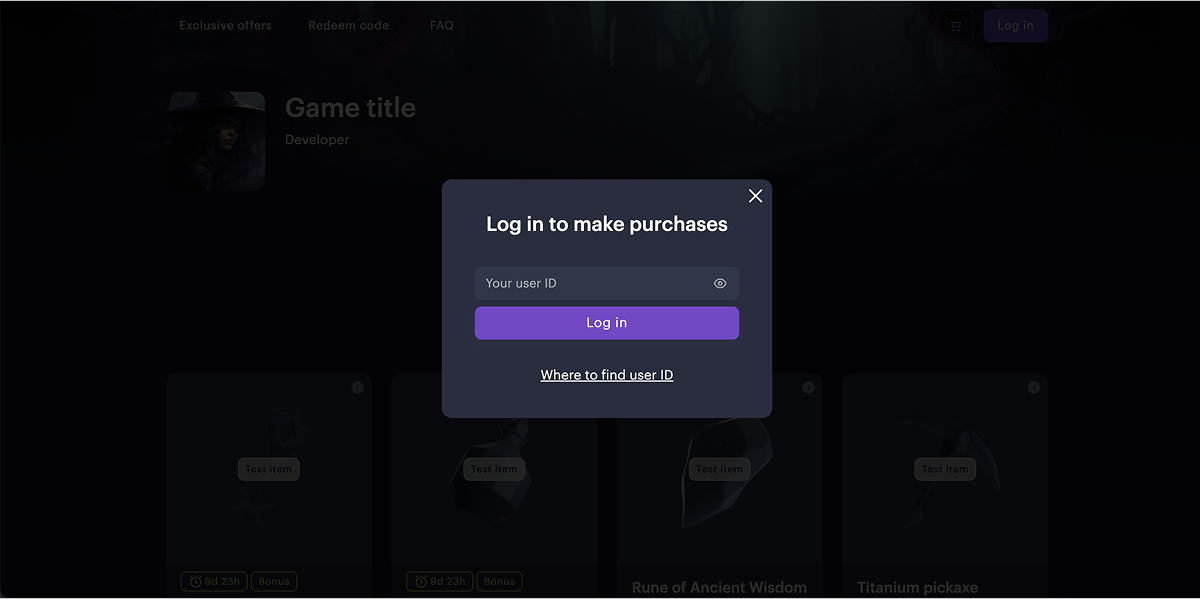
    If authentication via user ID is configured for the site, the Fast Login block displays a field for entering the ID and a login button.

    Features:

    • User authentication without additional transition to the modal window.
    • Setting up the content of the block. You can enable and configure the following sections:
      • Title
      • Description
      • Instructions on how to find the user ID
      • Custom background

    You can also expand the features of the block, for example, add text, a button, or an image, using JS code.

    If authentication via Xsolla Login is configured for the site, an additional button calling for authorization is displayed in the Fast Login block. When you click on the button in the block, a modal window opens for authorization using one of the Xsolla Login methods.

    Features:

    • Setting up the text of the button calling for authorization
    • Setting up a custom background

    You can also expand the features of the block, for example, add text, a button, or an image, using JS code.

    For new sites, the Fast Login block is added to Web Shop template by default, and you can remove it if necessary.

    If you created a site earlier and it doesn’t have a Fast Login block, you can add it.

    To add a Fast Login block:

    1. Open the project in Publisher Account.
    2. In the side menu, click Site Builder.
    3. In the Sites section, select your site and click Open Site Builder.
    4. Click Add block.
    5. Choose Fast Login block.
    Note

    To use the Fast Login block, an authorization option should be chosen in advance from the drop-down list in the Login settings section.

    For the user ID authentication method in the Login settings section, you also need to specify the URL to receive the webhook. If you don’t specify it, the site can’t be published because user authentication will be unavailable.

    User authentication during site preview is possible without adding a webhook URL.

    Next steps

    1. Test Web Shop in sandbox mode.
    2. Publish the site.

    Integration flow

    Was this article helpful?
    Thank you!
    Is there anything we can improve? Message
    We’re sorry to hear that
    Please explain why this article wasn’t helpful to you. Message
    Thank you for your feedback!
    We’ll review your message and use it to help us improve your experience.
    Last updated: March 13, 2025

    Found a typo or other text error? Select the text and press Ctrl+Enter.

    Report a problem
    We always review our content. Your feedback helps us improve it.
    Provide an email so we can follow up
    Thank you for your feedback!
    We couldn't send your feedback
    Try again later or contact us at doc_feedback@xsolla.com.