Hello Money, Your First Integration with Unreal SDK 3
Xsolla SDK 3 reduces every purchase, on any platform, to the same four steps: authenticate the player, load a catalog, start a purchase, and finalize it. This article is the talk Hello Money, Your First Integration with Unreal SDK 3, written out step by step; if you would rather watch it than read it, the recording is available here. Unreal Engine is the newest addition to that lineup, currently available as a pilot release, and this article walks through what those four steps look like there specifically. We will build a complete example from scratch: a real Xsolla Publisher Account, a real catalog item, and a real Pay Station purchase, wired into Crop Out, one of Epic Games' own sample projects.
By the end, there will be a working purchase, confirmed inside a running game, built starting from a completely empty Publisher Account. The walkthrough is built in Blueprints from start to finish, and each step also includes the equivalent C++, since the SDK supports both equally and most teams end up reaching for each at different points in a real project.
WALKTHROUGH SPECIFICS
| Engine version | Unreal Engine 5.8 |
| Demo project | Crop Out, a free official sample project from Epic Games |
| Authentication | Silent Device ID sign-in (the player is signed in automatically, with no login form) |
| Payment UI | Xsolla Pay Station, opened in the system's default browser |
| Validation | Client-side, confirmed with Get Inventory Items after the order finalizes |
Before you start. This walk-through builds the whole integration in Blueprints, and Blueprints alone are enough to follow it start to finish. Alongside every step, you will also find what that same step looks like written in C++: not because both are required, but because plenty of developers reading this will want to see it in code rather than nodes. Treat each C++ snippet as a second way of looking at the same idea, worth a look if that is how you prefer to work, and easy to skip entirely if it is not. The C++ itself is worth reading the same way: it is one reasonable way to write each step, not the only correct one. Structure the class differently, name things differently, store the access token somewhere else entirely, and it would still work, as long as the same handful of SDK calls happen in roughly the same order.
What we're building
We are building on top of Crop Out, one of Epic Games' own official sample projects, available for free from the Samples section of the Epic Games Launcher, or on Fab. It is a small village economy: villagers need food to keep working, and the more they work, the more the village can build, eventually finishing its own monument once enough food is banked. That loop gives us a natural place to hook in a real purchase, since food is something the player can watch grow immediately after paying for it.
Right now, the Buy Food button already exists in the game, but it does nothing beyond triggering normal gameplay. By the end of this guide, pressing it will open a real Xsolla checkout, and completing that purchase will drop food straight into the village's economy, the same way any other in-game reward would.
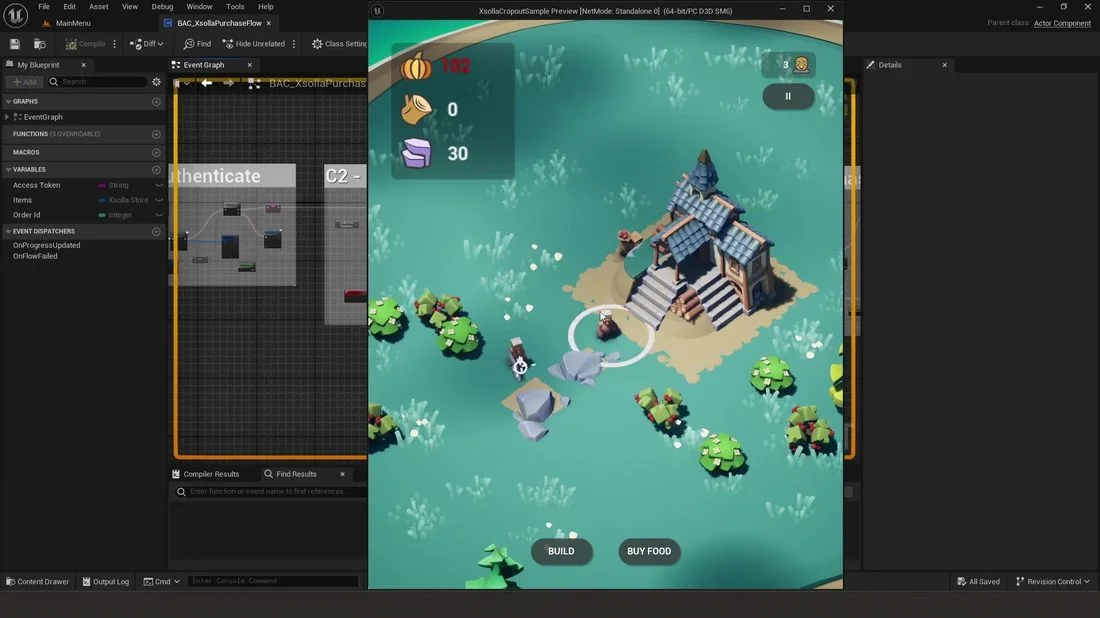
Crop Out's Buy Food button, currently backed by nothing but normal gameplay.
Prerequisites
A few things need to be in place before starting:
- Unreal Engine 5.8.
- On Windows, Visual Studio 2022 with the Game Development with C++ workload installed. On Linux, the standard clang toolchain is enough. Xsolla SDK 3 ships as source code rather than a compiled binary, so your project's own build compiles the plug-in the first time you open it, even if every line of your own gameplay code stays in Blueprints.
- An active Xsolla Publisher Account. If you don't have one yet, the next section walks through setting one up.
Note. That toolchain is only there to compile the plugin itself. A project built entirely in Blueprints still needs it, since the SDK compiles from source the same way either way. It has no bearing on whether you ever open the C++ shown alongside each step below.
The four stages of integration
However complicated a game's economy eventually becomes, every purchase built on Xsolla SDK 3 breaks down into the same four steps. This guide follows that order from here on.
Authenticate
Establish who the player is. Handled silently here through Device ID, so the player never sees a login screen.
Load Catalog
Fetch your products. The catalog comes from Xsolla's backend, ready to reference the moment the player wants to buy something.
Purchase Product
Start the transaction. Pay Station takes over from here, handling the payment UI and returning a token and an order ID.
Finalize Purchase
Act on the result. Confirm the order's final state, check the item is actually owned, then credit the reward in-game.
These four steps are the smallest complete loop that still does something real. Once this works end to end, you have the whole shape of the integration, and everything else, additional login methods, virtual currency, bundles, coupons, and deeper inventory tools, builds on the same foundation. The SDK's own documentation in the pilot repository on GitHub covers those in more depth; access is granted by joining the Unreal Engine pilot.
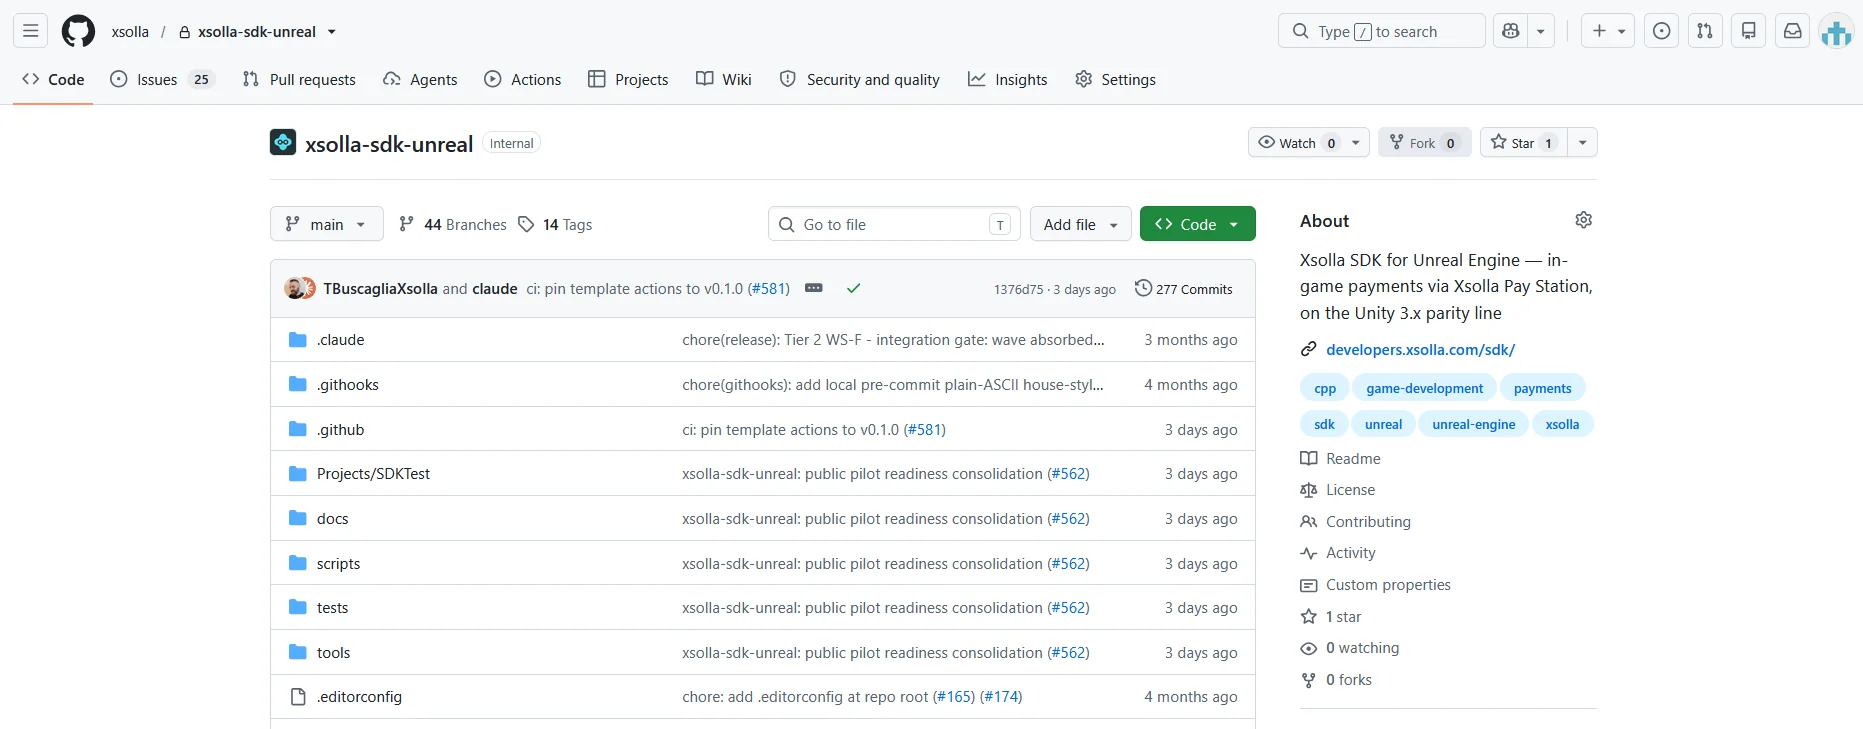
Unreal SDK GitHub Page
Set up your Xsolla Publisher Account
Every Xsolla integration, on any engine, begins in the same place: the Xsolla Publisher Account. It is the dashboard behind your whole commerce setup. Your catalog lives there, your pricing lives there, and it looks the same whether you are shipping on Unreal, Unity, or something else entirely. Before opening Unreal at all, there are three IDs to collect from it, walked through step by step below.
Create a project
A project connects your game to its own store configuration: your own catalogue, your own pricing, kept separate from anything else on the account.
-
Log into your Publisher Account. This is the dashboard you will land on.
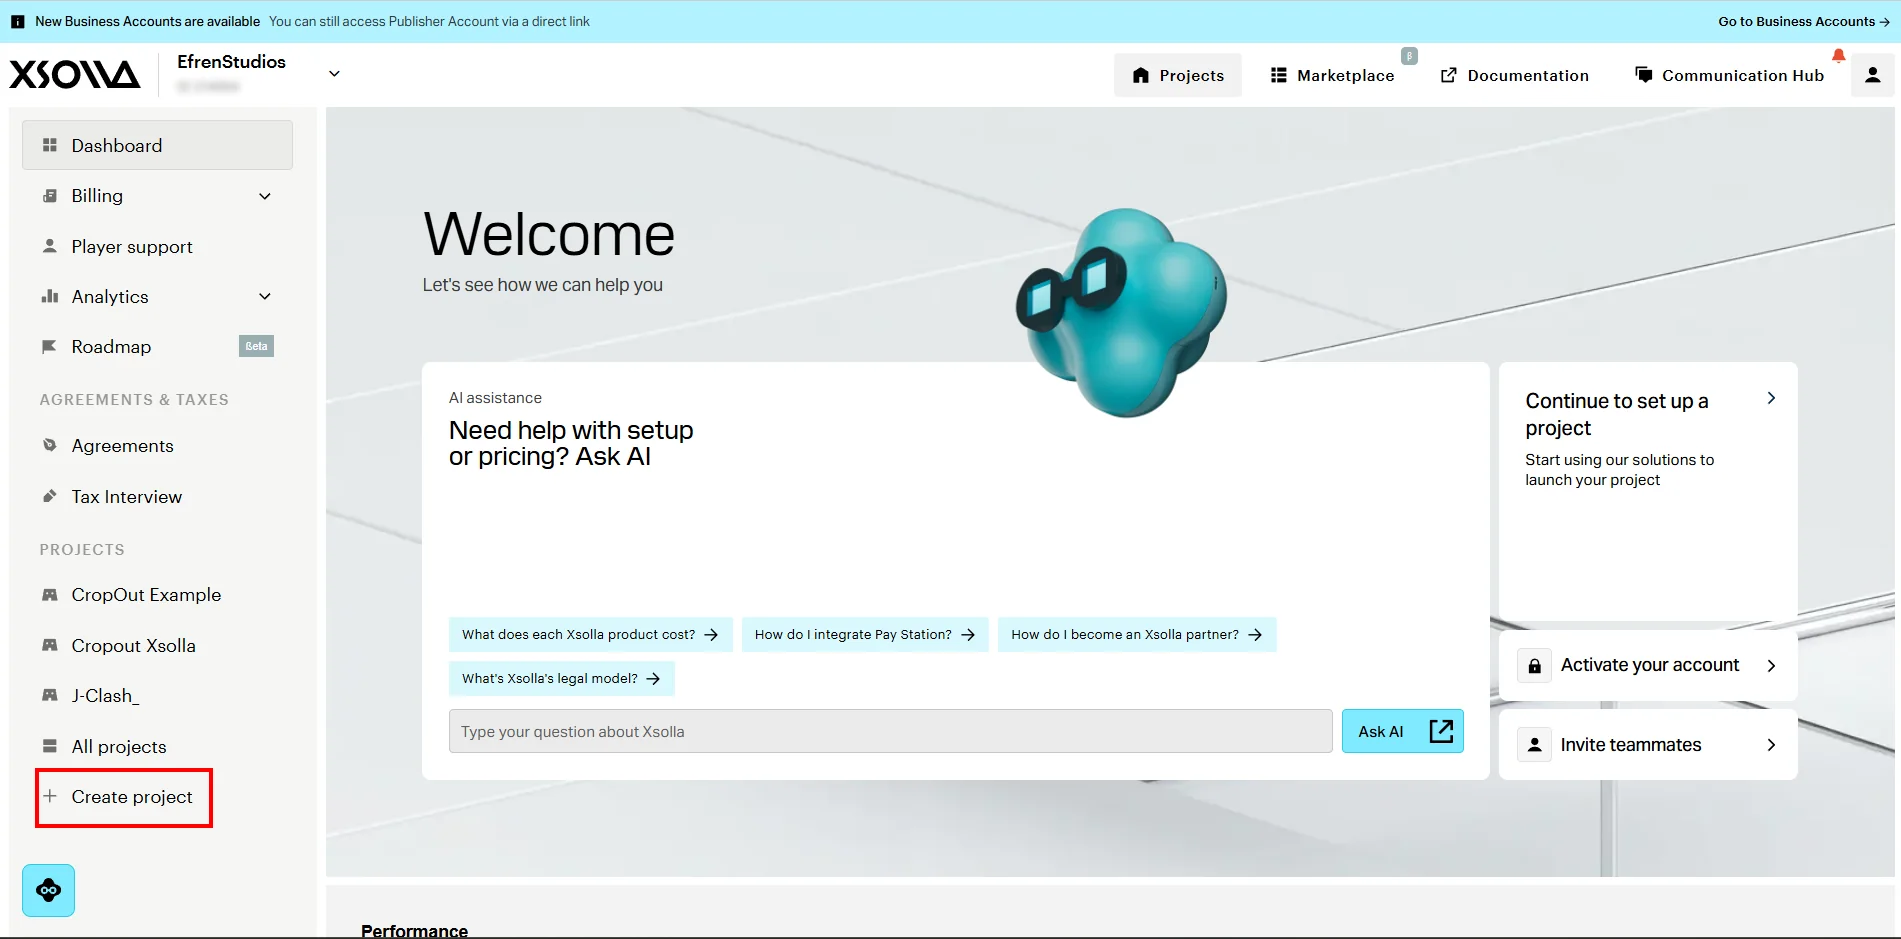
The Publisher Account dashboard, right after logging in.
-
Click Create Project, and fill in the basics: a name, your monetization type (in-game purchases, for this walkthrough), your genre, and your engine. None of these choices are permanent, so there is no need to overthink them.
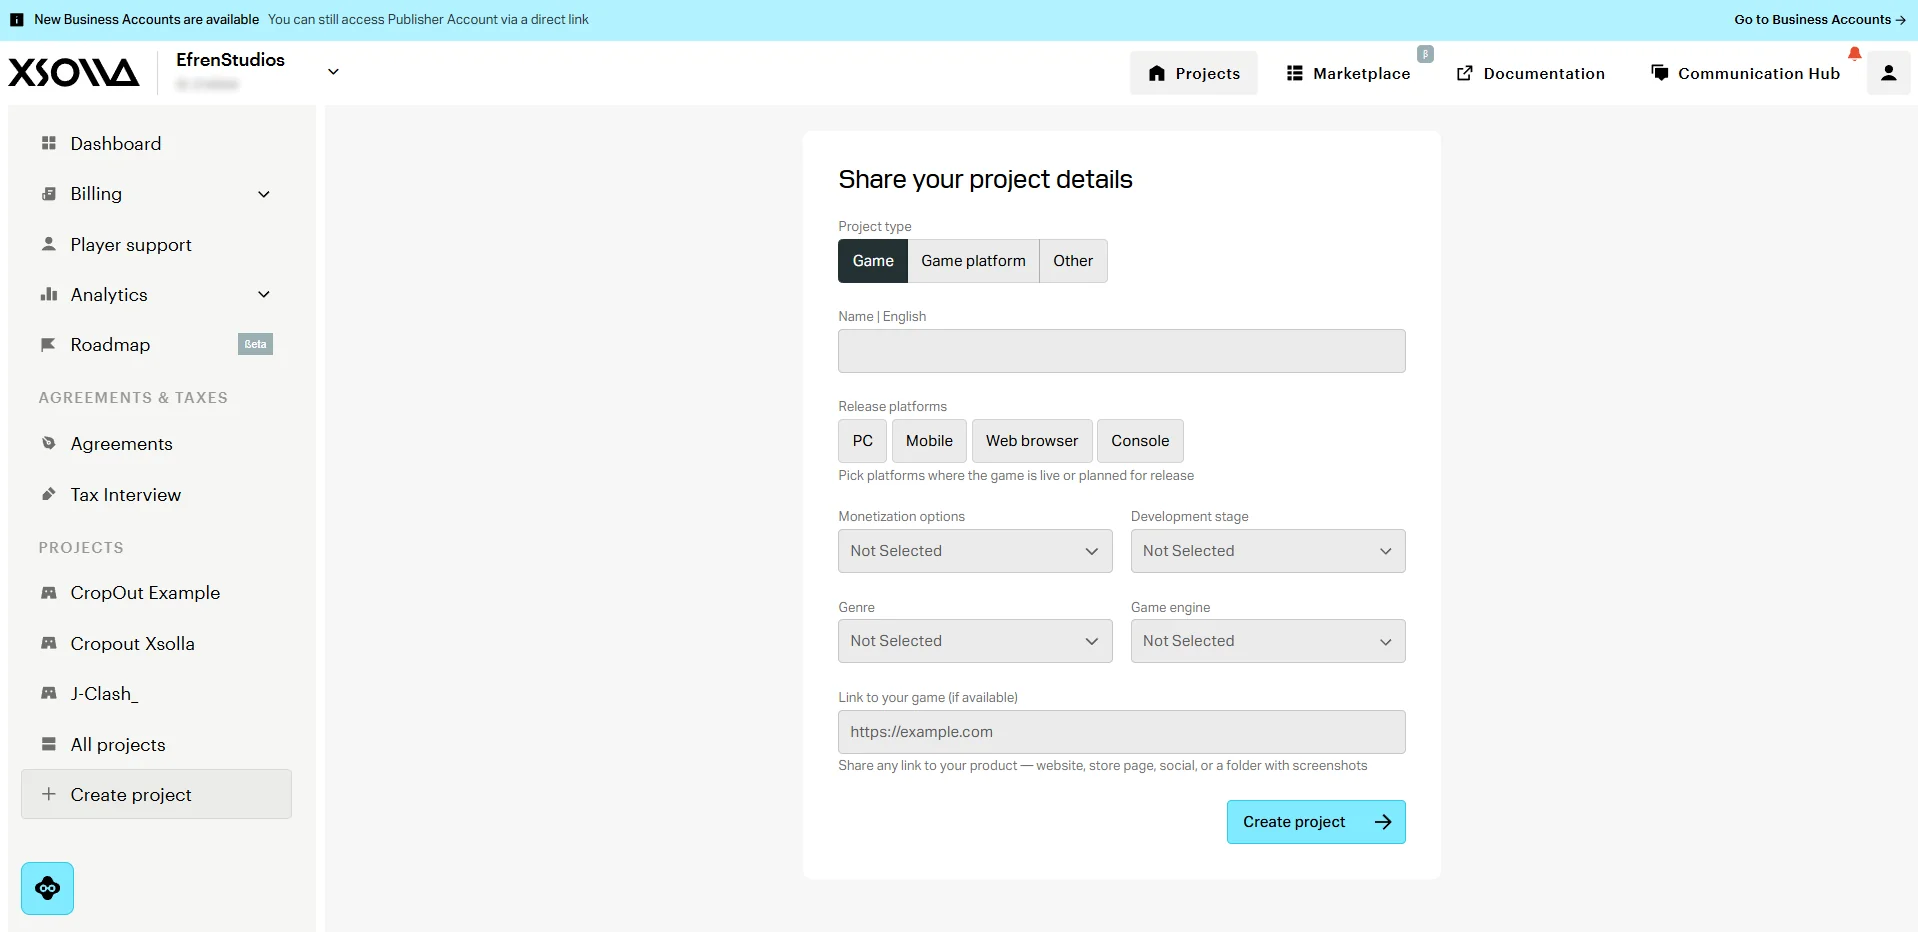
Filling in the project basics.
-
Create the project, and take note of your new Project ID. It will be needed shortly, back in Unreal.
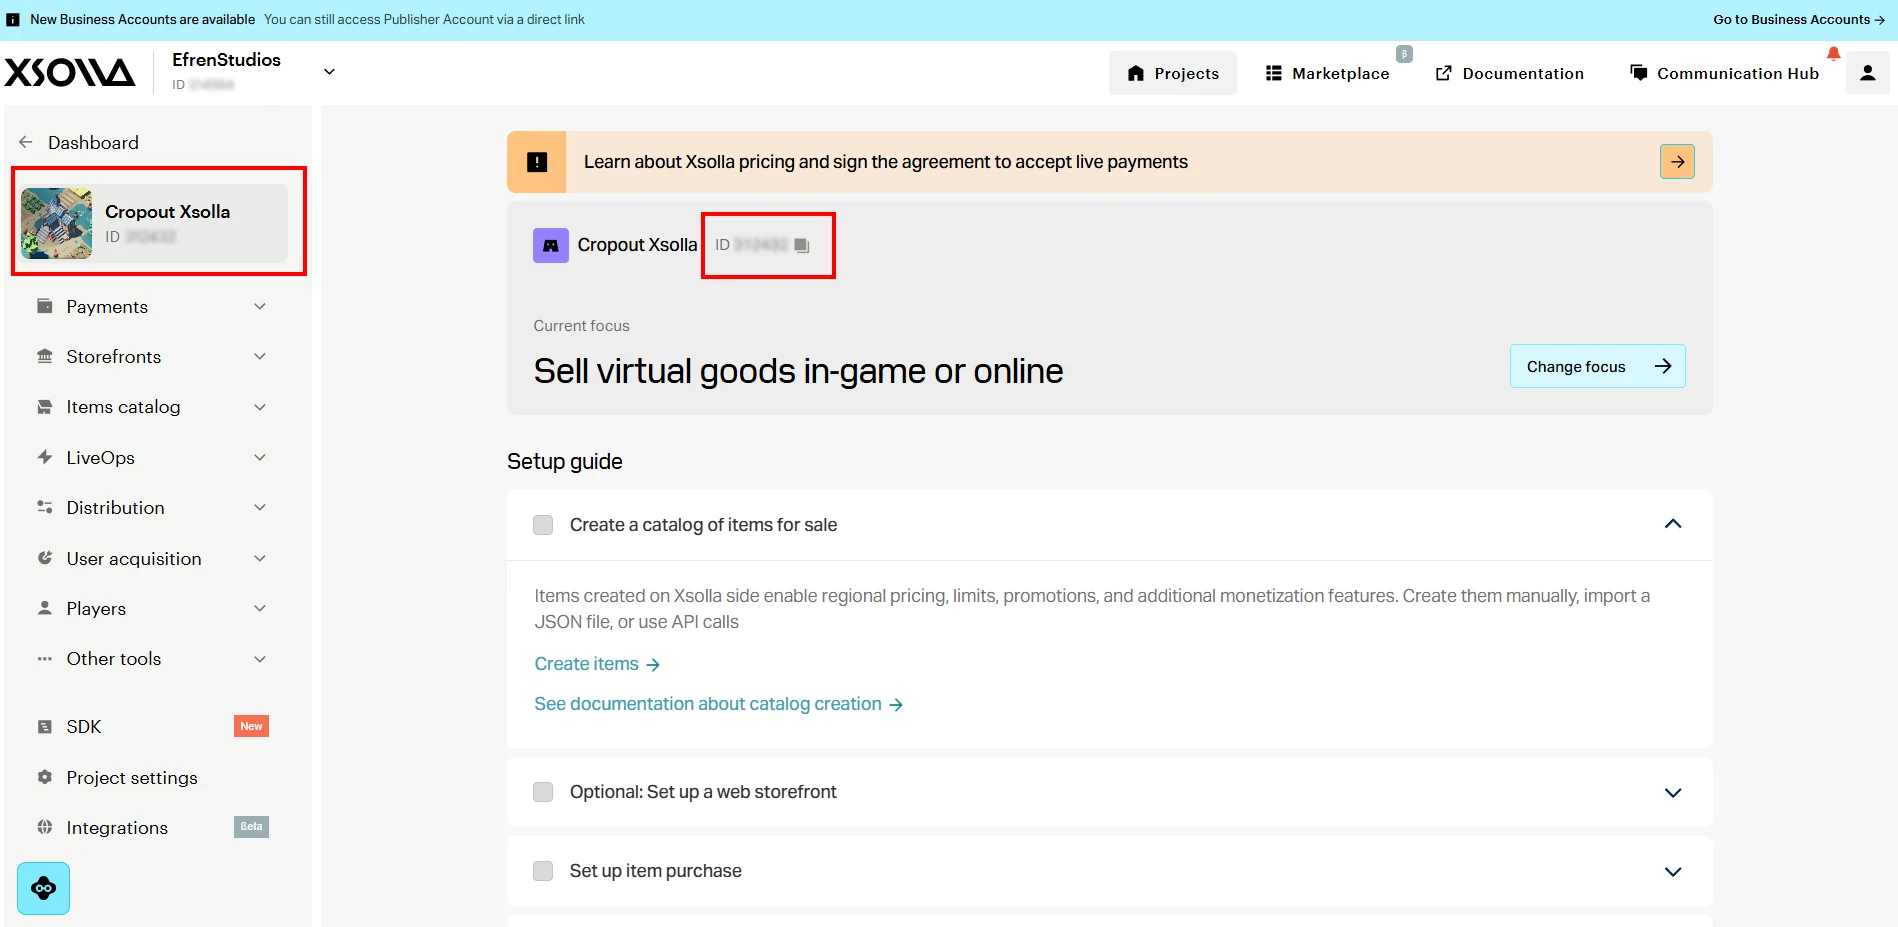
Project ID
Create a Login project
Your Project handles what you are selling; a separate Login project handles who your players are. Keeping the two apart is deliberate, since a single game might eventually support several sign-in methods without ever touching its catalog. This is also the step that trips people up first, mostly because that separation is not obvious the first time through.
-
Under Player, then Login, you'll land on a short welcome screen the first time.
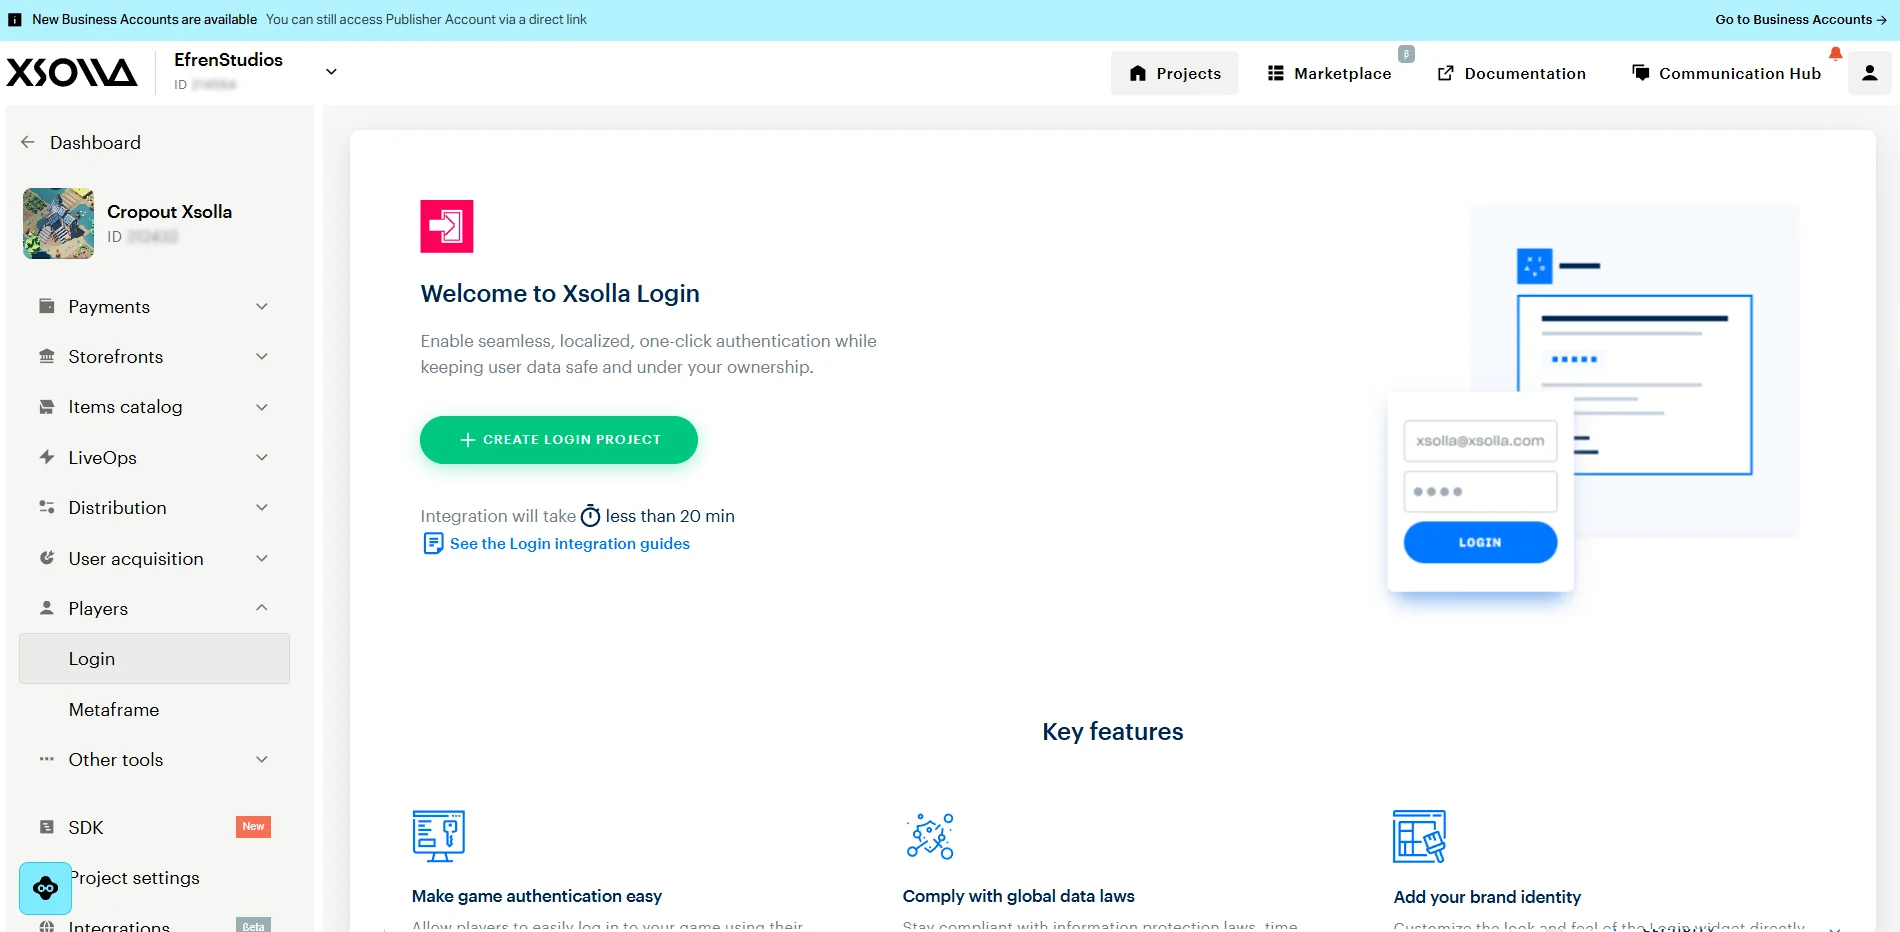
Login's welcome screen, the first time you open it.
-
Create a new Login project. For this walk-through, players sign in using Device ID, meaning they are authenticated automatically the moment the game opens, with nothing to type and no form to fill in. A Standard Login project is all that requires.
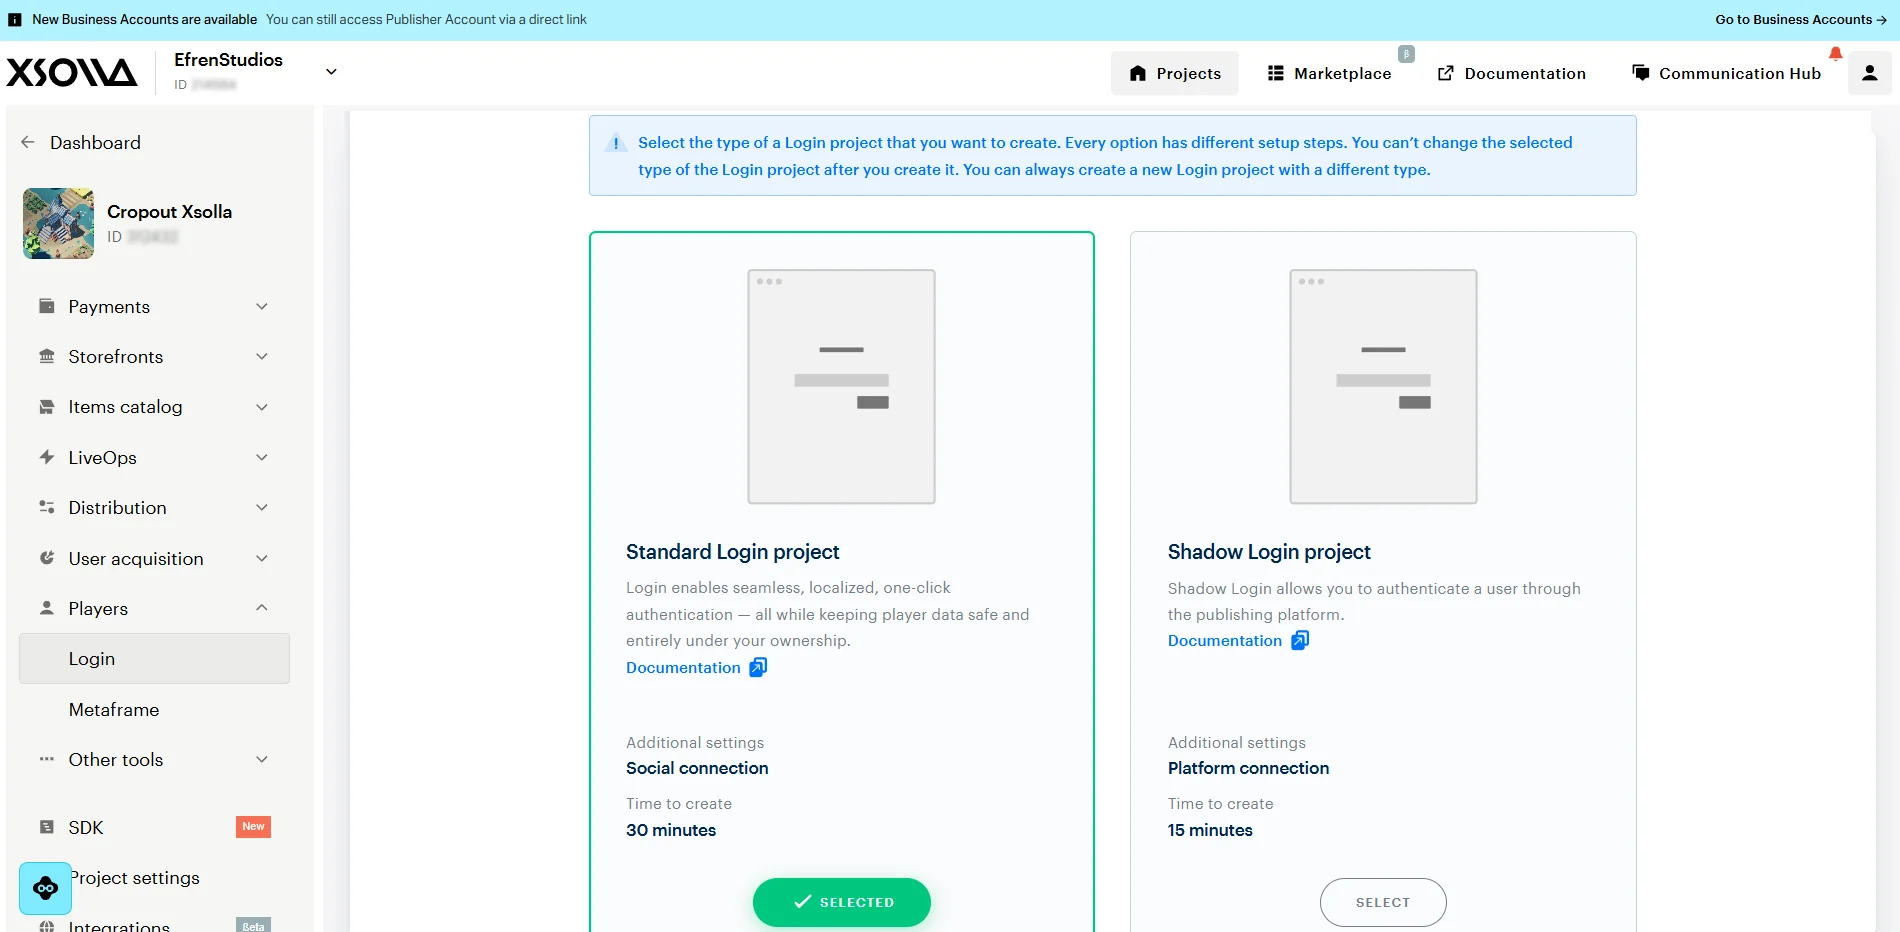
Standard Login project, the right choice for Device ID sign-in.
-
Inside the new Login project, find Login API Integration, off by default.
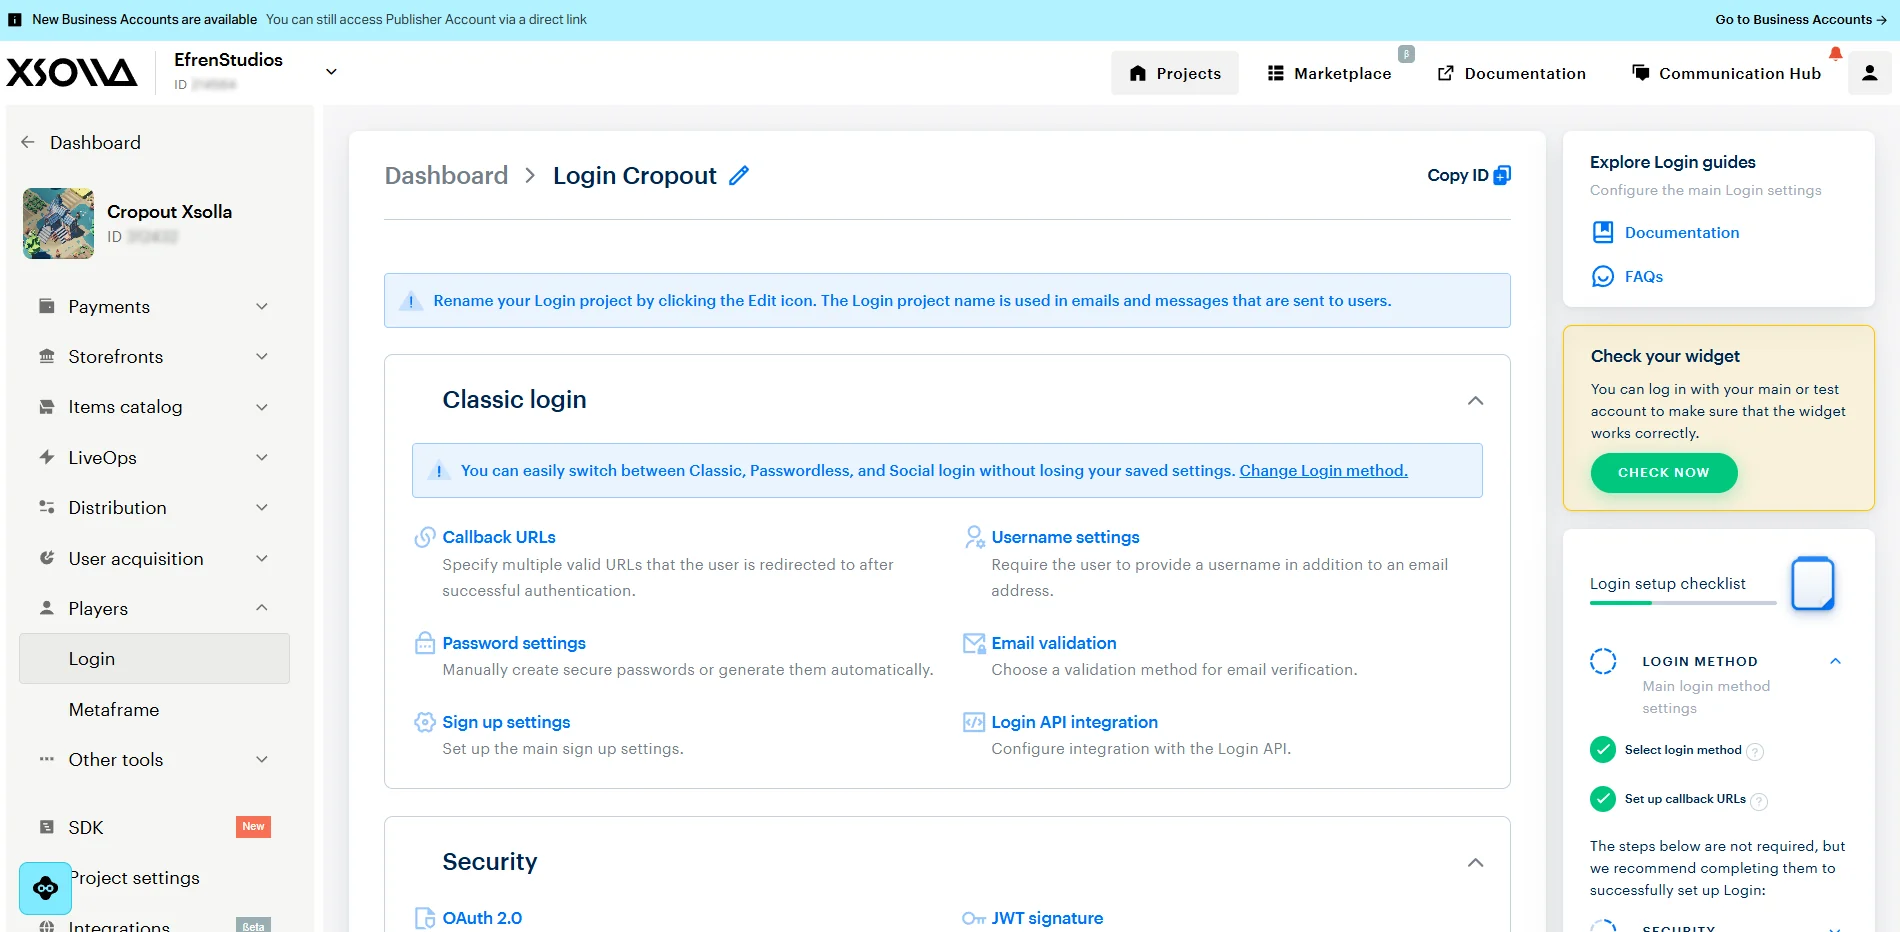
Login API Integration, still off, sitting inside the Login project dashboard.
-
Switch Login with device ID on, and save.
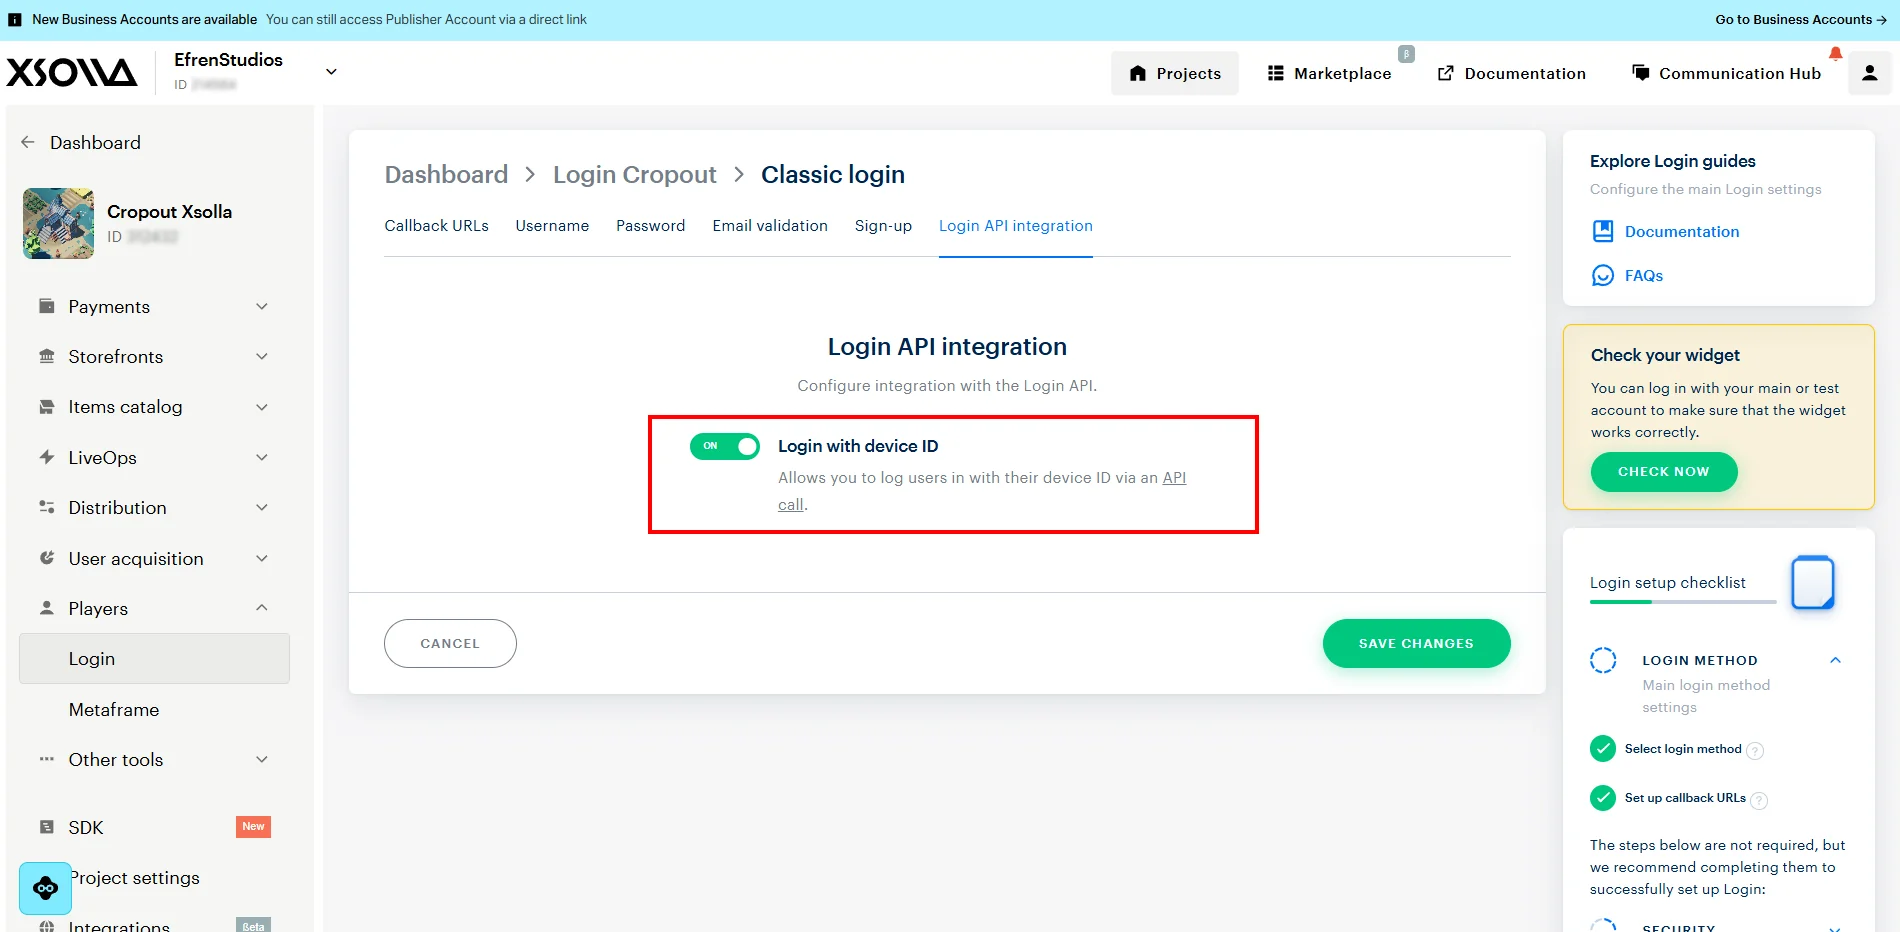
Switched on. This is what unlocks Device ID sign-in.
Easy to miss. Leaving this toggle off means sign-in fails, with nothing obvious pointing back at this setting as the cause. Turning it on also generates your Login ID, a UUID rather than a short number, so it is worth not confusing it with the Project ID from the previous section.
Grab your OAuth Client ID
- Still inside the Login project, open Security, then OAuth 2.0, and note the Client ID shown there.
Not the same as your Login ID. This value is easy to overlook, and it is not the same as the Login ID. The Login ID is a UUID; the OAuth Client ID is a separate numeric identifier that the OAuth2 endpoint expects. Mixing the two up tends to pass casual testing and then fail quietly once real traffic hits the game, which makes it a frustrating thing to debug later if it is not caught here.
Create a virtual item
Finally, something real to sell.
-
In the Items catalog, create a new virtual item. This walkthrough uses Golden Crop, with a clean SKU such as
golden_crop, avoiding spaces or special characters that could cause issues later when referencing it from code.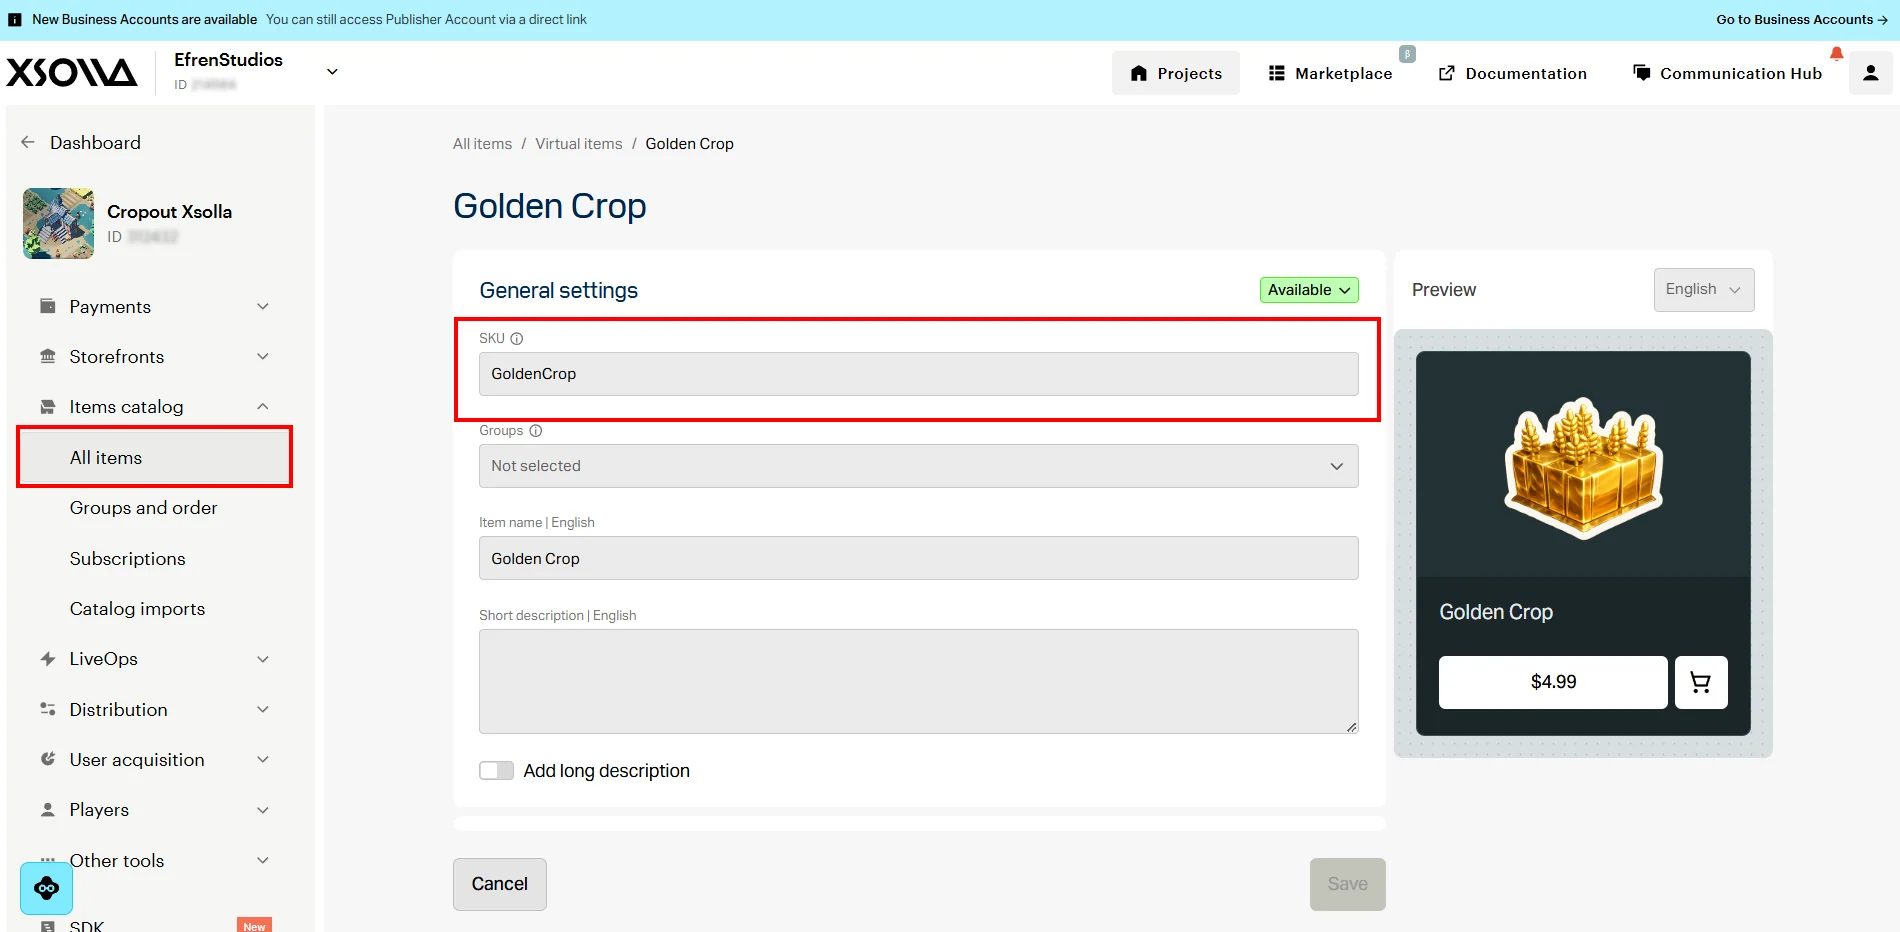
Golden Crop, taking shape in the Items catalog.
-
Set a real price rather than zero. A free item skips the checkout screen entirely, so a zero price would mean never actually seeing Pay Station later in this walkthrough.
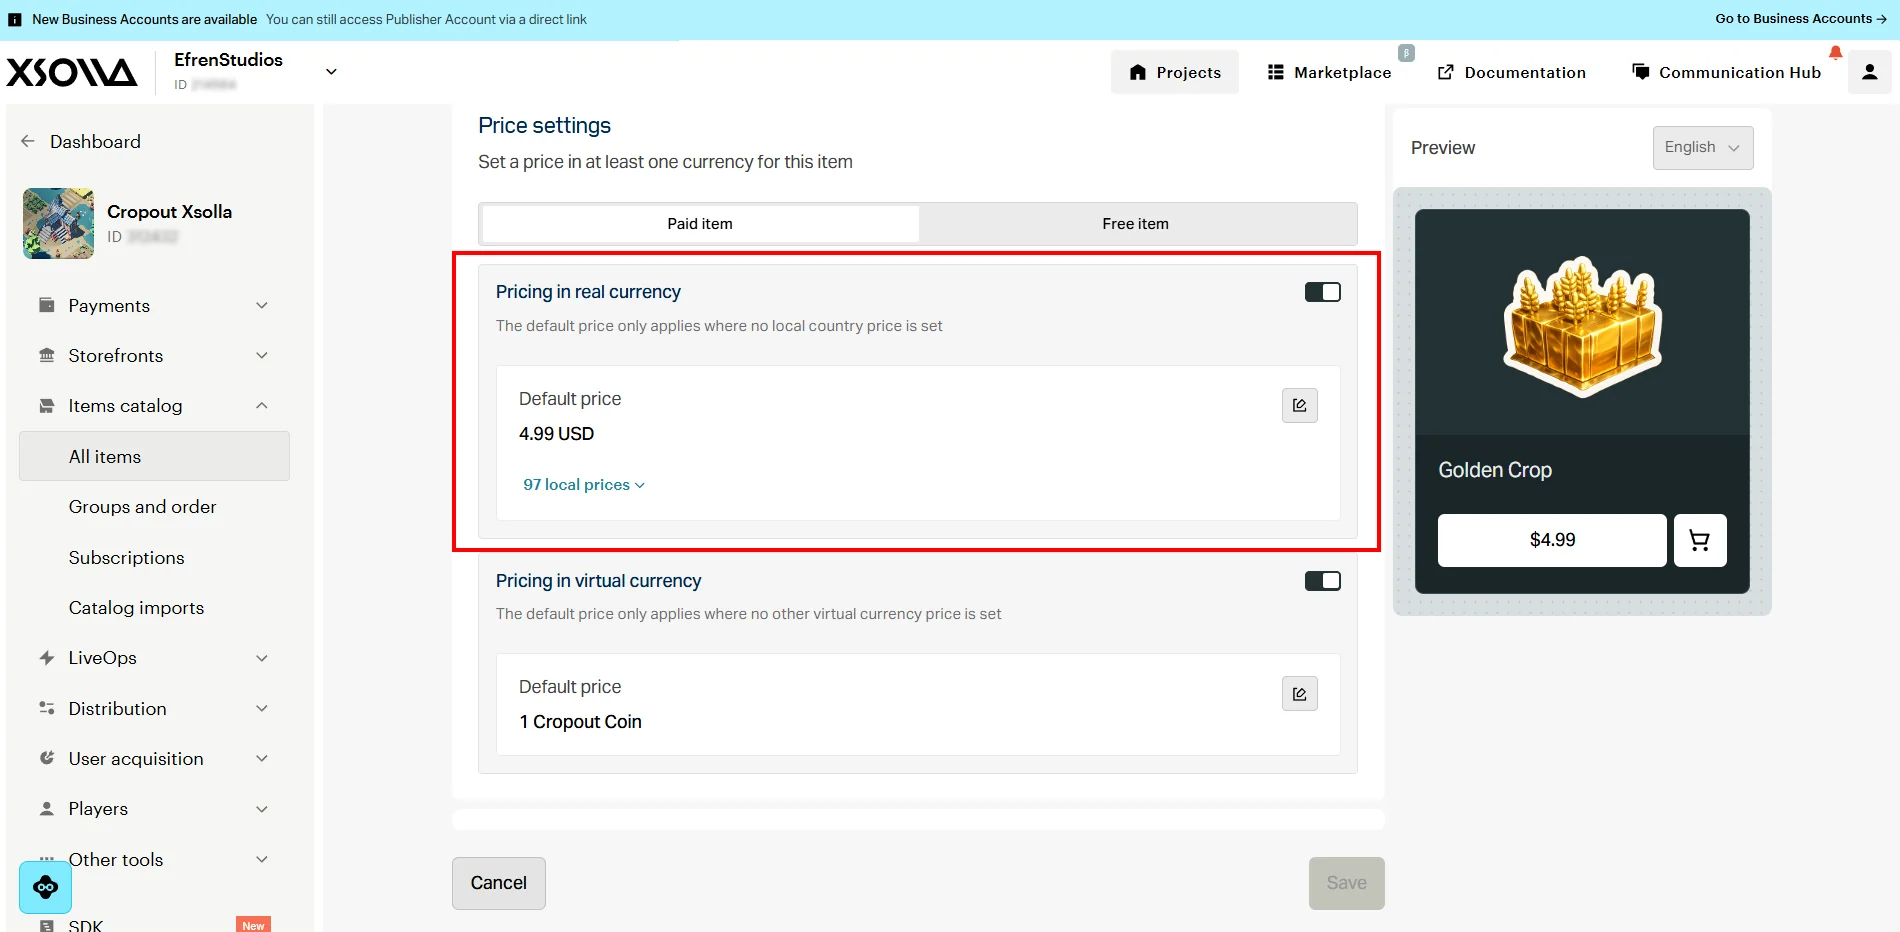
Pricing Golden Crop, with a live preview of the storefront card.
-
Mark the item Available before saving, the setting people forget most often.
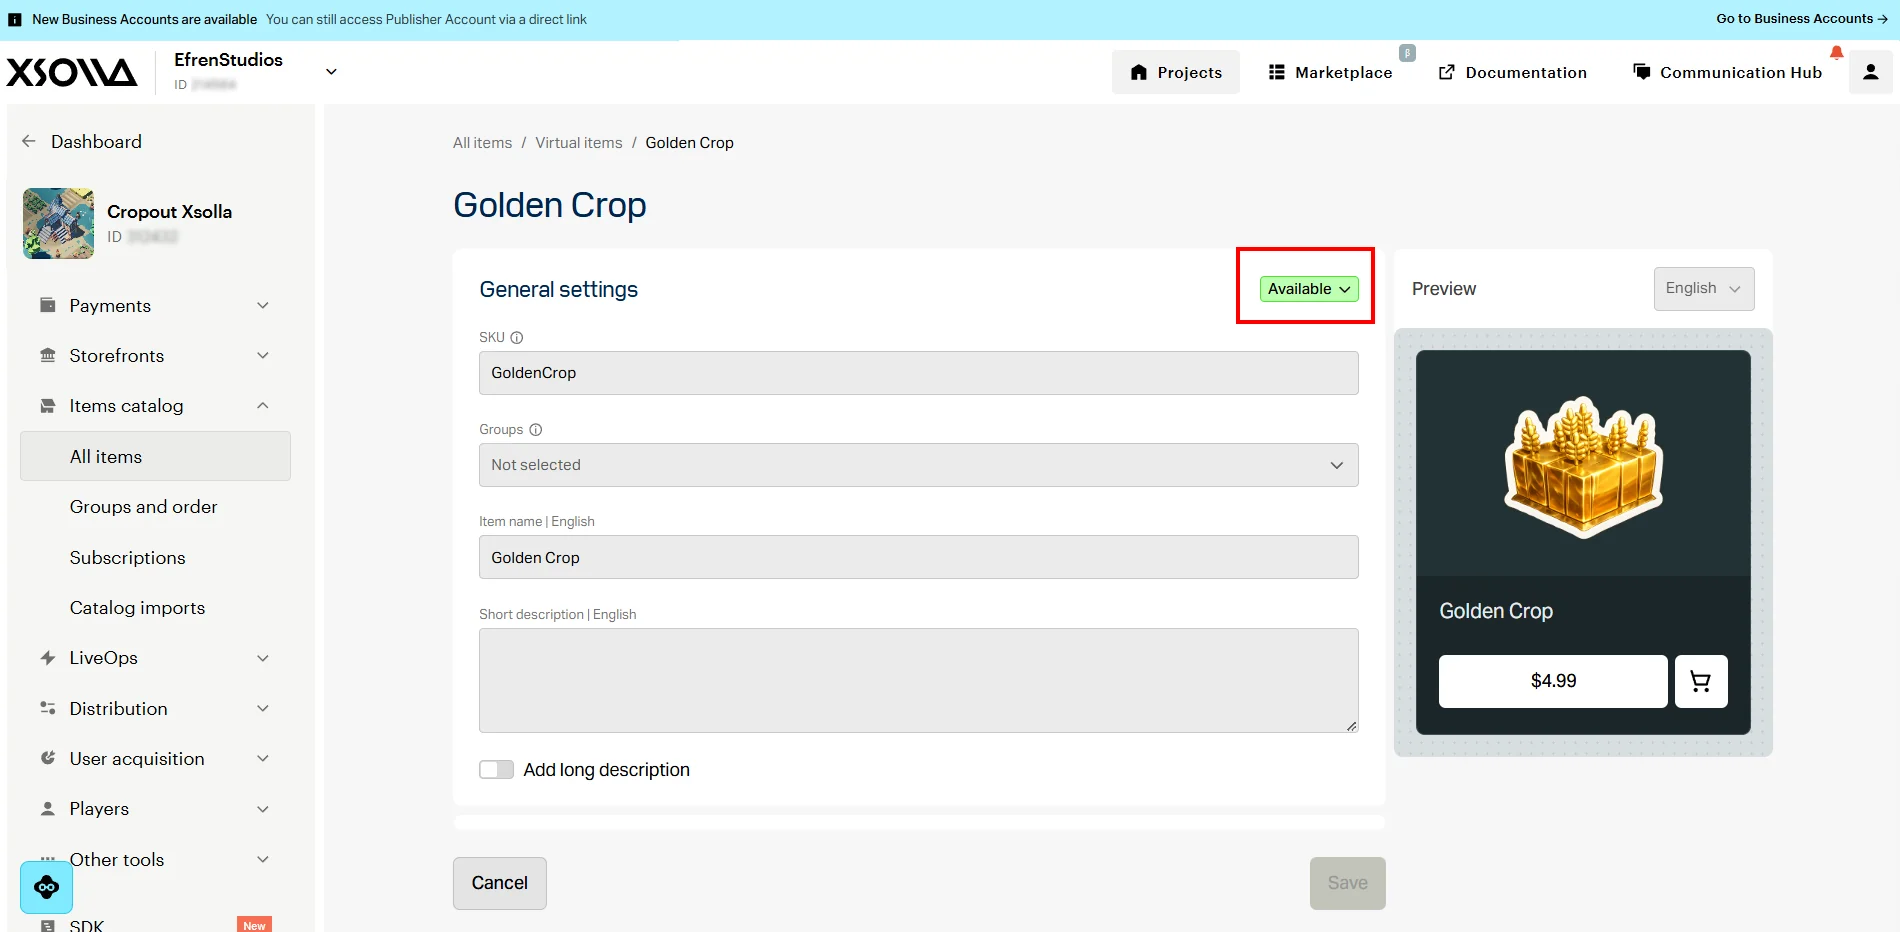
Mark the item available.
🚫 Worth double-checking. Skipping Available means the item simply will not appear later, no matter how correct its SKU is, and there is no error message to point you back here.
With that, the setup guide Publisher Account shows for a new project is essentially done: a project, a Login project with Device ID enabled, and one item ready to sell.
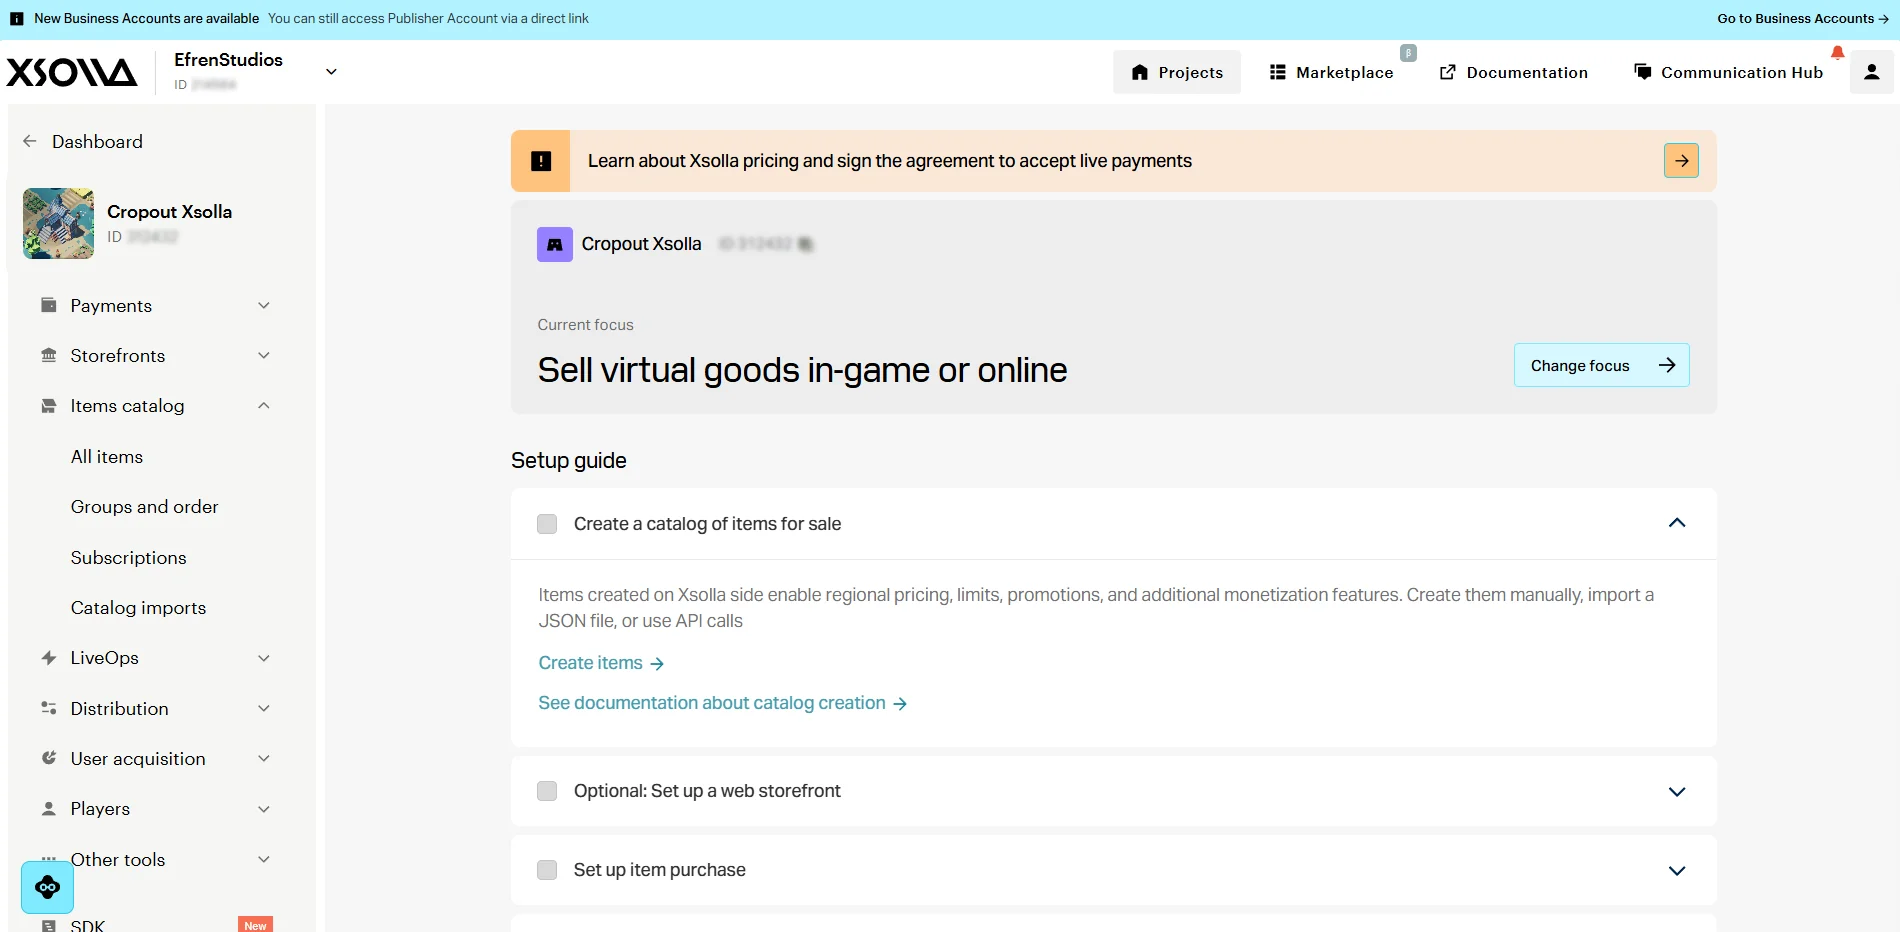
The project's own setup checklist, for reference.
Three IDs collected (Project ID, Login ID, and OAuth Client ID) and one item ready to sell, all done from inside a browser, without opening Unreal yet.
💡 Tip. Publisher Account's screens are updated from time to time, so if a field looks slightly different by the time you follow this yourself, the official Publisher Account documentation will reflect whatever the current layout is.
Install and configure the plugin
With those three IDs ready, it is time to bring the plugin into the project itself.
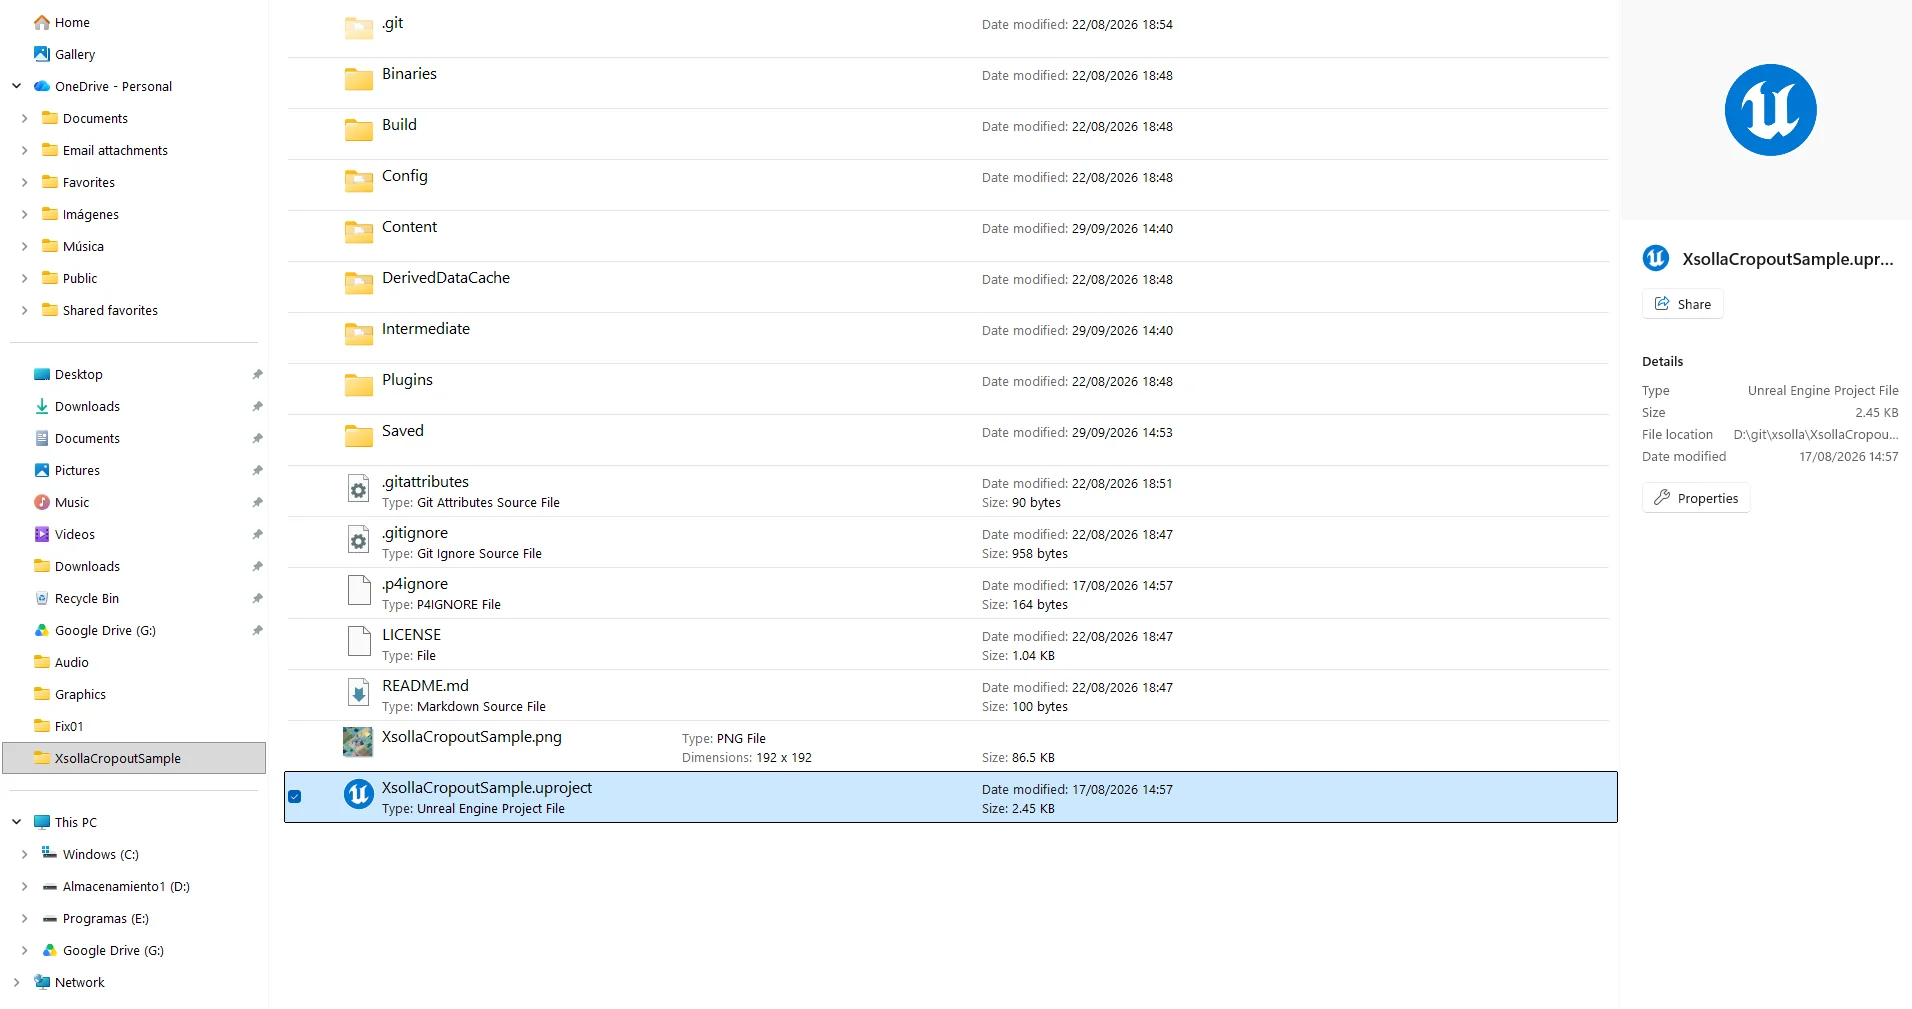
What "ships as source" means. Xsolla SDK 3 ships as source code rather than a compiled binary. There is no ready-made plugin file to drop in. Instead, the project's own build compiles the plugin the first time it opens, which is why the Visual Studio or clang requirement from earlier matters here specifically, and nowhere else in the project.
-
Inside the project's
Pluginsfolder, create a new folder for the plugin. This walkthrough usesPlugins/XsollaSDK. -
Download a source-only release from the SDK's GitHub releases page, and extract it into that folder. The repository is available to pilot participants; join the Unreal Engine pilot to get access.
Unreal SDK GitHub Page
-
Add the plugin to the project's
.uprojectfile. This is the one line that tells Unreal the plugin needs to load. -
Open the project. Unreal prompts you to compile the plugin the first time; accept, and let it finish.
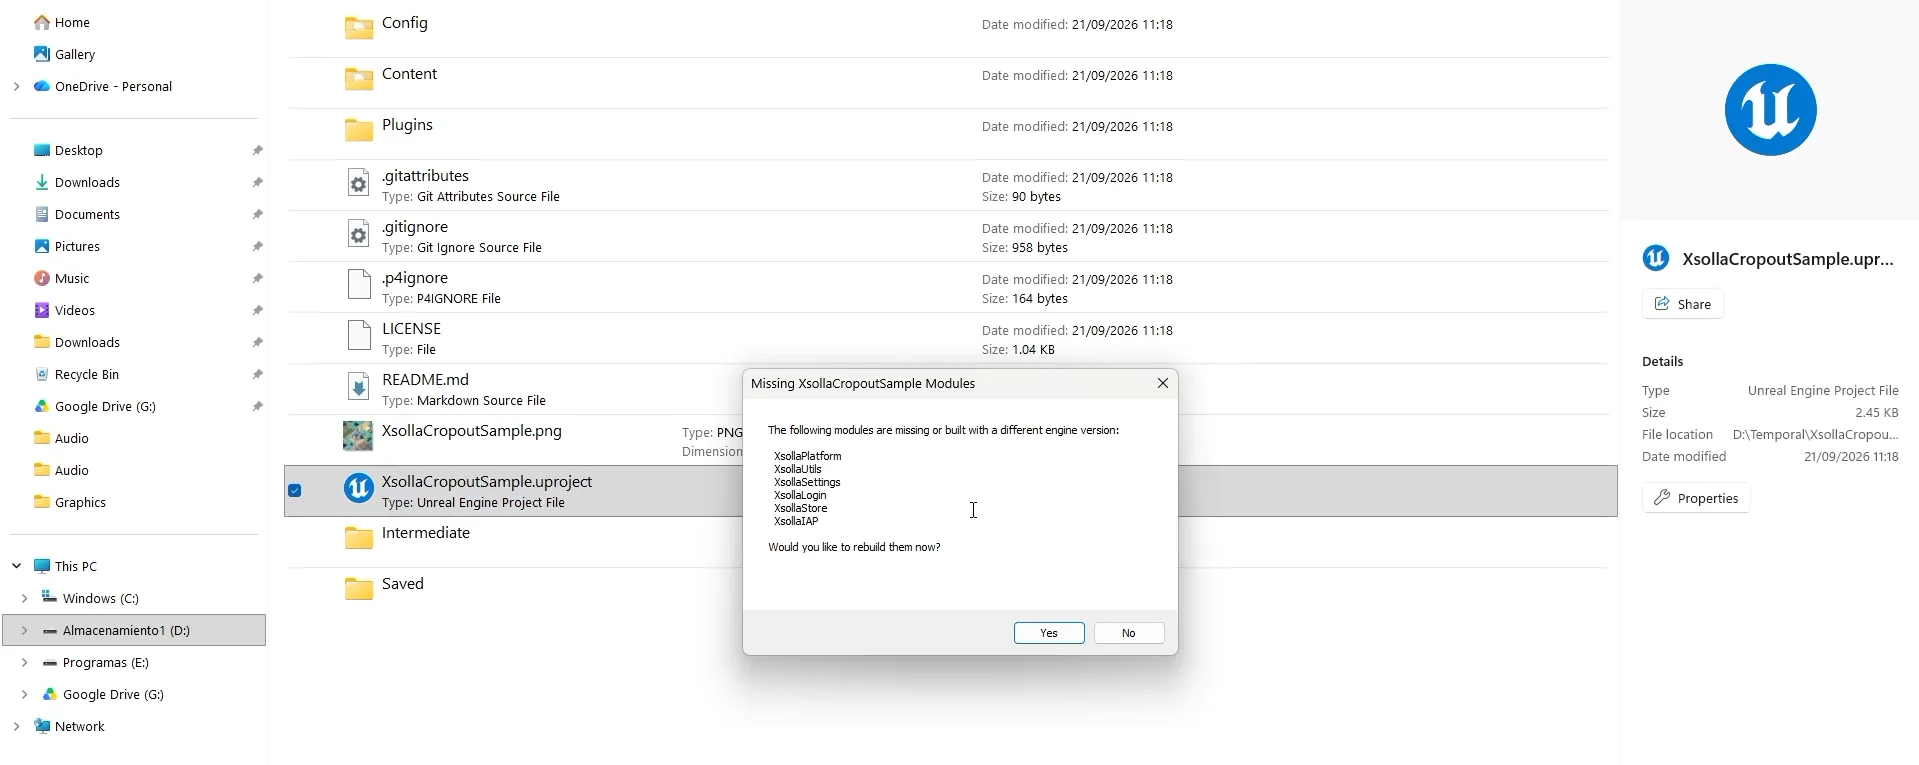
-
Open Edit, then Plugins, and confirm XsollaSDK shows up there as Enabled.
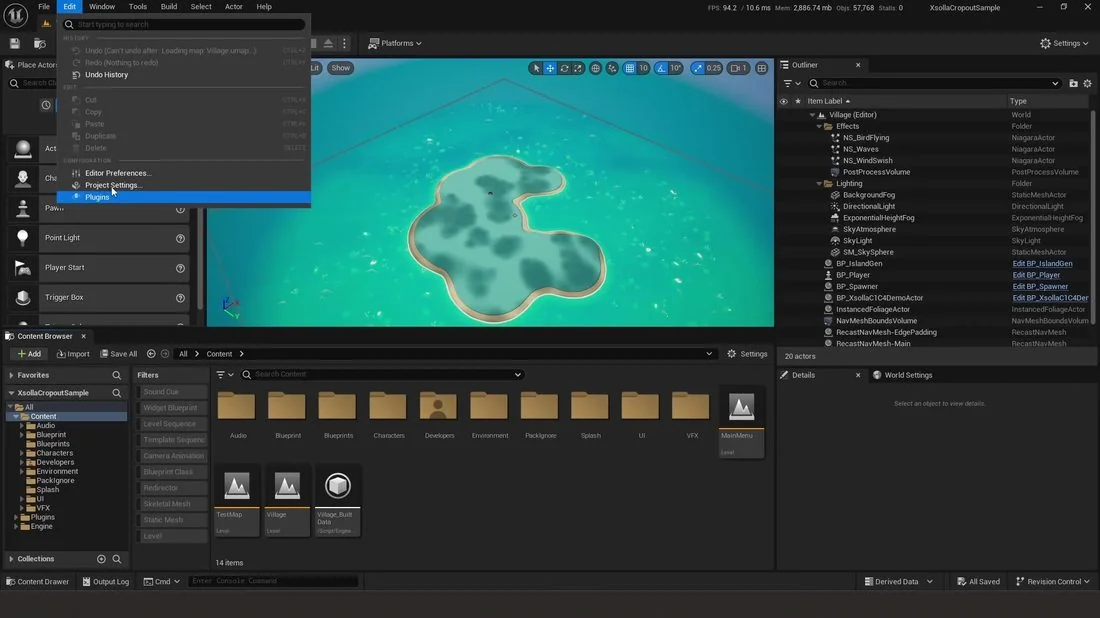
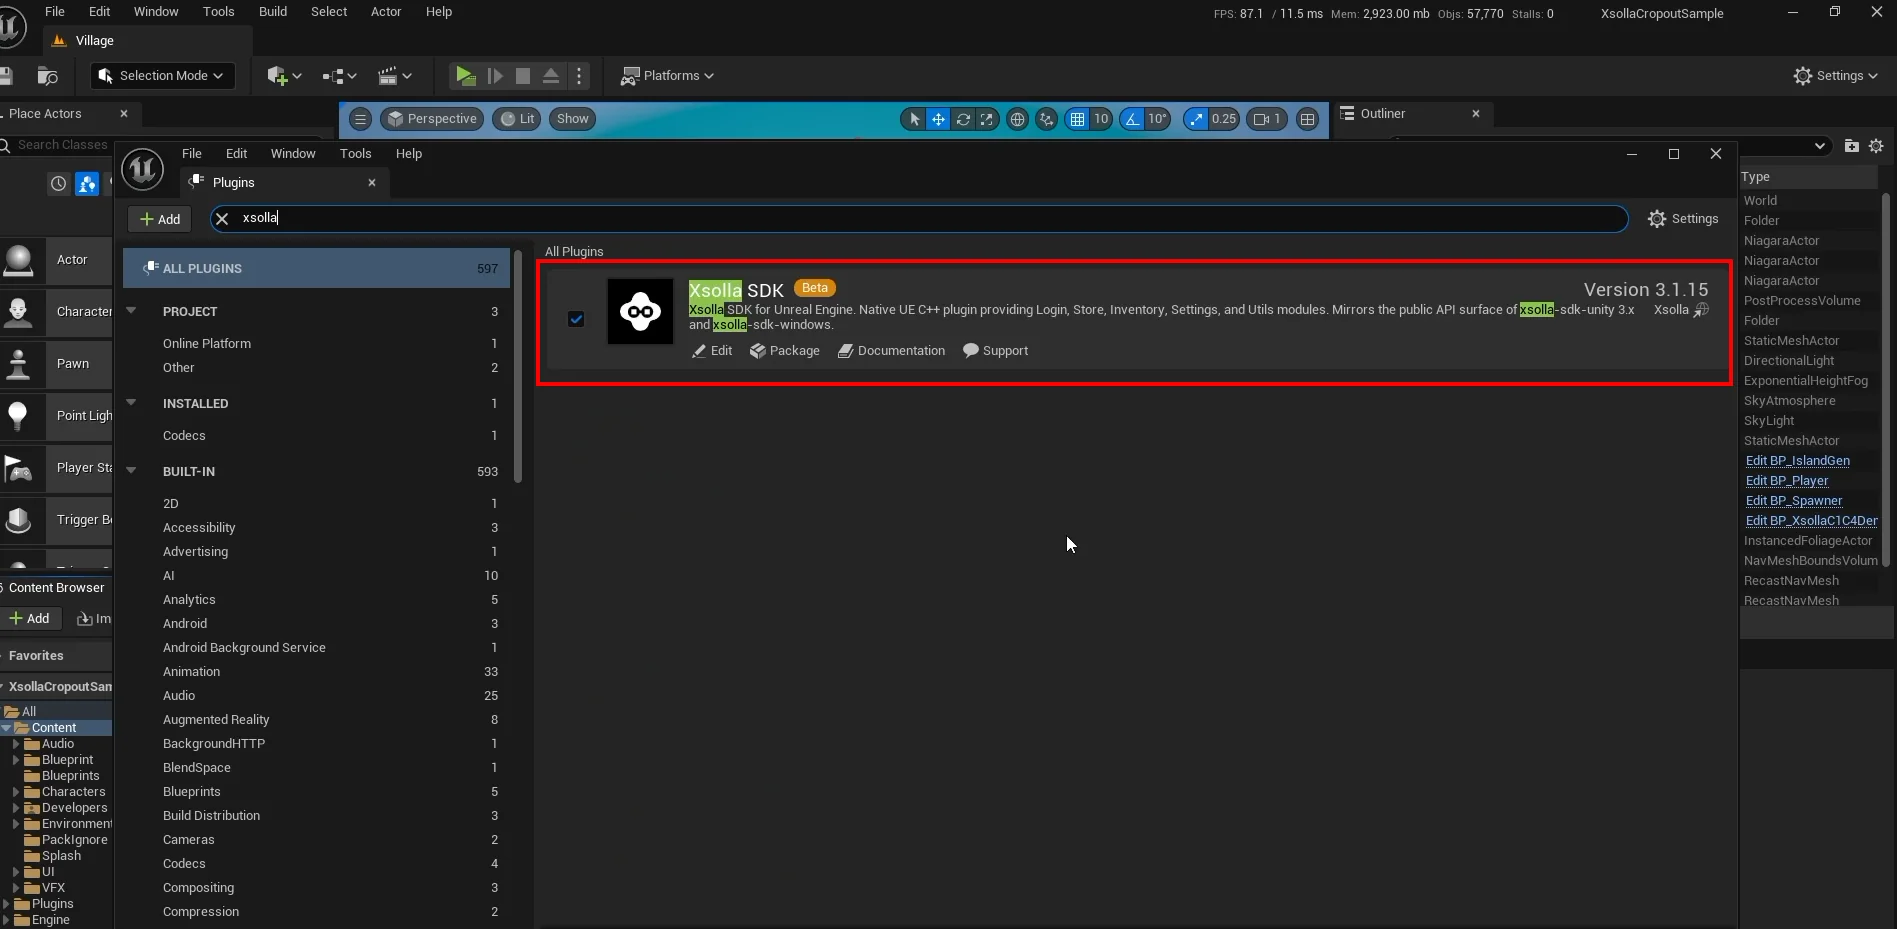
Next, the credentials. Open DefaultGame.ini, found in the project's Config folder, and add a section called [/Script/XsollaSettings.XsollaSDKSettings]. The same fields are also available inside the editor itself, under Project Settings, then Plugins, then Xsolla SDK, which writes to the same file automatically. Either way, this is where the three IDs from the Publisher Account go: ProjectId, LoginId, and OauthClientId, alongside an Environment field set to Sandbox, which routes every call to Xsolla's sandbox endpoints instead of production, so testing never risks spending real money.
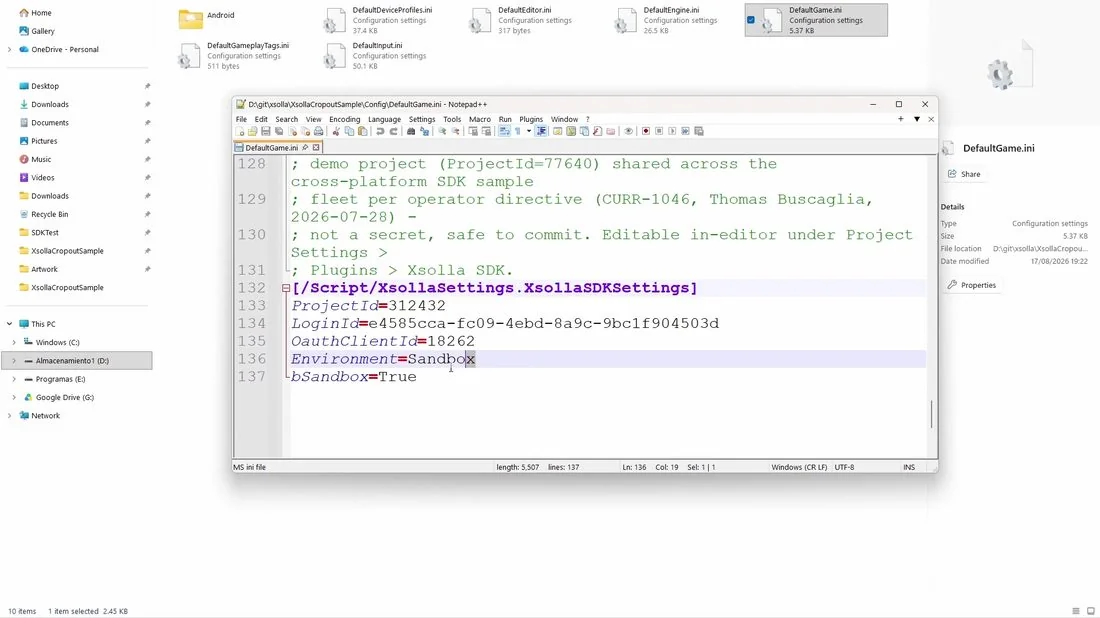
DefaultGame.ini, where ProjectId, LoginId, OauthClientId, and Environment live.
[/Script/XsollaSettings.XsollaSDKSettings]
ProjectId=<your Project ID>
LoginId=<your Login project UUID>
OauthClientId=<your OAuth2 client_id, an integer>
Environment=Sandbox
A bSandbox line may also appear. Once the editor writes to this file, you may notice a
bSandboxline sitting in the same block. That field is a deprecated leftover, kept only so older code that reads it directly still works, and Unreal keeps it in sync withEnvironmentautomatically. There is no need to edit it by hand.Environmentis the setting that actually controls which endpoints the SDK talks to.
Before you ship. Remember to switch
EnvironmenttoProductionbefore release. LeavingSandboxset in a live build means real purchases will never actually process.
How this demo is built
Before working through the four steps themselves, it is worth being upfront about how this particular demo is put together, and just as importantly, about what that structure is and is not.
Every Xsolla call in this demo lives inside a single Actor Component, all of it kicked off from one Event Begin Play. That is not because it is the right way to build this, or even a particularly good one; it is simply the easiest structure for watching all four steps happen in one place while learning what each one does. Nothing about the SDK cares where these calls come from. A real project just as often spreads them across a widget, a Game Mode, a subsystem of its own, or wherever else actually fits how that project is organized. Read what follows as one way to see the whole cycle work, not as a pattern to copy into production.
The one piece worth carrying forward regardless of structure is how Login and Store are exposed: both are Game Instance Subsystems.

Unreal creates exactly one instance of each automatically the moment the game starts, and keeps that instance alive for the entire session, so there is never a need to spawn one manually. Wherever a project ends up calling these from, the subsystem itself is always reached the same way: call Get Game Instance Subsystem, and pick the class.
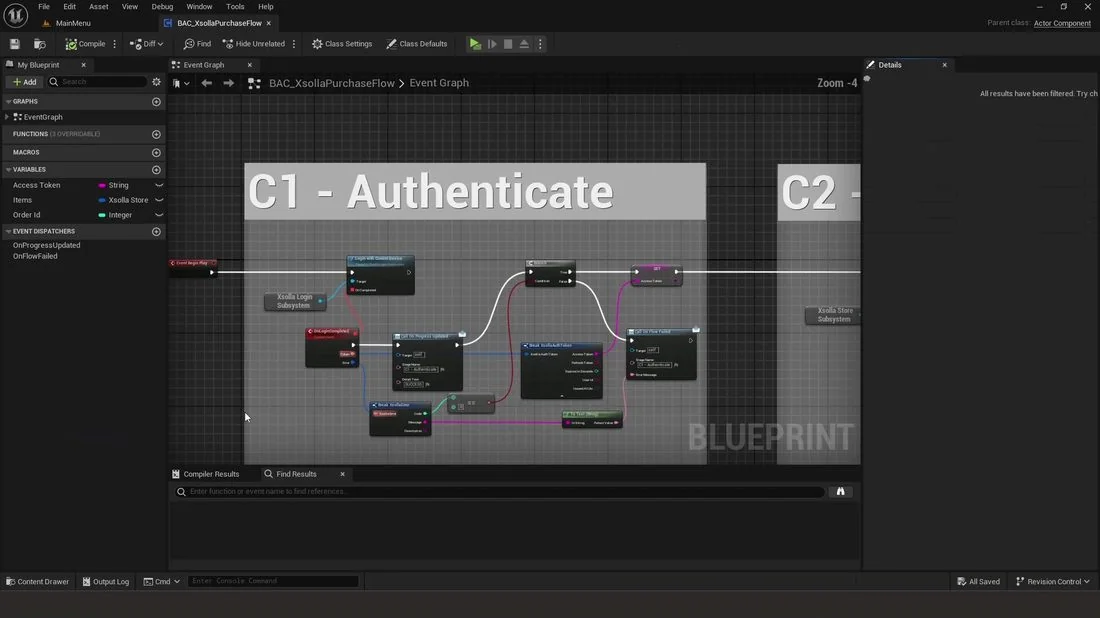
BAC_XsollaPurchaseFlow, one Actor Component walking through all four steps, chosen here for simplicity rather than as a recommended structure.
This particular Actor Component happens to resolve both subsystems once, track the access token, the loaded catalog items, and the current order ID, and report progress through two events: On Progress Updated and On Flow Failed. Any HUD or UI listening to those events can react to what is happening without needing to know anything about how Xsolla works underneath, regardless of what ends up calling them in your own project.
💡 Tip. Subsystems are a general Unreal Engine concept, worth reading up on beyond what is covered here. The engine's own documentation goes deeper into the pattern, including other ways to structure access to them across a project.
STEP 1 OF 4
Authenticate
On Event Begin Play, get the Login subsystem, and call Login With Current Device: the Device ID path described earlier, with no form and no typed credentials, since the player is simply signed in. Placing a breakpoint on this call marks the exact point where control leaves the Blueprint and hands off to Xsolla. Everything downstream then waits for a genuine round trip to a server, rather than something that resolves instantly.
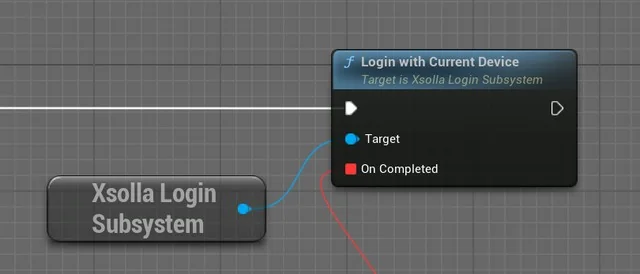
Login With Current Device, then OnLoginCompleted, then the access token saved for every step after this one.
Login With Current Device and Login With Device ID. Login With Current Device is a convenience node. It reads the current device's identity for you and passes it to Login With Device ID, the call it wraps. That makes it a good fit for a demo like this one. In a real project, calling Login With Device ID directly lets your own code decide which device information gets sent.
On Login Completed fires once that round trip finishes, carrying both a token and an error. On success, the token is broken apart, the access token is saved to a variable (every step from here on needs it), and success is reported through On Progress Updated. On failure, execution routes to On Flow Failed instead, carrying the error message along with it.
Running the game at this point, with only this much wired up, would succeed and then simply stop, since there is no catalog loaded yet. That is expected.
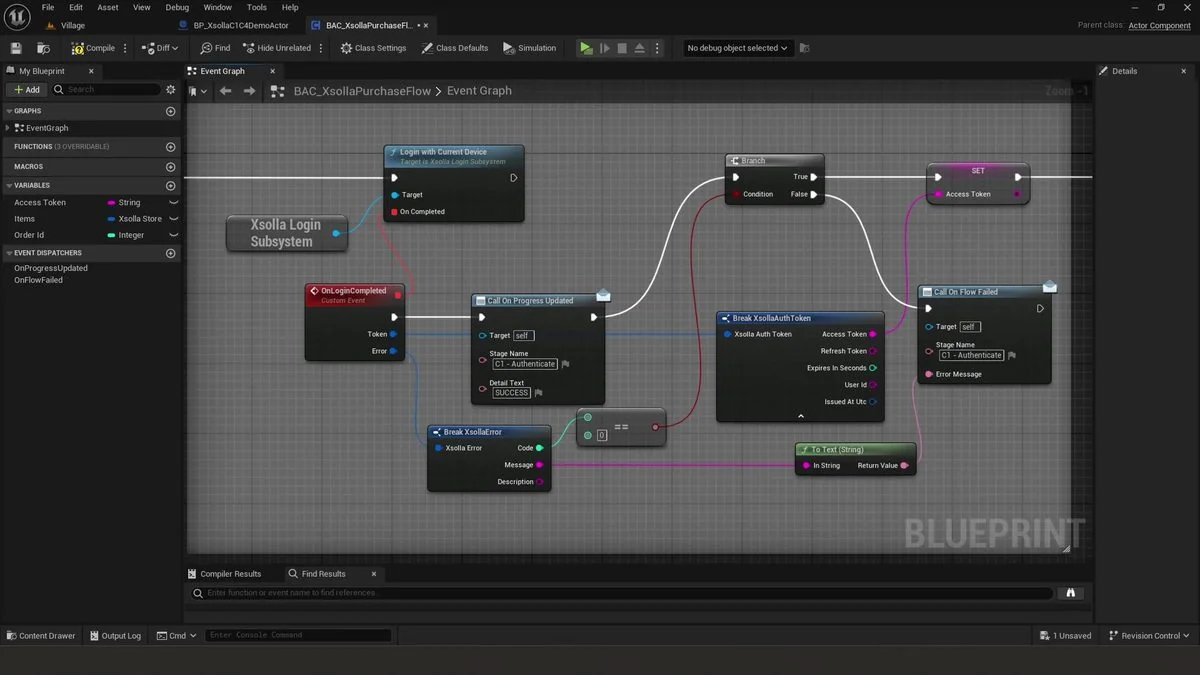
Login With Current Device, then OnLoginCompleted, then the access token saved for every step after this one.
C++ equivalent
This is the first C++ block in the guide, so a word on how to read it: what follows is not a separate implementation to choose between, it is the authentication step described above, written in code instead of nodes, for anyone who would rather follow along that way. There is more than one reasonable way to structure this in a real project; what matters is resolving the Login Subsystem and calling LoginWithCurrentDevice, much like the Get Login Subsystem node does. This particular version reaches the subsystem through GetWorld() rather than a direct GetGameInstance() call, since the code lives inside an Actor Component rather than an Actor itself, and only Actors expose that shortcut directly.
UXsollaLoginSubsystem* LoginSubsystem =
    GetWorld()->GetGameInstance()->GetSubsystem<UXsollaLoginSubsystem>();

FOnLoginCompleted OnCompleted;
OnCompleted.BindDynamic(this, &UBAC_XsollaPurchaseFlow::OnLoginCompleted);
LoginSubsystem->LoginWithCurrentDevice(OnCompleted);
OnCompleted here is a dynamic delegate, Unreal's way of providing a callback for an operation that finishes later, in a form that can also be wired up from Blueprints. Binding it with BindDynamic, instead of looking the function up by name at runtime, lets the compiler check that OnLoginCompleted actually matches the delegate's expected signature, catching a mismatch immediately rather than leaving it to fail later.
Inside OnLoginCompleted, an error check comes first. If nothing went wrong, the access token gets saved for use in every step that follows.
void UBAC_XsollaPurchaseFlow::OnLoginCompleted(const FXsollaAuthToken& Token, const FXsollaError& Error)
{
    if (Error.IsError())
    {
        return;
    }
    AccessToken = Token.AccessToken;
}
STEP 2 OF 4
Load Catalog
For a setup this simple, one button pointed at one item already known in advance, loading the whole catalog is not strictly necessary; the SKU could just be referenced directly. It is included here anyway because it is part of the pattern, and worth seeing work correctly before relying on it elsewhere.
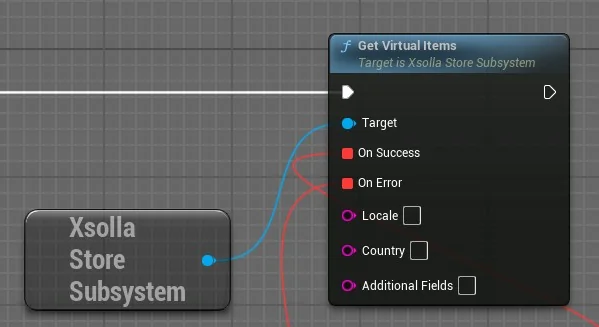
Get Virtual Items
Get the Store subsystem, and call Get Virtual Items. The same reasoning from Step 1 applies here too: this is another network boundary, with the Blueprint handing off to Xsolla and waiting for a response. Unlike Step 1, this call does not need an access token, since the sandbox catalog can be read anonymously, though a production project might require one depending on how it is configured.
On success, the returned list is stored in an Items variable. This is also where the Available toggle from earlier actually matters: forgetting to mark an item available means this list comes back empty, with no other obvious symptom, so it is worth checking first if a catalog ever looks unexpectedly bare.
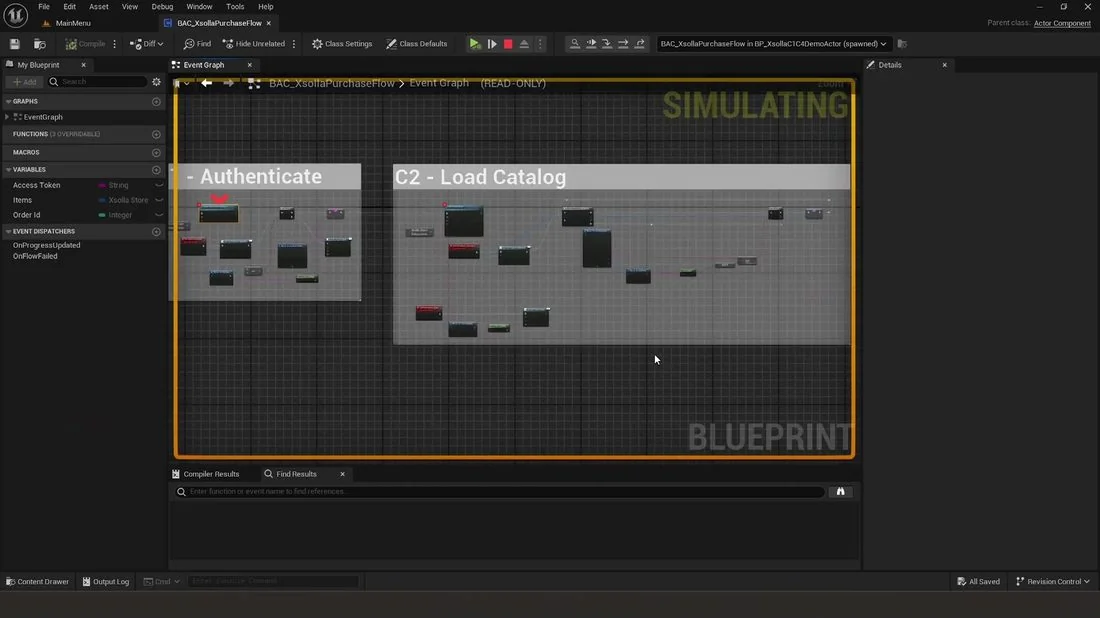
Breakpoints landing across Authenticate and Load Catalog, each one a real round trip to Xsolla.
C++ equivalent
Worth repeating here too: this is one way to write the step in C++, not something you need to match exactly. It resolves the Store Subsystem through the Game Instance, much like the Get Store Subsystem node does above, and calls GetVirtualItems to pull the catalog down. The function that ends up handling the result is called OnCatalogLoaded in this version, though the name itself does not matter here, what matters is the call itself.
UXsollaStoreSubsystem* StoreSubsystem =
    GetWorld()->GetGameInstance()->GetSubsystem<UXsollaStoreSubsystem>();

FOnStoreItemsUpdate OnSuccess;
OnSuccess.BindDynamic(this, &UBAC_XsollaPurchaseFlow::OnCatalogLoaded);
FOnStoreError OnError;
OnError.BindDynamic(this, &UBAC_XsollaPurchaseFlow::OnStoreError);

StoreSubsystem->GetVirtualItems(OnSuccess, OnError);
Once the call finishes, OnCatalogLoaded runs with the full list of items, and the only thing it needs to do is save that list into CachedItems, ready to search through the moment the player wants to buy something.
void UBAC_XsollaPurchaseFlow::OnCatalogLoaded(const FXsollaStoreItems& Items)
{
    CachedItems = Items;
}
STEP 3 OF 4
Purchase Product
This is the step where the player actually does something. The Buy Food button is wired to a custom event called Purchase Product, and pressing it kicks off everything described below.
Golden Crop is pulled out of the catalog first, and both its SKU and its free flag are checked before anything else happens. That check matters because a free item still returns a perfectly valid response, just with an empty payment token, so skipping it could mean trying to open a checkout screen for something that was never going to produce one.
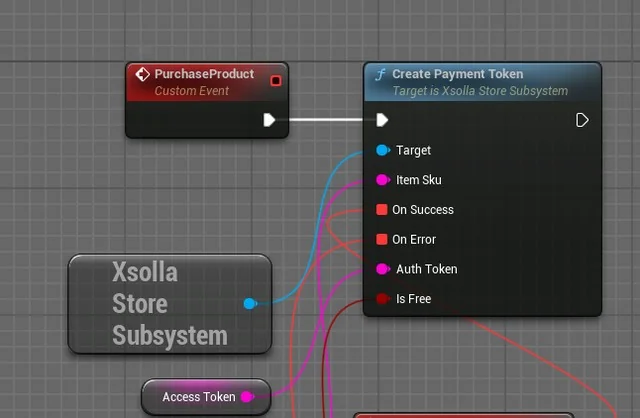
Create Payment Token.
Golden Crop is not free in this walkthrough, so Create Payment Token is called next, using the SKU and the access token, which creates the actual order on Xsolla's side. A breakpoint here marks that handoff.
C++ equivalent: Create Payment Token
Same as before: this C++ is one way to write it, not the only correct way. It searches CachedItems for the entry whose SKU matches Golden Crop, and checks bIsFree, mirroring what the Blueprint checks first, before doing anything else. If the item isn't free, CreatePaymentToken gets called on the Store Subsystem with the SKU and the access token, and OnPaymentTokenReady picks up the result.
const FXsollaStoreItem* GoldenCrop = CachedItems.Items.FindByPredicate(
    [](const FXsollaStoreItem& Item) { return Item.Sku == TEXT("golden_crop"); });

if (!GoldenCrop || GoldenCrop->bIsFree)
{
    return;
}

UXsollaStoreSubsystem* StoreSubsystem =
    GetWorld()->GetGameInstance()->GetSubsystem<UXsollaStoreSubsystem>();

FOnPaymentTokenSuccess OnSuccess;
OnSuccess.BindDynamic(this, &UBAC_XsollaPurchaseFlow::OnPaymentTokenReady);
FOnStoreError OnError;
OnError.BindDynamic(this, &UBAC_XsollaPurchaseFlow::OnStoreError);

StoreSubsystem->CreatePaymentToken(GoldenCrop->Sku, OnSuccess, OnError, AccessToken, GoldenCrop->bIsFree);
If you do sell a free item elsewhere in your game. Golden Crop is deliberately priced for this walkthrough, so the early return above only ever runs if the SKU lookup itself fails. A genuinely free item in your own catalog is still worth selling through this same flow, just handled slightly further downstream:
CreatePaymentTokenreturns a valid order with an empty payment token for a free item, and the correct handling is to skip Open Purchase UI entirely and callAwaitOrderFinalizationdirectly, since there is no Pay Station session to open in that case.
On success, a payment token and an order ID come back together. The order ID is held onto for Step 4, and the token is passed into Open Purchase UI, the line that actually opens Pay Station.
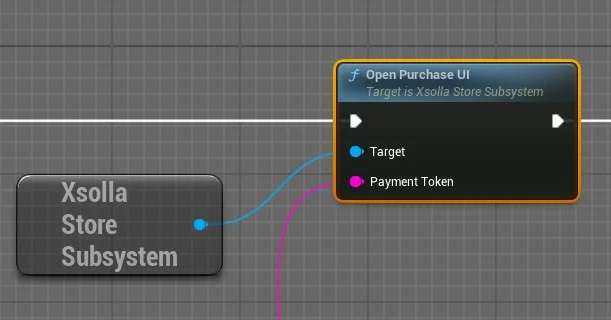
Open Purchase UI
C++ equivalent: the payment token callback and Open Purchase UI
Once more, since it is easy to forget by this point in a long guide: what follows is an example, not a rule. This callback picks up once CreatePaymentToken succeeds, and does what the Blueprint does right after: it holds onto the order ID for Step 4, then passes the token into OpenPurchaseUI to actually open Pay Station.
void UBAC_XsollaPurchaseFlow::OnPaymentTokenReady(const FXsollaPaymentToken& Token)
{
    CurrentOrderId = Token.OrderId;

    UXsollaStoreSubsystem* StoreSubsystem =
        GetWorld()->GetGameInstance()->GetSubsystem<UXsollaStoreSubsystem>();
    StoreSubsystem->OpenPurchaseUI(Token.Token);
}
On desktop, this opens Pay Station in the system's default browser, the same approach other platforms fall back to whenever an external browser is the available option. This call does not freeze the game; only a breakpoint does that. Left running on its own, the game continues normally while the player is on the checkout page, with Unreal simply waiting for a signal to come back. Golden Crop, at its sandbox price, can be paid for with a test card, since nothing in Sandbox ever touches a real payment method.
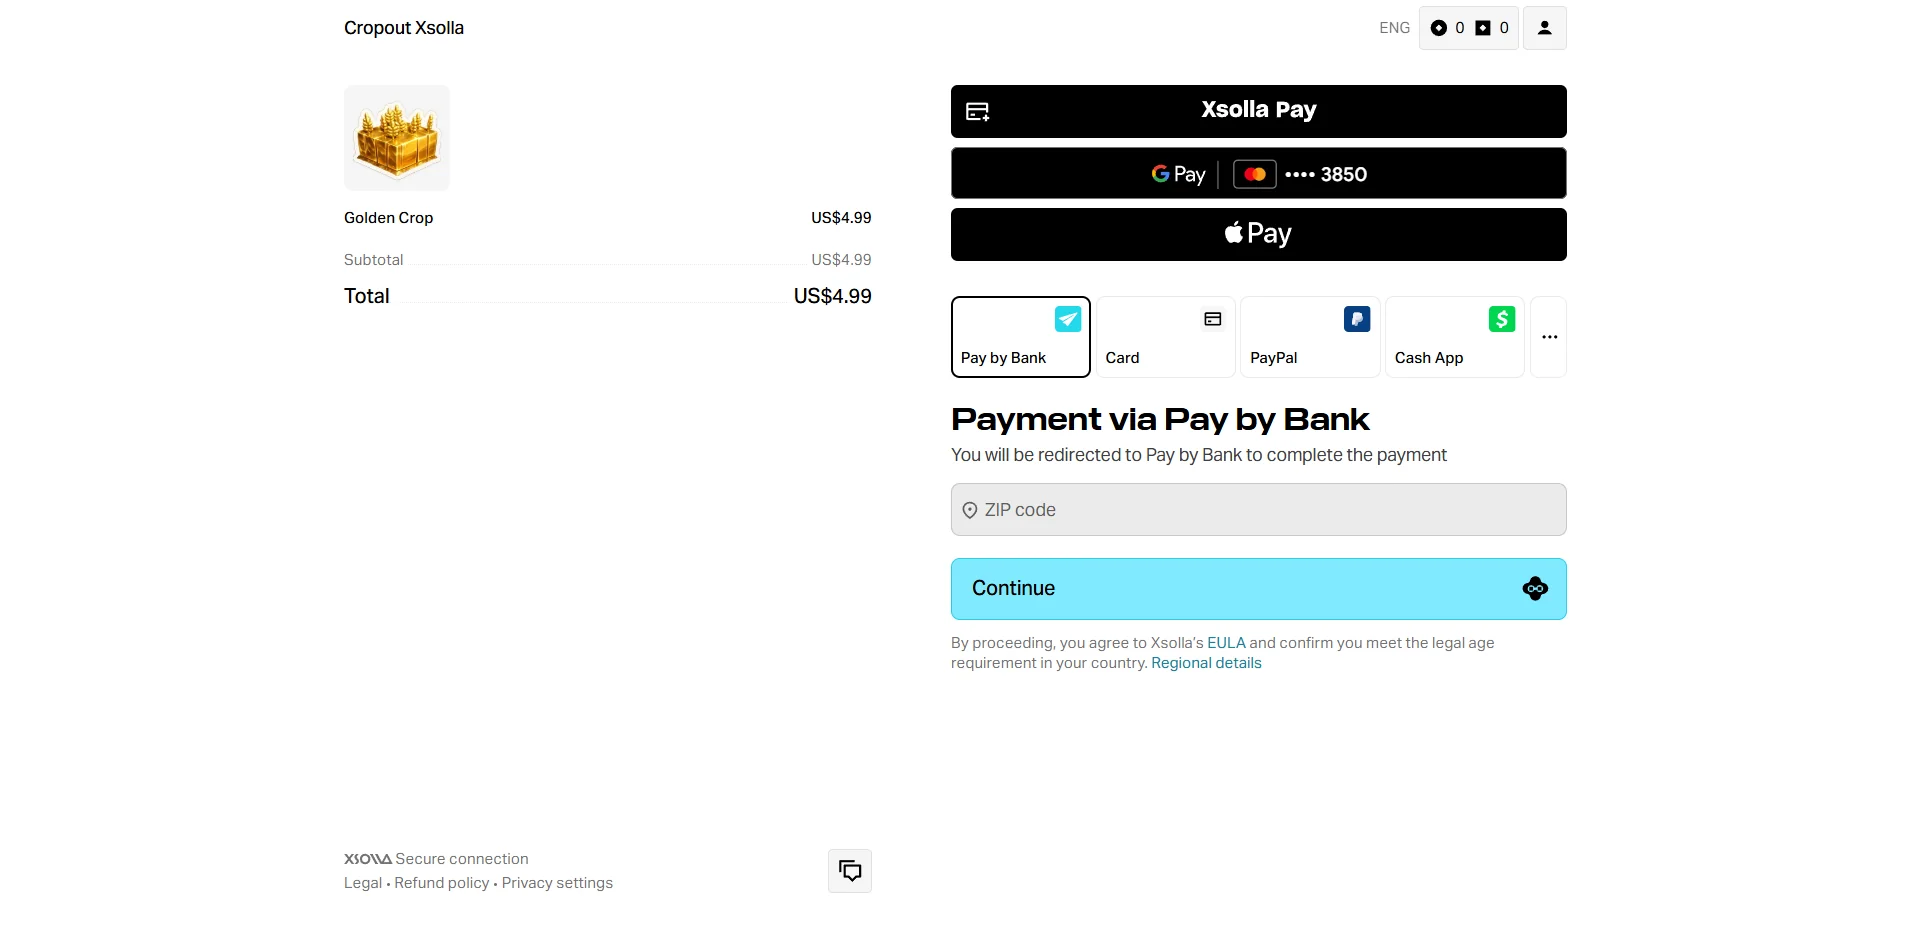
STEP 4 OF 4
Finalize Purchase
This last step involves a decision worth explaining, since it is not obvious from the Blueprint alone. Unreal's standalone build has no way to detect a browser window closing, so there is no close event to simply wait for. Instead, the game asks.
Await Order Finalization is called with the access token and the order ID, with On Order Finalized bound before that call goes out. Underneath, this checks the order's status roughly every two seconds until it reaches a final state, paid, done, or cancelled, then fires once.
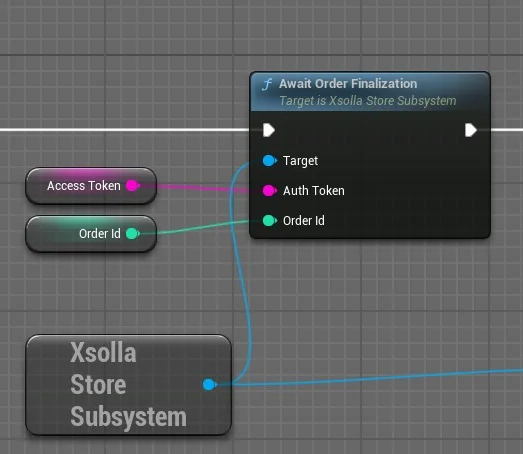
Await Order Finalization
Polling and webhooks, in short. Two terms worth defining before going further, since they come up here without much introduction. Polling means the game itself asks Xsolla, again and again on a timer, whether an order is finished yet. A webhook works the other way around: a server you control sits and waits, and Xsolla sends it a message the moment an order finishes, with nothing to ask for. Explaining either concept in real depth is outside what this guide sets out to do; Xsolla's own documentation on webhooks and the Events API is the better place for that.
💡 Polling versus webhooks, here specifically. This polling happens automatically and needs no extra configuration, which is what makes Await Order Finalization convenient for a first integration like this one. If a project already has its own backend, that backend can observe order completion a different way instead, either through real Xsolla webhooks or through the Events API, configured separately through a setting called
WebhooksMode. That setting lives inDefaultEngine.inirather thanDefaultGame.ini, since it belongs to the project's server-side deployment choices rather than its Publisher Account identity, and it is worth reaching for once a backend actually exists to listen. Until then, polling is the simpler and entirely valid place to be.
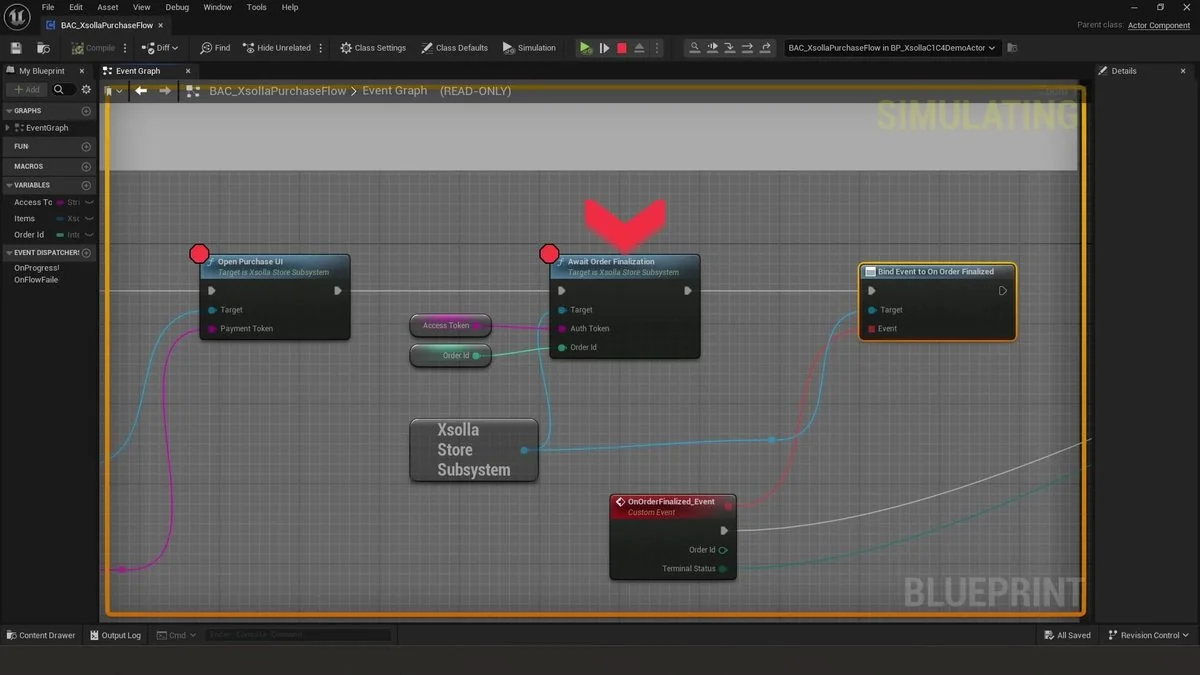
The breakpoint hitting on Await Order Finalization, waiting for a final order status
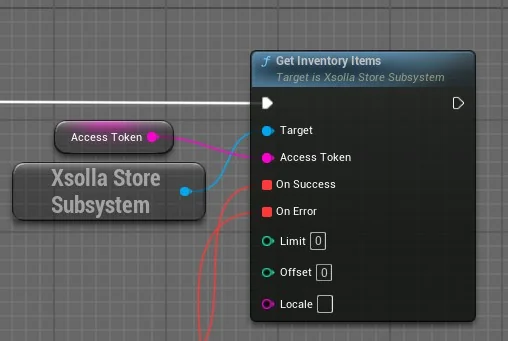
Once a final status comes back, Get Inventory Items confirms the item shows up as owned: real proof the purchase went through, rather than just a status that happened to come back green.
Get Inventory Items
C++ equivalent
Just to say it again, since this is the last one: nothing below is the one correct way to write it. The waiting step translates fairly directly into C++. It binds HandleOrderFinalized to OnOrderFinalized first, using AddDynamic rather than BindDynamic since OnOrderFinalized is a multicast delegate that can notify more than one listener, then calls AwaitOrderFinalization with the access token and the order ID, achieving the same result as the node above.
UXsollaStoreSubsystem* StoreSubsystem =
    GetWorld()->GetGameInstance()->GetSubsystem<UXsollaStoreSubsystem>();

StoreSubsystem->OnOrderFinalized.AddDynamic(this, &UBAC_XsollaPurchaseFlow::HandleOrderFinalized);
StoreSubsystem->AwaitOrderFinalization(AccessToken, CurrentOrderId);
Once HandleOrderFinalized fires, it calls GetInventoryItems with the access token, matching the Get Inventory Items node. OnInventoryLoaded is where the item's presence actually gets confirmed, checking the returned list for the same SKU purchased earlier, and only once that check passes does the reward get credited in the game.
void UBAC_XsollaPurchaseFlow::HandleOrderFinalized(int32 OrderId, EXsollaOrderTerminalStatus TerminalStatus)
{
    UXsollaStoreSubsystem* StoreSubsystem =
        GetWorld()->GetGameInstance()->GetSubsystem<UXsollaStoreSubsystem>();

    FOnInventoryItemsLoaded OnSuccess;
    OnSuccess.BindDynamic(this, &UBAC_XsollaPurchaseFlow::OnInventoryLoaded);
    FOnStoreError OnError;
    OnError.BindDynamic(this, &UBAC_XsollaPurchaseFlow::OnStoreError);

    StoreSubsystem->GetInventoryItems(AccessToken, OnSuccess, OnError);
}

void UBAC_XsollaPurchaseFlow::OnInventoryLoaded(const FXsollaInventoryItems& Items)
{
    const bool bOwnsGoldenCrop = Items.Items.ContainsByPredicate(
        [](const FXsollaInventoryItem& Item) { return Item.SKU == TEXT("golden_crop"); });

    if (bOwnsGoldenCrop)
    {
        // Confirmed: credit the reward here, the equivalent of Add Resource in Blueprint.
    }
}
From here, Get Game Mode leads into Add Resource, set to Food.

Add Resource
This is where your own logic takes over. Add Resource is a testing command that already exists inside Crop Out, meant originally for the sample project's own QA, and borrowed here as a stand-in for real reward logic. Everything before this node is portable to any Unreal project. This is the exact point where a real project's own inventory or currency system would plug in instead. A failed inventory check routes through On Flow Failed, the same as every other step in this flow.
Seeing it work
Before running this end to end, clear all four breakpoints, otherwise the game keeps pausing the moment play begins. At this point, the player is authenticated, a real catalog is loaded, a real purchase is wired to a real button, and that purchase gets confirmed before anything is credited. That is the complete cycle: four steps, running back to back, with nothing skipped.
The moment that final node resolves, food jumps immediately, the villagers keep working, and, since there is now enough food banked, the village goes on to finish its monument. That is this integration doing exactly what a real purchase should do: turning a payment into something the player can see and enjoy right away.
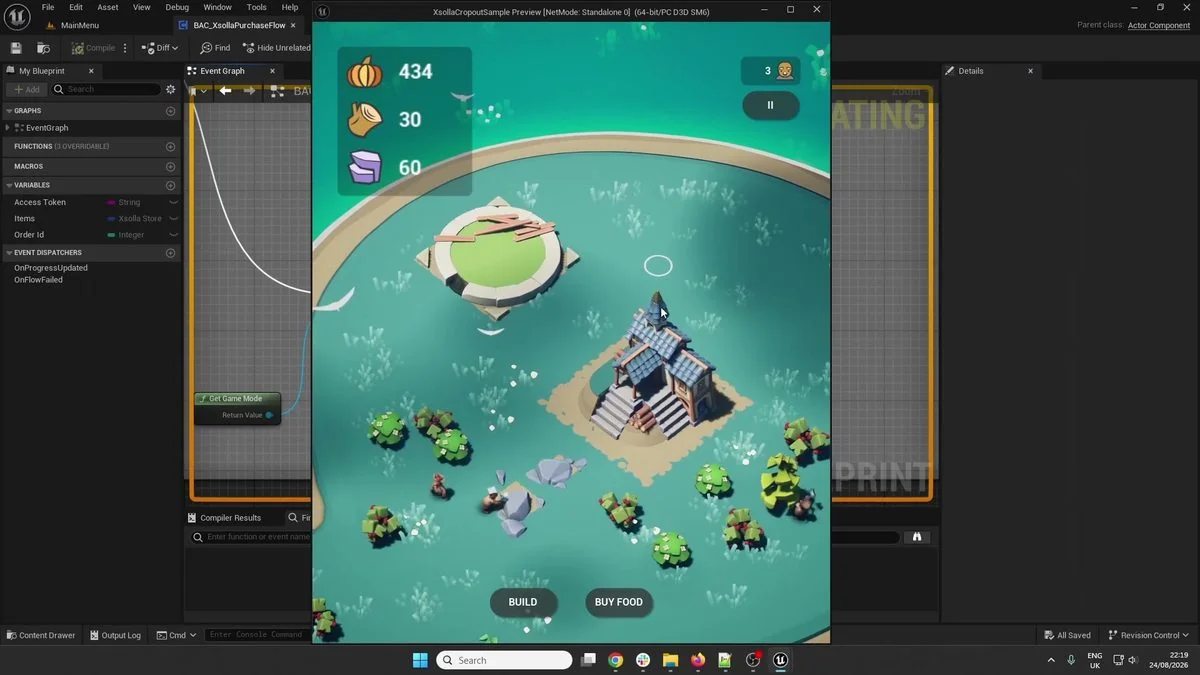
The loop, closed: a completed purchase, reflected immediately in the village's food count.
What you've built
That is a complete Xsolla SDK 3 integration in Unreal Engine, built from an empty Publisher Account up to a real, working purchase, following the same four steps every time, regardless of where each call ends up living in an actual project.
- Authentication configured with a real Project ID, Login ID, and Device ID sign-in
- A real catalog, loaded from the Publisher Account and gated by the Available toggle
- A real purchase, wired to the game's own UI and confirmed through Get Inventory Items before anything gets credited
- A C++ equivalent for every step, for projects that live outside Blueprints, or that mix both
Where to go next
- Add more products. Extend past a single SKU into a full catalog, the same way Step 2 already supports it.
- Move to server-side validation. Once a backend exists to receive them, switching to real webhooks or the Events API, through
WebhooksModeinDefaultEngine.ini, is generally a better fit for real-money economies than client-side polling. - Explore other login methods. Device ID is fast to set up, but it does not persist across a player switching devices. Xsolla supports a full range of other options, including email, social, and platform-native authentication.
- Configure Pay Station itself. The Publisher Account also controls payment methods, UI theming, and regional settings for the checkout screen players actually see.
- Read the source. The full plugin and its own documentation, including the API reference for every subsystem covered here, are available on GitHub to pilot participants. Join the Unreal Engine pilot to get access.
- Working in Unity instead? A companion walkthrough covers these same four steps: SDK 3 for Unity Mobile and SDK 3 for Unity PC.
Good luck, and if anything here does not behave as described, the Xsolla developer community and support team are there to help.