Native Android — Xsolla SDK 3 Integration Guide
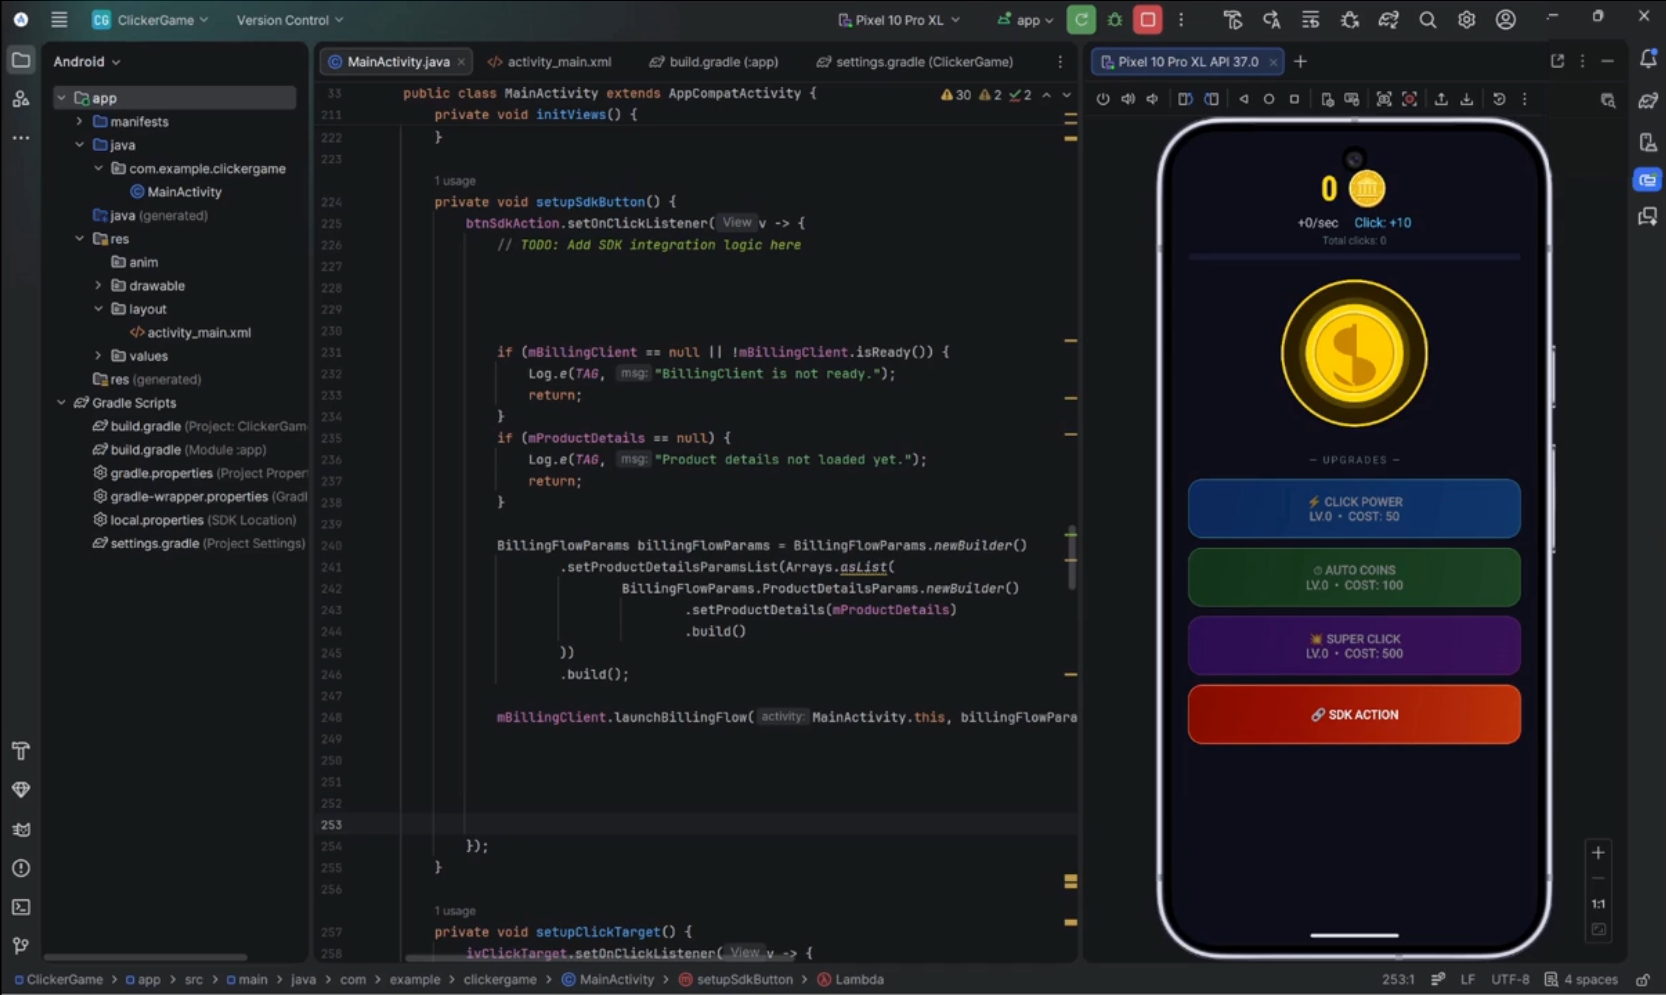
Integrating Xsolla SDK 3 into Your Native Android Game
Integrating a seamless, secure checkout experience shouldn't mean derailing your game's development schedule. In this guide, we're breaking down exactly how to integrate the Xsolla SDK into your native Android game to get your in-game monetization up and running.
By the end of this walkthrough, you'll have a fully working Xsolla payment flow running smoothly on Android. We will cover:
- The Essential Resources: Exactly where to find the right documentation to kickstart your integration without the guesswork.
- A High-Level Walkthrough: A step-by-step implementation guide to embedding the SDK into your native codebase.
- Going Production-Ready: The critical next steps required to configure your Xsolla Publisher Account and transition your game from testing to live production.
Whether you're looking to implement impulse-buy mechanics like health refills at a game-over screen or to set up a robust virtual storefront, this step-by-step guide will give you the foundational tools to start processing global payments natively.
Prerequisites
Before diving into the code, make sure your development environment matches the baseline requirements. Having these elements sorted beforehand ensures a smooth implementation process.
Development Requirements
- Android SDK: Minimum API level 24 (Android 7.0, Nougat) or higher.
- Java Development Kit (JDK): Version 11 or higher.
- Android Studio: It provides not only robust IDE capabilities, but also the full Gradle and SDK toolchain.
- Existing Game Architecture: We assume you already have a functional native Android project and a specific UI element (like a store menu, a game-over popup, or a checkout button) ready to trigger the payment flow. This article focuses strictly on SDK implementation, not building game UI elements from scratch.
Xsolla Infrastructure
- Xsolla Publisher Account: An active account is essential, especially when you are ready to transition your project to live production. If you haven't created one yet, head over to the Xsolla Publisher Account signup page.
Sandbox Environment: Setting up a full merchant profile won't hold you back today. To keep things streamlined, this walkthrough utilizes the Xsolla Sandbox environment, allowing you to test the complete purchasing process from end to end without needing to configure a live, production-ready account first. If you need a step-by-step guide on full publisher account management, please refer to the official Xsolla configuration documentation.
What We're Building
To demonstrate the Xsolla SDK 3 integration in a real-world scenario, this guide uses a straightforward demo project: a classic Android clicker game built entirely in native Java. Keeping the core gameplay mechanics simple allows us to focus 100% on the underlying monetization code without getting lost in complex game loops.
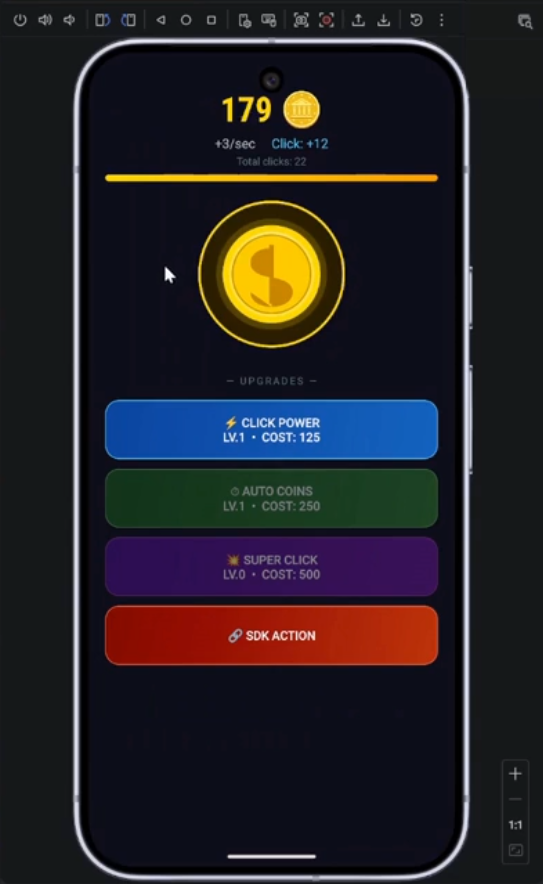
Simple Clicker game
The Demo Game Mechanics
The loop of our sample application centers on a few basic interactions:
- The Core Action: Players tap a large coin icon in the center of the screen to manually generate and accumulate virtual currency.
- Progressive Upgrades: Players can spend their accumulated coins on two distinct in-game items designed to accelerate their progress:
- Click Multiplier: Increases the value of each tap, making manual collection more efficient.
- Auto-Collector: Automatically accumulates coins over time, driving passive progression.
The SDK Integration Point
The monetization magic happens right at the premium store button. When a player taps the purchase button to acquire a premium item or bundle, the application initializes the Xsolla payment flow.
Instead of routing players to an external web browser, the app invokes the Xsolla SDK directly. Within a second, a secure checkout UI overlays the game, allowing the player to complete a full transaction using the Xsolla Sandbox environment.
In the upcoming sections, we'll open up the codebase and examine exactly which files and classes we need to modify to bring this native checkout experience to life.
Your Reference Resources
Before writing any code, you will want to open a few key documentation tabs. Having these reference points side-by-side with your IDE will save you a massive amount of time, as Xsolla provides pre-built code snippets specifically tailored for native Android environments.
1. The Central Hub: Xsolla SDK Site
Your primary starting point is developers.xsolla.com/sdk. This portal provides a comprehensive overview of the SDK's core capabilities, cross-platform architecture, and essential integration use cases.
2. The SDK Explorer & Integration Widget
The most powerful tool at your disposal is the SDK Explorer and its Integration Widget. The Integration Widget is a page on the Xsolla SDK site and a tab within the SDK Explorer that gives you the full, ready-to-use code for each integration step. Throughout this guide, we will frequently refer back to this widget to grab clean, production-ready blocks of Java code that you can copy and paste directly into your project files.
3. The Android Quick Start Guide
To find the exact code implementations used in this walkthrough, navigate through the sidebar following this path:
Mobile → Quick Start → Android
This sub-section houses the foundational native code blocks. We will break down exactly how to pull from these resources to achieve two primary milestones:
- Locally loading and rendering your virtual item catalog.
- Triggering a secure, native sandbox checkout flow for your player.
Looking Ahead: Keep an eye on the Publisher Account documentation section as well. While our immediate focus is getting the local Android code running via the sandbox, that section will be your step-by-step roadmap later on for initializing projects, setting up items, and mapping out credentials within the Publisher Account dashboard to take your game live.
Step 0: Set Up the Xsolla SDK Package
Before we can implement any payment features, we need to pull the Xsolla SDK into our Android project. While cross-platform tools like Unity use a Package Manager UI, native Android relies on Gradle to handle dependencies.
We will make two quick configuration changes to your project's Gradle files and then add a critical import to your main activity.
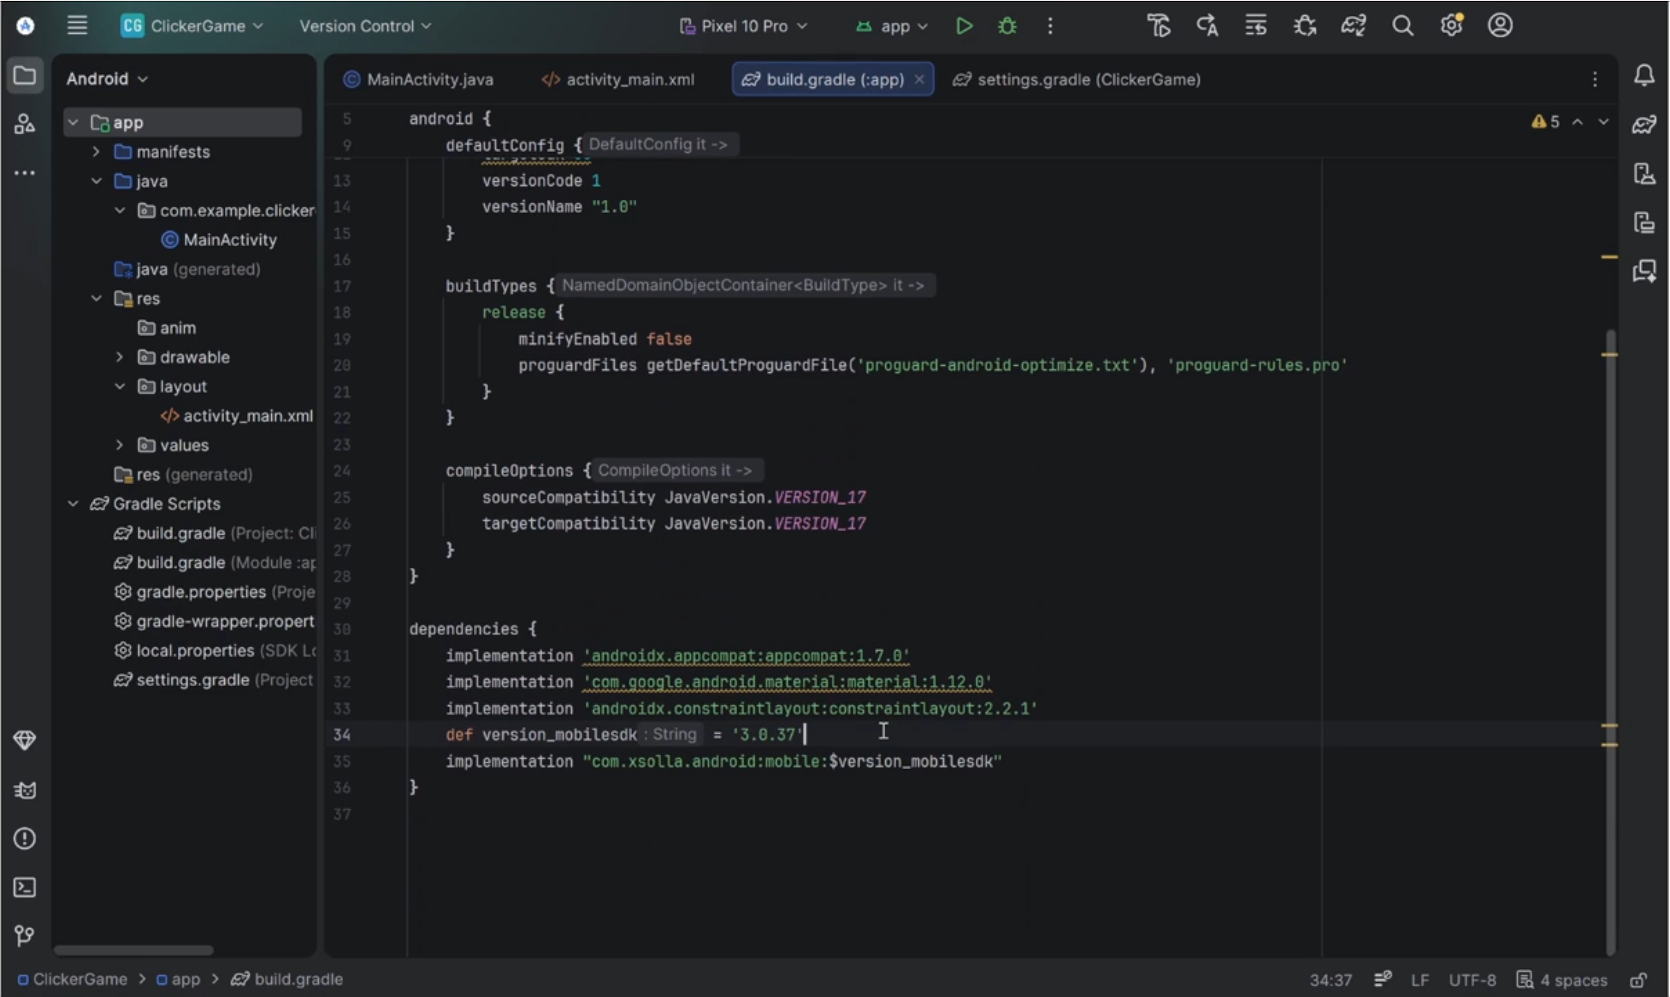
Setting Up Your Development Workspace
1. Update settings.gradle
First, we need to ensure your project knows where to find the Xsolla package repository. Open your settings.gradle file and verify that mavenCentral() is included in your repositories block:
// settings.gradle
repositories {
    mavenCentral()

    maven {
        url = uri("https://raw.githubusercontent.com/xsolla/xsolla-sdk-android/main")
    }
}
2. Configure build.gradle (Module: app)
Next, open your module-level build.gradle file. Scroll down to the dependencies block. Here, we will define the specific SDK version we want to use and declare the implementation line.
At the time of this guide, we are using version 3.0.37. Add the following lines to your dependencies:
// build.gradle
dependencies {
    def version_mobilesdk = '<version>' // '3.0.37'
    implementation "com.xsolla.android:mobile:$version_mobilesdk"
}
Defining the version as a variable (
def version_mobilesdk) keeps your file clean and makes it easy to update the SDK in the future.
3. Import the Package in Your Main Activity
Once you have modified your Gradle files, sync your project. To officially bridge the SDK with your game code, open your main Java activity file (e.g., MainActivity.java) and add the core Xsolla package import at the top of the file:
//MainActivity.java
import com.xsolla.android.mobile.*;
With this line in place, your native project is fully connected to the Xsolla SDK, and you're ready to begin writing the initialization logic.
Step 1: Authenticate
With the SDK package installed, our first official integration milestone is authentication. The Xsolla SDK requires a valid configuration initialized right as your application starts up. This process establishes a secure connection to Xsolla services, tells the system whether you are testing or running live transactions, and prepares the billing client for user interaction.
Setting Up the Code Context
In a native Android environment, this initialization logic lives directly inside your main activity's lifecycle. Open your main game activity file and navigate to the onCreate() method.
Head over to the Xsolla Integration Widget, select the Authentication tab, and grab the ready-to-use configuration snippet. You will paste this directly into your onCreate() method:
import com.xsolla.android.mobile.*;

@Nullable
private BillingClient mBillingClient;

final Config.Common configCommon = Config.Common.getDefault()
    .withDebugEnabled(true)
    .withLogLevel(LogLevel.VERBOSE)
    .withSandboxEnabled(true);

final Config.Integration configIntegration = Config.Integration.forXsolla(
    Config.Integration.Xsolla.Authentication.forAutoJWT(
        ProjectId.parse(301871).getRightOrThrow(),  // Test project
        LoginUuid.parse("dfcb133b-6d0b-4937-b8d2-c4f4d58fb53a").getRightOrThrow()  // Test login ID
    )
);

final Config config = new Config(
    configCommon,
    configIntegration,
    Config.Payments.getDefault(),
    Config.Analytics.getDefault()
);

// Inside onCreate(), after creating Config:
mBillingClient = BillingClient.newBuilder(this)
    .setConfig(config)
    .setListener((billingResult, purchases) -> {
        // Handle purchase completion - see Finalize Purchase
    })
    .build();

mBillingClient.startConnection(new BillingClientStateListener() {
    @Override
    public void onBillingServiceDisconnected() {
        Log.d(TAG, "Disconnected from Xsolla services.");
    }

    @Override
    public void onBillingSetupFinished(@NonNull final BillingResult billingResult) {
        if (!billingResult.isSuccessful()) {
            Log.e(TAG, "Connection failed: " + billingResult.getResponseCode());
            return;
        }
    }
});
Note: Transitioning to Production
For our walkthrough using the clicker game, the default demo IDs will get us up and running immediately. However, once you are ready to take your game live, you must log into your Xsolla Publisher Account, locate your unique Project ID and Login ID, and swap them into this configuration block. For more advanced options like custom identity provider routing, check the official Xsolla configuration documentation.
Step 2: Load Catalog
Once your game successfully establishes a connection to Xsolla services, the next step is pulling your virtual store data. The Xsolla SDK manages your catalog dynamically from the cloud, meaning any updates to item names, images, or regional pricing on your Publisher Account dashboard will update in your game automatically without requiring a new app update.
Implementing the Catalog Query
To fetch your inventory details, you need to build a query targeting the specific product IDs you want to display.
mBillingClient.queryProductDetailsAsync(
    QueryProductDetailsParams.newBuilder()
        .setProductList(Arrays.asList(
            QueryProductDetailsParams.Product.newBuilder()
                .setProductId("money.100")  // Test product SKU
                .setProductType(BillingClient.ProductType.INAPP)
                .build()
        ))
        .build(),
    (billingResult, productDetailsList) -> {
        // Launch purchase - see Purchase Product
    }
);
Step 3: Purchase Product
With the local catalog successfully loaded, we can now use that data to trigger a real transaction. When a player taps an item in your store UI, the Xsolla SDK intercepts the action and handles the heavy lifting, launching a secure overlay known as the Xsolla Pay Station. This overlay gives your users access to over 1,000 localized payment options natively inside your app.
Launching the Checkout Flow
To start the billing process, you pass the ProductDetails object retrieved from your Step 2 catalog query into the SDK's billing flow method.
Grab the initialization snippet from the Purchase Product tab of the Integration Widget and map it to your store button's click listener:
// Inside productDetails callback (from Load Catalog):
if (billingResult.isSuccessful() &&
    productDetailsList != null && !productDetailsList.isEmpty()) {

    mBillingClient.launchBillingFlow(
        activity,  // Your Activity reference
        BillingFlowParams.newBuilder()
            .setProductDetailsParamsList(Arrays.asList(
                BillingFlowParams.ProductDetailsParams.newBuilder()
                    .setProductDetails(productDetailsList.get(0))
                    .build()
            ))
            .build()
    );
} else {
    Log.e(TAG, "No products available: " + billingResult.getResponseCode());
}
Simulating a Completed Transaction
Because we enabled sandbox mode back in Step 1, you can test this complete payment cycle immediately without worrying about hidden credit card charges. When the Pay Station UI slides onto the screen, choose the Credit/Debit Card option and utilize one of Xsolla's official mock testing profiles:
| Card Brand | Test Card Number | Expiration | Security Code (CVV) |
|---|---|---|---|
| Visa | 4111 1111 1111 1111 | Any future date | Any 3 digits |
| Mastercard | 5555 5555 5555 4444 | Any future date | Any 3 digits |
Inputting these credentials simulates a successful, fully cleared authorization loop, prompting the SDK to pass a success token back to your application state.
Step 4: Finalize Purchase
The final link in our monetization loop is listening for the transaction results and securely awarding the virtual item to the player. Launching the checkout UI is only half the battle; your game must listen for the callback from Xsolla servers when the player finishes entering their billing information.
Once the purchase is successfully completed, consume the transaction token to award the product to the user.
// Inside onPurchasesUpdated callback:
if (billingResult.isSuccessful() && purchases != null) {
    for (Purchase purchase : purchases) {
        mBillingClient.consumeAsync(
            ConsumeParams.newBuilder()
                .setPurchaseToken(purchase.getPurchaseToken())
                .build(),
            (billingResult, purchaseToken) -> {
                if (billingResult.isSuccessful()) {
                    Log.d(TAG, "Purchase consumed - award item to user");
                    // Award the product (virtual item) to the user here
                } else {
                    Log.e(TAG, "Consumption failed: " + billingResult.getResponseCode());
                }
            }
        );
    }
} else {
    Log.e(TAG, "Purchase failed or cancelled: " + billingResult.getResponseCode());
}
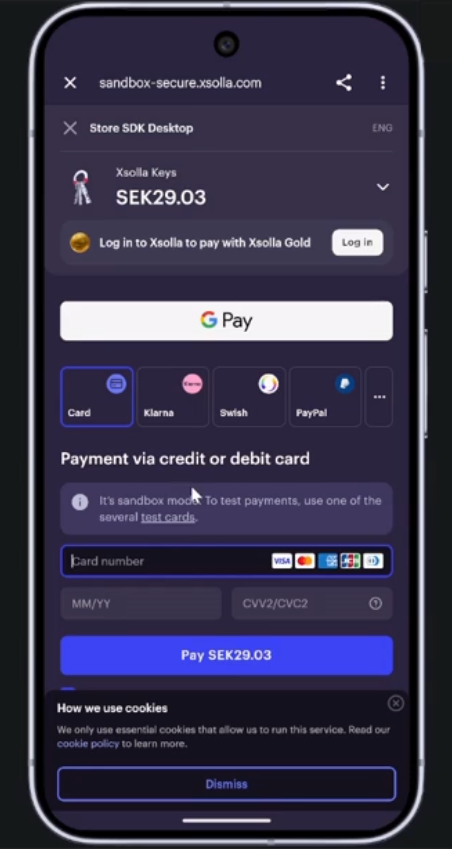
Xsolla Pay Station
Validate and Consume
This process consumes the transaction, allowing you to securely grant the virtual item to the player. For troubleshooting error scenarios or exploring advanced implementation options, refer to the official purchase flow documentation.
Where to Go Next
Congratulations! You now have a working blueprint for a native Android Xsolla SDK integration. While our clicker game demonstrates the fundamental loop, transitioning a game from a local sandbox clone into a global commercial success requires a few strategic upgrades.
Here is your roadmap for taking your implementation to the next level:
1. Hands-On Experimentation: The Extended Example
If you want to poke around a complete, standalone implementation, head back to the Android Quick Start Guide and scroll to the bottom to find the Extended Example.
- The Key Difference: The Pay Station overlay launches immediately upon application boot. It serves as an excellent, isolated sandbox to copy, paste, and test your environment variables without external code interference.
2. Secure Your Economy with Server-Side Webhooks
While local client-side confirmation works for initial prototyping, a production title should never rely entirely on the device to validate payments.
- The Upgrade: To reduce the risk of fraud, transition your backend architecture to utilize the Xsolla Events API or webhook-based server validation. This ensures transactions are securely verified server-to-server before items are handed out.
- Note: To get the webhooks or Events API properly configured for your specific ecosystem, you can easily set it up via your Publisher Account dashboard or reach out directly to your account team at [email protected].
3. The SDK Explorer
To get the most out of this guide, open the Xsolla SDK Explorer and its Integration Widget side-by-side with your IDE. The widget acts as your codebase foundation, supplying the exact Java snippets needed for each milestone. While we copy-paste that code directly into our game files, we'll use the wider SDK Explorer to configure credentials and check event behavior along the way.
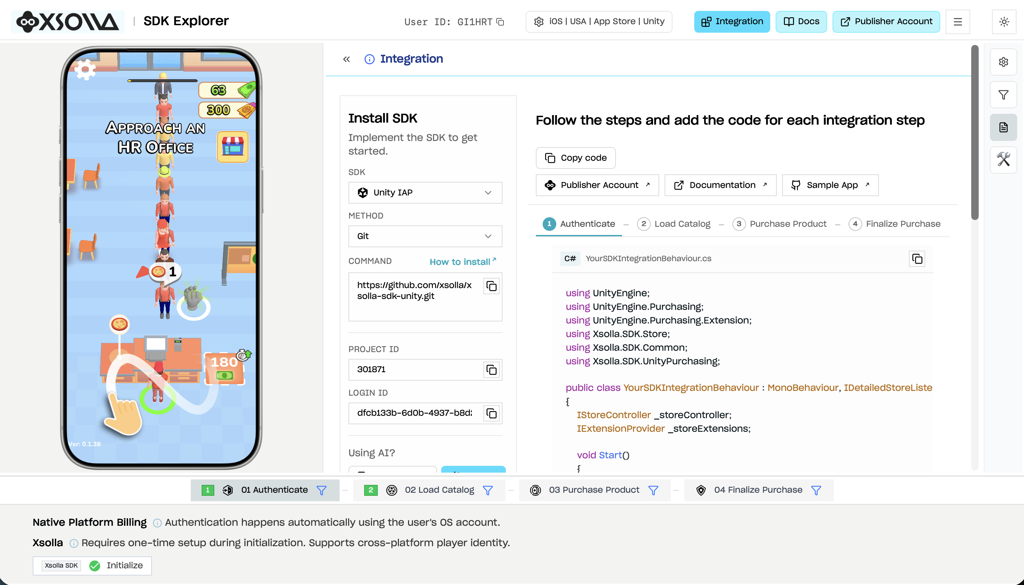
SDK Explorer - Integration Widget View (Large)
4. Register as a Publisher
The most critical next step is stepping away from the code editor and claiming your home on the web. Head over to the Publisher Account page and register your official Publisher Account.
Inside your Publisher Account dashboard, you will follow a simple setup wizard to:
- Generate your permanent, live Project ID and Login ID.
- Build out your authentic virtual store catalog, replacing generic testing keys with your actual premium items, artwork, and descriptions.
- Theme your Pay Station UI wrapper to match your game's unique brand visual identity.
The official documentation contains step-by-step guides for every single toggle inside the Publisher Account dashboard. Take your time exploring the tools, lean on the vibrant developer community if you hit a snag, and good luck launching your game on the global marketplace!