Configurer un projet UE4
- Open your UE4 project in Unreal Editor.
- For Blueprint projects only:
- Compile your UE4 project.
- Go to the
Content Browser and add aNew C++ Class with theNone parent node.
- Go to
Settings > Plugins > Installed > Xsolla Inventory SDK . Check theEnabled box and click theRestart Now button to save settings and reload the Unreal Editor.
- Specify project parameters:
- Go to
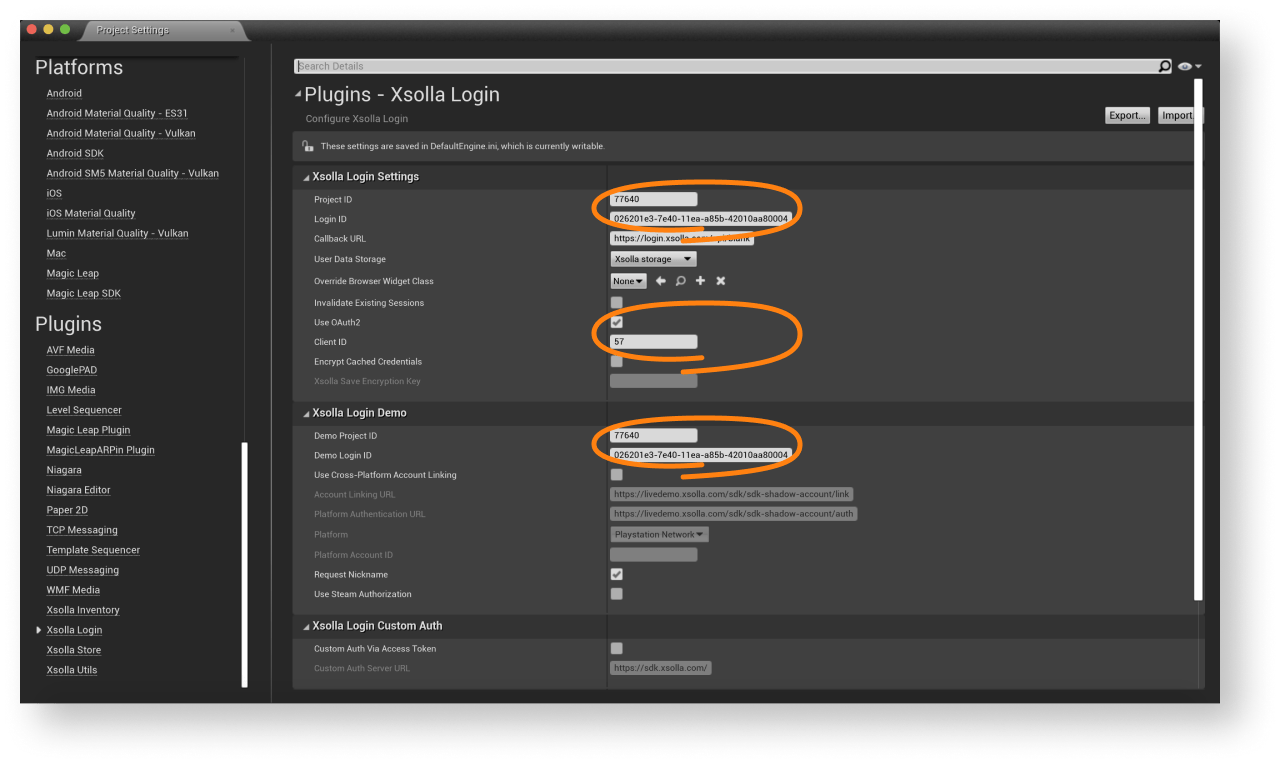
Settings > Project Settings > Plugins > Xsolla Login and specify the following parameters:
- Go to
- In the
Login ID andDemo Login ID fields, specify the Login ID from Publisher Account. - In the
Project ID andDemo Project ID fields, specify the Project ID from Publisher Account. - Enable
Use OAuth 2.0 option. - In the
Client ID field, specify Client ID received when setting up OAuth 2.0 in Publisher Account.
- In the
Note
If you use your own authorization system, you do not need to fill in Login ID and Demo Login ID fields.

- Go to
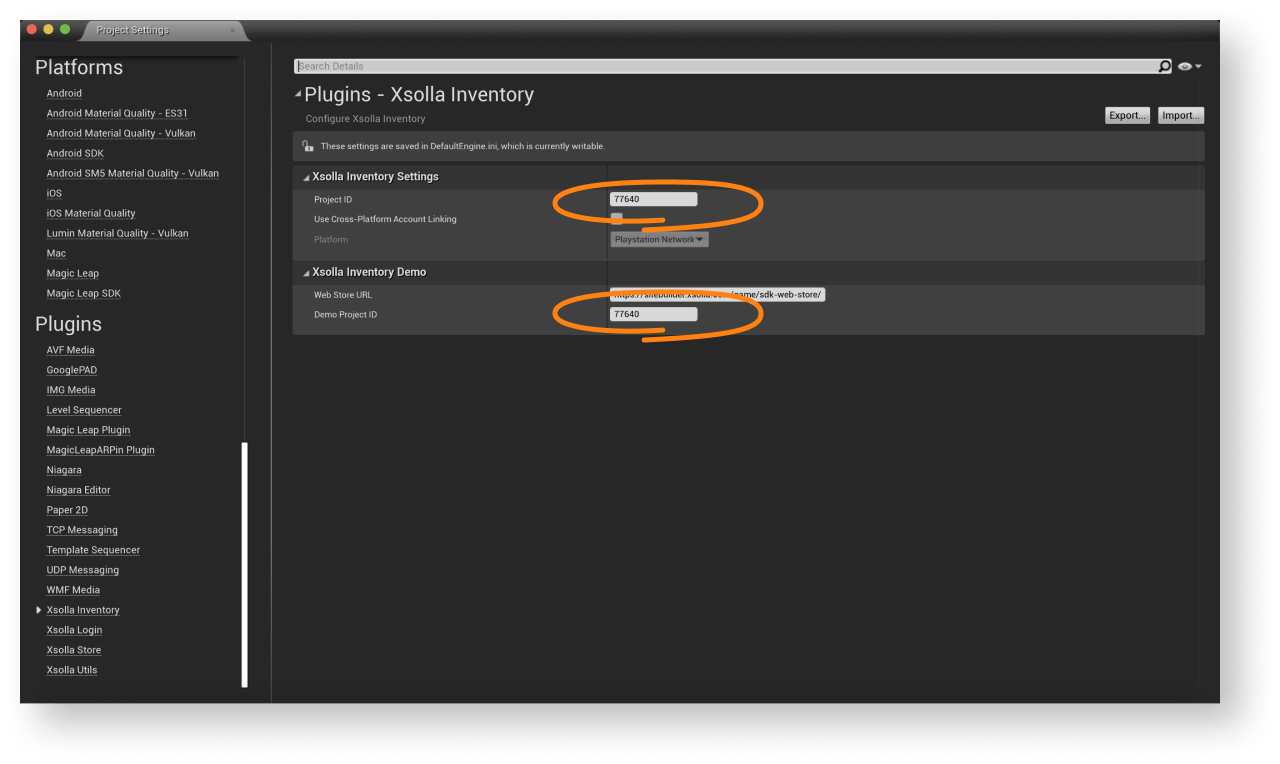
Settings > Project Settings > Plugins > Xsolla Inventory and specify the following parameters:- Specify the Project ID in the
Project ID andDemo Project ID fields. - In the
Web Store URL field specify the site address of the in-game items store (optional).
- Specify the Project ID in the
- Go to
Note
You can create the site for an in-game item store using Site Builder. When setting up Site Builder, use the same Login project as when setting up the Cross-Buy plug-in.
As a result, your project in Publisher Account will be connected to demo maps.

- Go to
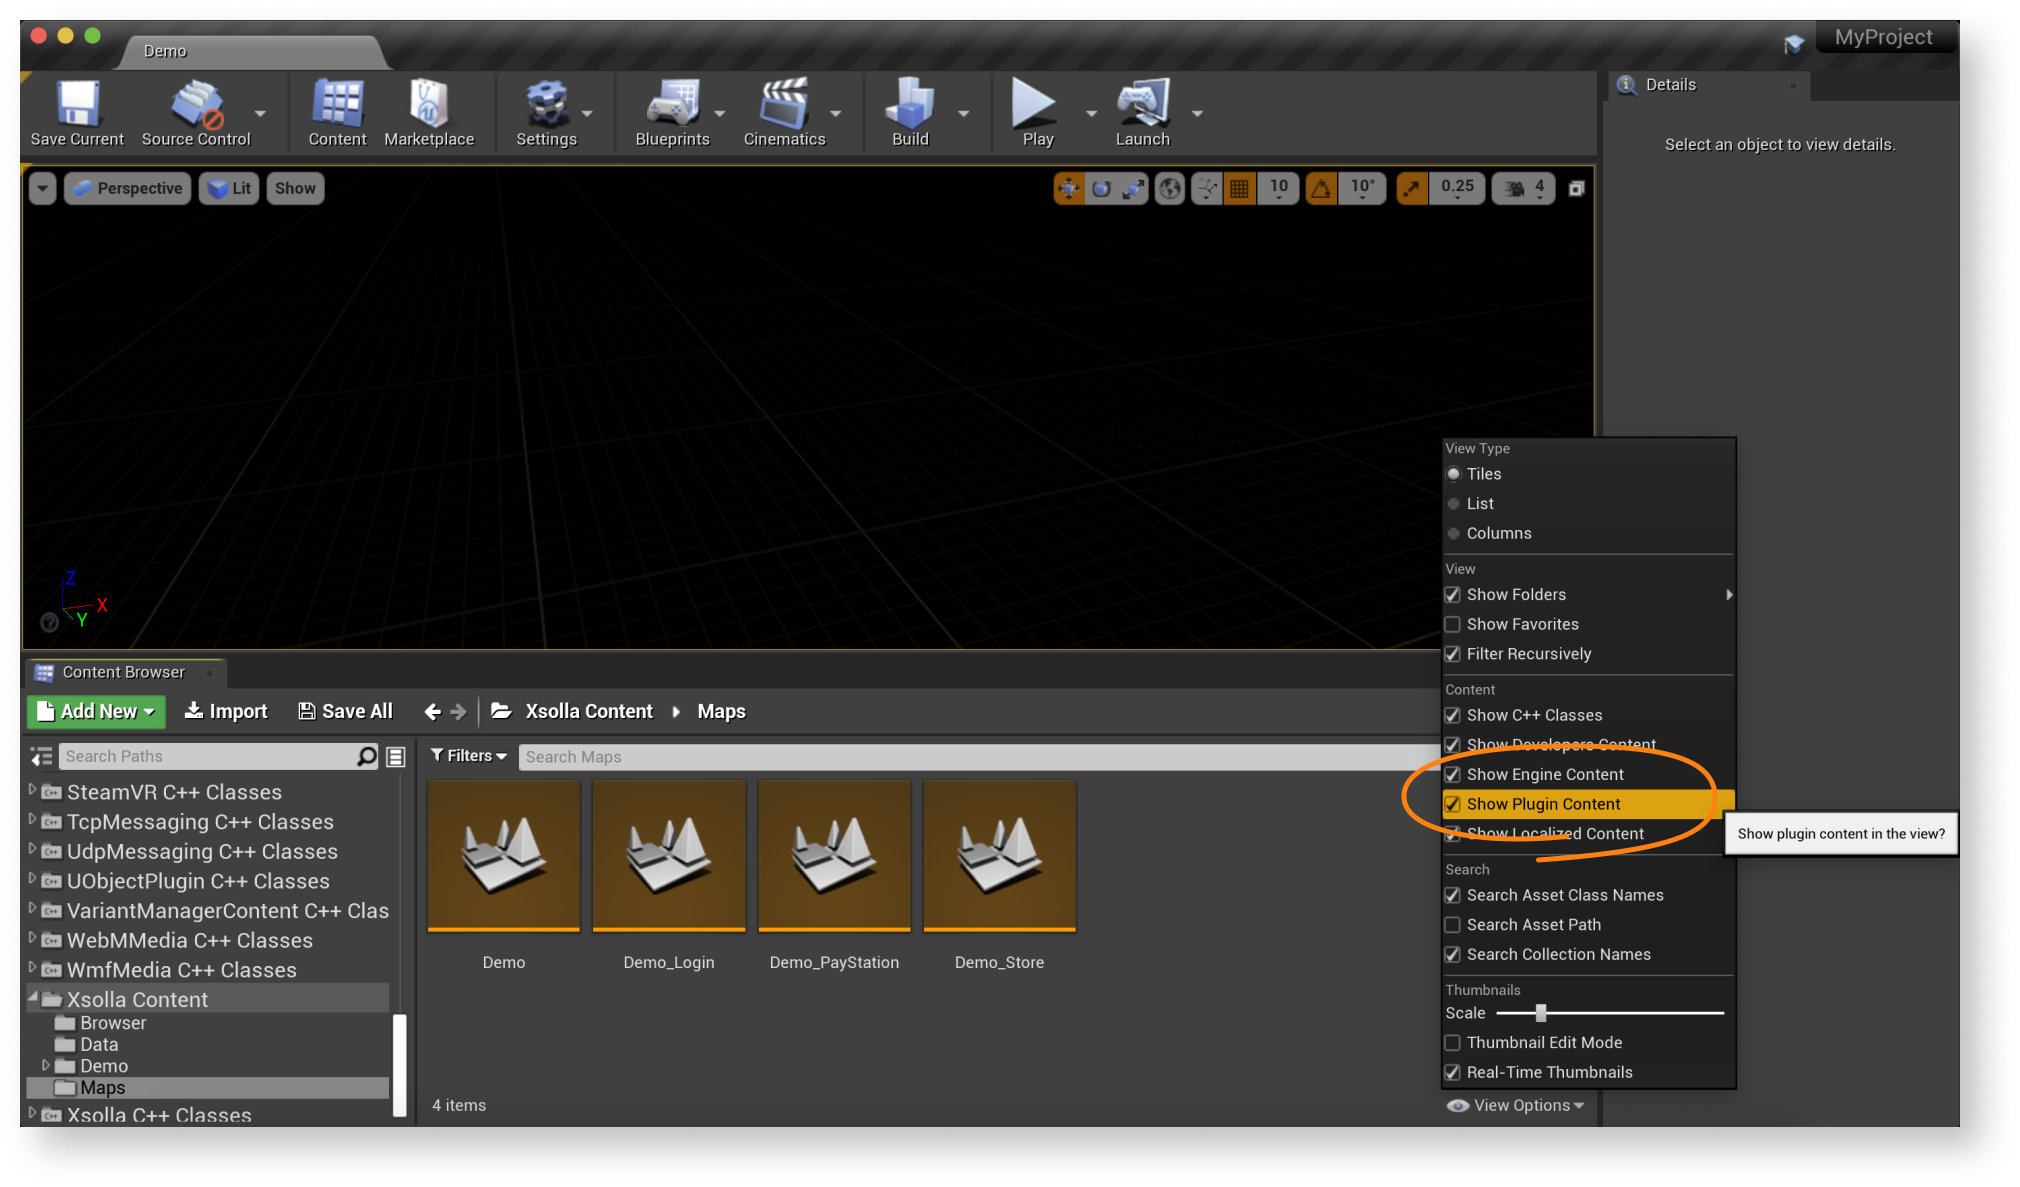
Content Browser > View Options and check the boxes forShow Engine Content andShow Plugin Content .

- Go to
Content Browser > Xsolla Content > Maps and launch theDemo_Inventory map of the game. Make sure that the authorization and other functions are working correctly. - Design an interface for the login system and other pages for your application.
Note
You can create your own solution by following UMG UI documentation, or use the demo scene as a template. To adapt the demo scene interface to your application, use the UI builder.
- Set up event handling according to your application logic using SDK methods. Follow the step-by-step tutorials to get started with basic SDK features.
Note
To modify the SDK for your application specifics, follow the SDK modification instruction.
Cet article vous a été utile ?
Merci pour votre commentaire !
Nous examinerons votre message et l'utiliserons pour améliorer votre expérience.Poursuivre la lecture
Dernière mise à jour:
17 Février 2026
Faute de frappe ou autre erreur dans le texte ? Sélectionnez le texte concerné et appuyez sur Ctrl+Entrée.
