
Configurar o projeto Unity
- Open your Unity project.
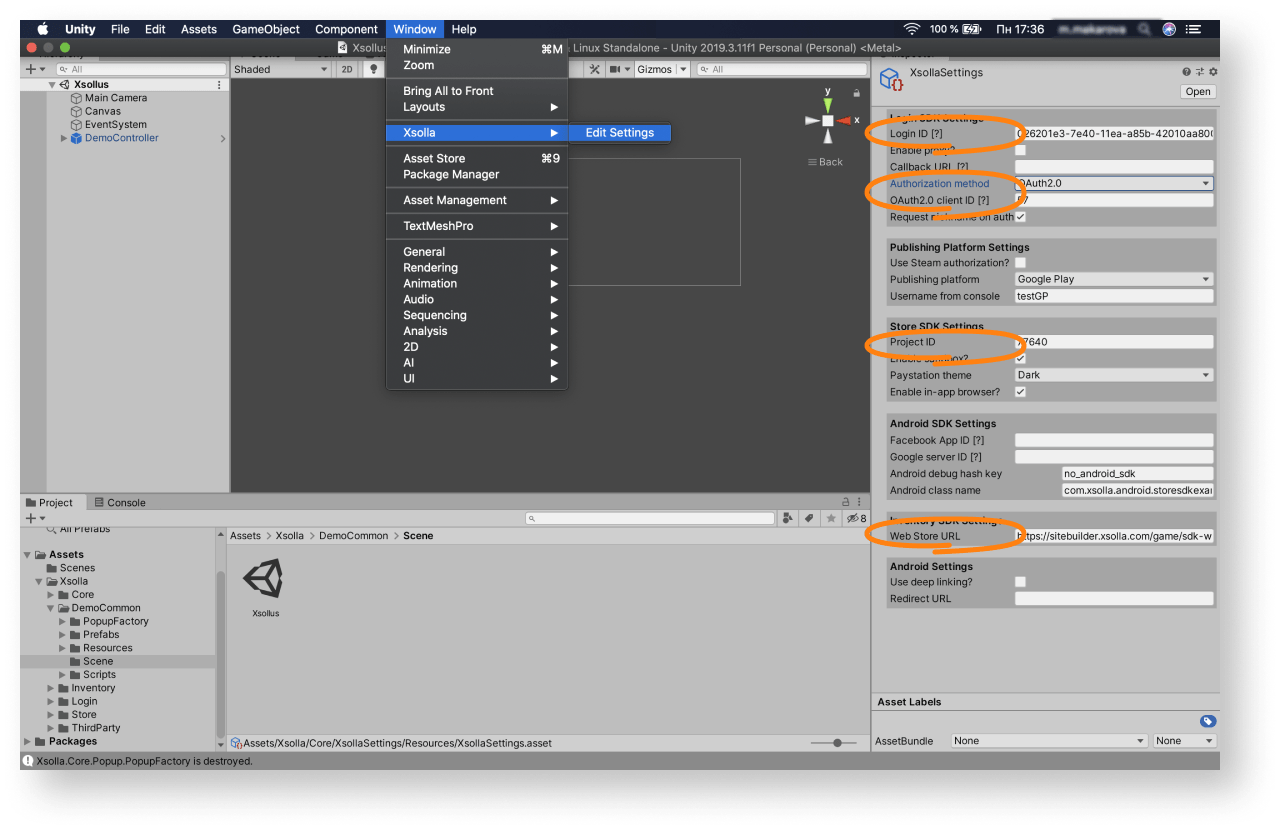
- Click
Window > Xsolla > Edit Settings in the main menu. - Specify project parameters in the
Inspector panel:- In the
Login ID field, specify the Login ID from Publisher Account.
- In the
Observação
If you use your own authorization system, you do not need to fill in the Login ID field.
- In the
Project ID field, specify the Project ID from Publisher Account. - In the
Web Store URL field specify the site address of the in-game items store (optional).
- In the
Observação
You can create the site for an in-game item store using Site Builder. When setting up Site Builder, use the same Login project as when setting up the Cross-Buy asset.
- In the
Authorization method field, selectOAuth2.0 . - In the
OAuth2.0 client ID field, specify Client ID received when setting up OAuth 2.0 in Publisher Account.
- In the
As a result, your project in Publisher Account will be connected to the demo scene.
- Launch the demo scene
Assets > Xsolla > DemoCommon > Scene > Xsollus and make sure that the authorization and other functions are working correctly. - Design an interface for the login system and other pages for your application.
Observação
You can create your own solution by following Unity instructions, or use the demo scene as a template. To adapt the demo scene interface to your application, use the UI builder.
- Set up event handling according to your application logic using SDK methods. Follow the step-by-step tutorials to get started with basic SDK features.
Este artigo foi útil?
Obrigado pelo seu feedback!
Avaliaremos sua mensagem e a usaremos para melhorar sua experiência.Continuar lendo
Última atualização:
29 de Março de 2023
Encontrou um erro de texto ou digitação? Selecione o texto e pressione Ctrl+Enter.
