Authenticate users in your application
To ensure security and correct operation of payment transactions, the Xsolla API uses the user JSON Web Token (JWT), obtained during authorization using Xsolla Login.
Below, you can find instructions for the fastest way to integrate Xsolla Login — integrating a ready-made web widget into the application.
If you want to use your own UI to log users into your application, you should implement user authentication logic using the Login API or SDK methods.
Choose the most suitable SDK for your project:
General instructions for importing the widget and working with it are given in the README file.
Use test web applications as an implementation example:
Connect Xsolla Login widget SDK
The Xsolla Login widget is available for installation using the NPM package manager or the <script> tag on an HTML page.
Connect the Xsolla Login widget SDK in one of the following ways:
Launch the console and run the command:
- bash
1npm i @xsolla/login-sdk
Add the following code to the <head> tag of the HTML page on which the widget will be placed:
- html
1<script src="https://login-sdk.xsolla.com/latest/">
2</script>
Initialize Xsolla Login widget SDK
Initialize the widget using one of the methods below. Specify the following parameters:
projectId— Login project ID. You can find it in your project in Publisher Account, in the Players > Login > Dashboard section.preferredLocale— the interface language. The following languages are supported: Arabic (ar_AE), Bulgarian (bg_BG), Czech (cz_CZ), English (en_US), German (de_DE), Spanish (es_ES), French (fr_FR), Hebrew (he_IL), Italian (it_IT), Japanese (ja_JP), Korean (ko_KR), Polish (pl_PL), Portuguese (pt_BR), Romanian (ro_RO), Russian (ru_RU), Thai (th_TH), Turkish (tr_TR), Vietnamese (vi_VN), Chinese Simplified (zh_CN), Chinese Traditional (zh_TW).clientId— OAuth 2.0 client ID. You can find it in your project in Publisher Account, in the Players > Login > your Login project > Security > OAuth 2.0 section.redirectUri— The URL the user is redirected to after they confirm their account, log in, or confirm password reset. Must be specified in the Publisher Account in the OAuth 2.0 client settings.
Leave the rest of the parameters unchanged.
Add the initialization code to the JS file:
- javascript
 1import { Widget } from '@xsolla/login-sdk';
 2const xl = new Widget({
 3  projectId: 'LOGIN_PROJECT_ID',
 4  preferredLocale: 'en_US'
 5  clientId: 'CLIENT_ID',
 6  responseType: 'code',
 7  state: 'CUSTOM_STATE',
 8  redirectUri: 'REDIRECT_URI',
 9  scope: 'SCOPE'
10});
Add the widget initialization code to the <body> tag:
- html
 1<script>
 2const xl = new XsollaLogin.Widget({
 3  projectId: 'LOGIN_PROJECT_ID',
 4  preferredLocale: 'en_US',
 5  clientId: 'CLIENT_ID',
 6  responseType: 'code',
 7  state: 'CUSTOM_STATE',
 8  redirectUri: 'REDIRECT_URI',
 9  scope: 'SCOPE'
10});
11</script>
Add Xsolla Login widget opening
- Add a button with the
on-clickevent and thexl.open()function to your HTML page:
- html
1<div id="xl_auth" style="display: none"></div>
2<button onclick="showFullscreen()">Fullscreen widget</button>
- Add the code to open the widget in the
<div>block of your HTML page.
Add the following code to the JS file:
- javascript
1xl.mount('xl_auth');
2const showFullscreen = () => {
3  const myDiv = document.querySelector('#xl_auth');
4  myDiv.style.display = 'block';
5  xl.open();
6}
Add the code for opening the widget to the <body> tag:
- html
 1<script type="text/javascript">
 2  xl.mount('xl_auth');
 3
 4  function showFullscreen() {
 5    const myDiv = document.querySelector('#xl_auth');
 6    myDiv.style.display = 'block';
 7
 8    xl.open();
 9  }
10</script>
Import package from an archive
- Download the latest SDK version (recommended) or choose the required SDK version on GitHub and download it.
- Unzip the package.
- Open your Unity project or create a new one.
- In the Unity editor, go to
Assets > Import Package > Custom Package in the main menu and select the SDK.
Set up compiler
We recommend you use the
- Click
Edit > Project Settings in the main menu. - Go to the
Player > Other Settings > Configuration section. - Make sure that
Mono is selected in theScripting Backend field.

Set up SDK
- Open your Unity project.
- Click
Window > Xsolla > Edit Settings in the main menu. - Specify the main project parameters in the
Inspector panel in one of the following ways:
- Import settings from Publisher Account:
- Click
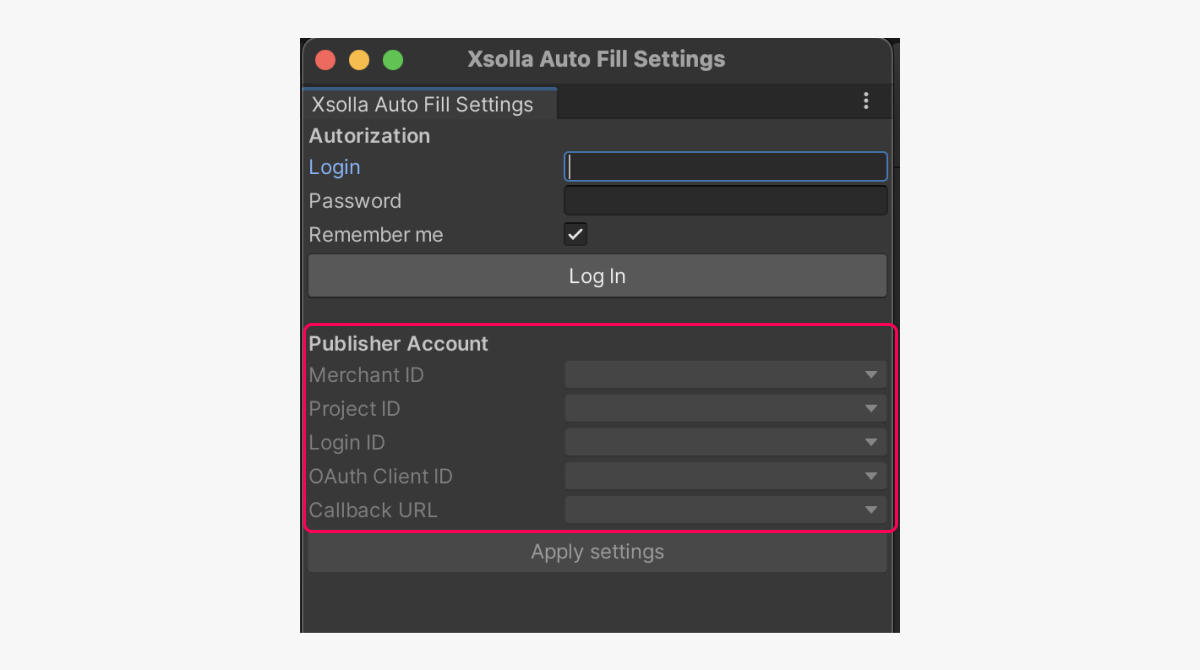
Fill settings by PA . - Specify Publisher Account authorization data in the
Login andPassword fields. - Click
Log In . - Fill in the fields in the
Publisher Account section.
- Click
- Import settings from Publisher Account:
- Click
Apply Settings .
- Click

- On the sign-up/login page of Publisher Account, click Forgot your password? and follow the instructions.
- Specify a new password in Publisher Account in the Profile settings > Change password section (in the Current password field, enter an arbitrary value).
- Specify the parameters manually:
- In the
Project ID field, specify the project ID that can be found in Publisher Account next to the name of your project. - In the
Login ID field, specify the ID of the Login project. To get it, open Publisher Account, go to the Players > Login > Dashboard > your Login project section, and click Copy ID next to the name of the Login project. - In the
Callback URL field, specify the URL or path where users are redirected after they have been successfully authenticated, confirmed their email, or reset their password. The value must match the one specified in Publisher Account in the Players > Login > your Login project > Security > OAuth 2.0 section.
- In the
- Specify the parameters manually:
- In the
OAuth Client ID field, specify client ID for OAuth 2.0 that can be found in Publisher Account in the Players > Login > your Login project > Security > OAuth 2.0 section.
- In the
- Set other settings if necessary (e.g., display options for the payment UI in the
Pay Station UI section).
Add Xsolla Login widget opening
To open the widget, call the XsollaAuth.AuthWithXsollaWidget SDK method, passing the following parameters:
onSuccess— the successful user authentication callback.onError— the request error callback.onCancel— the user authentication cancellation callback, triggered when the user closes the widget without completing the authentication process.locale— the UI language (optional). The following languages are supported: Arabic (ar_AE), Bulgarian (bg_BG), Czech (cz_CZ), English (en_US), German (de_DE), Spanish (es_ES), French (fr_FR), Hebrew (he_IL), Italian (it_IT), Japanese (ja_JP), Korean (ko_KR), Polish (pl_PL), Portuguese (pt_BR), Romanian (ro_RO), Russian (ru_RU), Thai (th_TH), Turkish (tr_TR), Vietnamese (vi_VN), Chinese Simplified (zh_CN), Chinese Traditional (zh_TW).
For standalone builds, the widget opens in the built-in browser that is included with the SDK. You can use a different built-in browsing solution that allows you to track URL changes
Install SDK
- Download the Epic Games Launcher.
- Create a new Unreal Engine project.
- Download and install the SDK:
- To download and install the SDK from the Unreal Engine Marketplace:
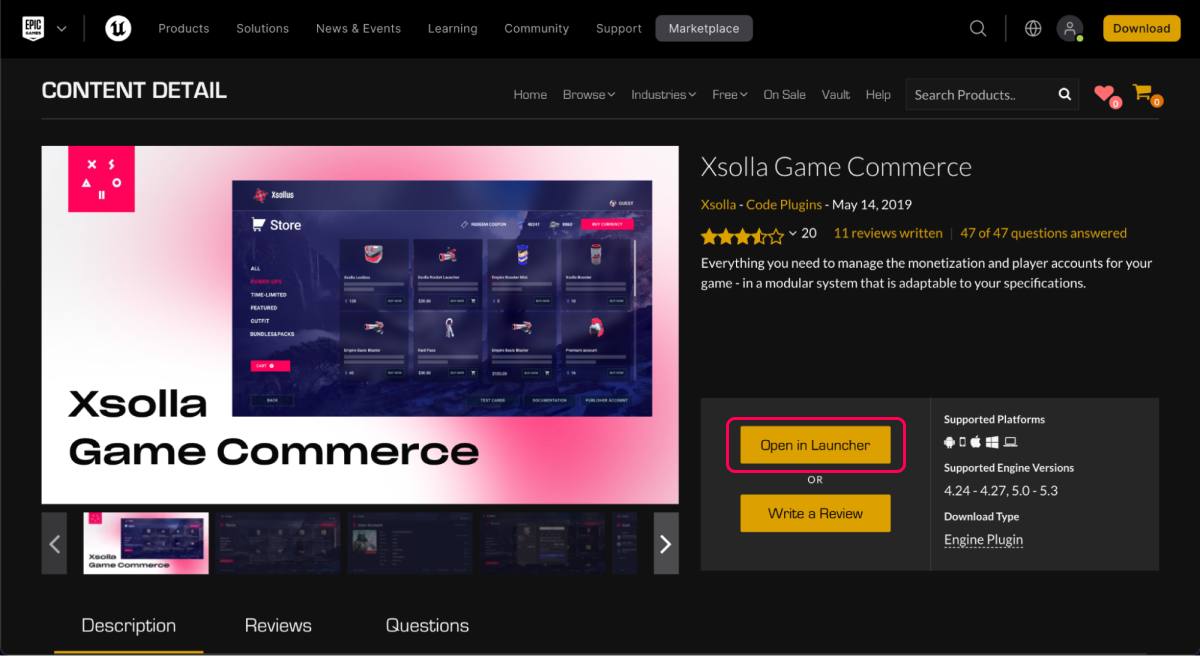
- Go to the SDK page on the Unreal Engine Marketplace.
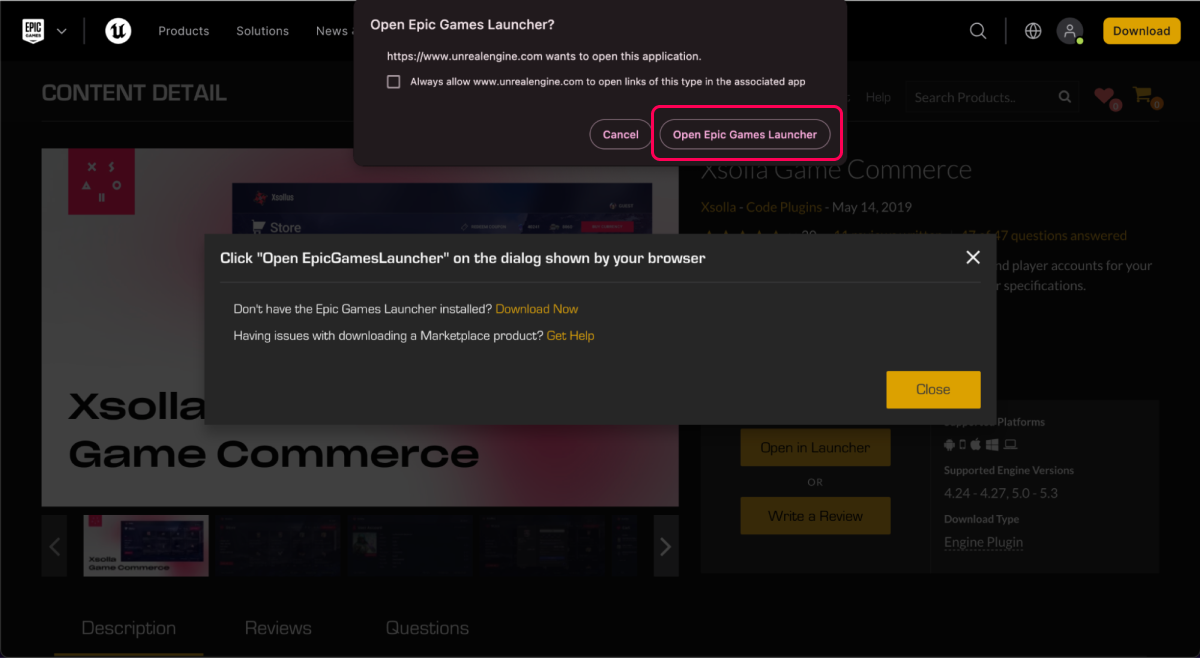
- Click
Open in Launcher .
- To download and install the SDK from the Unreal Engine Marketplace:

- Go to Epic Games Launcher.

- Click
Install to Engine . - Open your Unreal Engine project in Unreal Editor.
- Go to the
Settings > Plugins > Installed > Xsolla SDK section. Check theEnabled box and clickRestart Now to save settings and reload the Unreal Editor.
- Click
- To download and install the SDK from GitHub:
- Download the package with the SDK for your version of the engine.
- Unzip the package.
- Move the SDK folder to the
pluginsdirectory in the root of your Unreal Engine project.
- To download and install the SDK from GitHub:
Set up SDK
- Open your Unreal Engine project in Unreal Editor.
- Go to
Settings > Project Settings > Plugins > Xsolla Settings > General and specify project parameters:
- In the
Project ID field, specify the project ID that can be found in Publisher Account next to the name of your project. - In the
Login ID field, specify the ID of the Login project. To get it, open Publisher Account, go to the Players > Login > Dashboard > your Login project section, and click Copy ID next to the name of the Login project. - In the
Client ID field, specify client ID for OAuth 2.0 that can be found in Publisher Account in the Players > Login > your Login project > Security > OAuth 2.0 section. - In the
Redirect URI field, specify the URL or path in the application to which users are redirected after they have successfully authenticated, confirmed their email, or reset their password. The value must match the one specified in Publisher Account in the Players > Login > your Login project > Security > OAuth 2.0 section. - Set other settings if necessary (e.g., display options for the payment UI in the
Pay Station UI section).
- In the
- As a result, your project in Publisher Account will be connected to demo maps.

- Go to
Content Browser > View Options and check the boxes forShow Engine Content andShow Plugin Content .

Add Xsolla Login widget opening
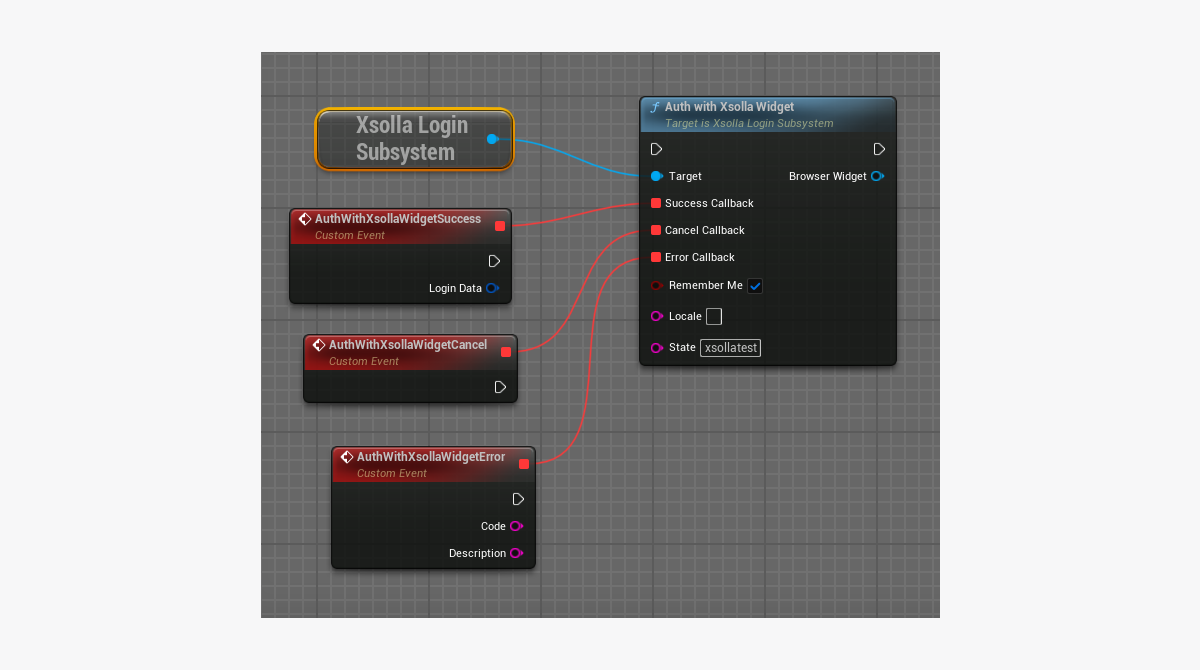
Call the AuthWithXsollaWidget SDK method, passing the following parameters:
WorldContextObject— the world context object (for C++ call).SuccessCallback— the successful user authentication and token receipt callback (optional).CancelCallback— the user authentication cancellation callback, triggered when the user closes the widget without completing the authentication process (optional).ErrorCallback— the callback for errors that occur during the authentication process (optional).bRememberMe— whether it is necessary to retain the authentication data (optional). By default, the value is set tofalse.Locale— the UI language (optional). By default, this value is defined by the user’s IP address.State— a string used for additional verification of the user on the application server. The default value is set toxsollatest.
Example:

In standalone builds, the widget is opened using the W_LoginBrowser blueprint, which comes bundled with the SDK.
You can customize the existing blueprint to open the authentication widget.
Found a typo or other text error? Select the text and press Ctrl+Enter.
