
Personalization
How it works
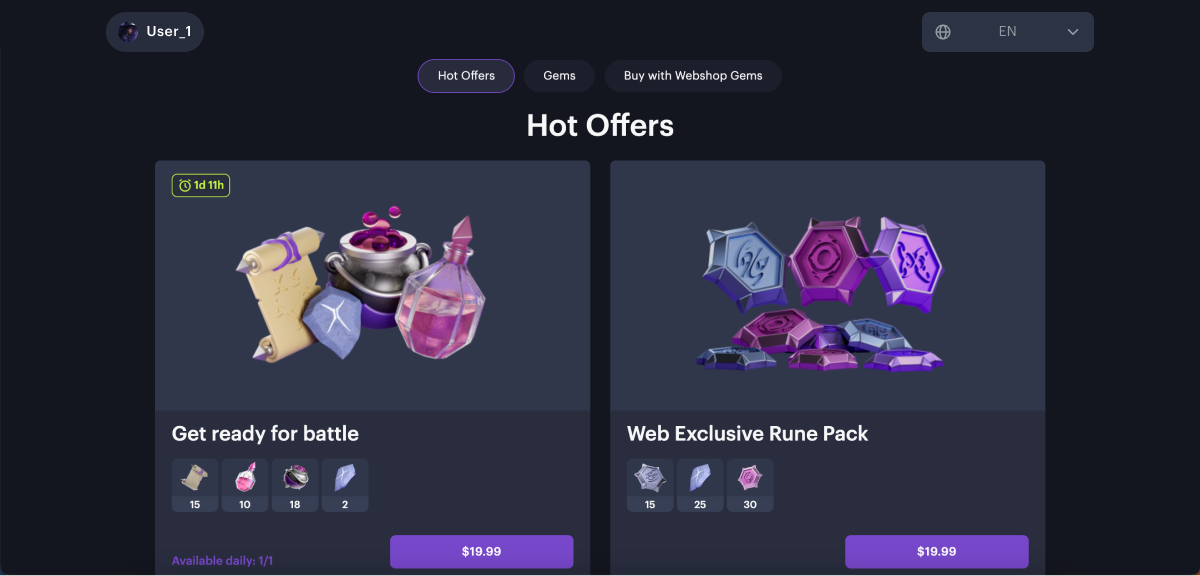
Personalization allows you to specify the conditions for displaying the item catalog and applying promotions only for certain authorized users.
It gives you an opportunity:
- to offer items and promotions that are most relevant to particular users
- to motivate users to make their first in-game purchase
Personalization configuration is available for the following scenarios:
- sale of in-game items — virtual items, virtual currency packages, and bundles
- sale of games and DLC via game keys
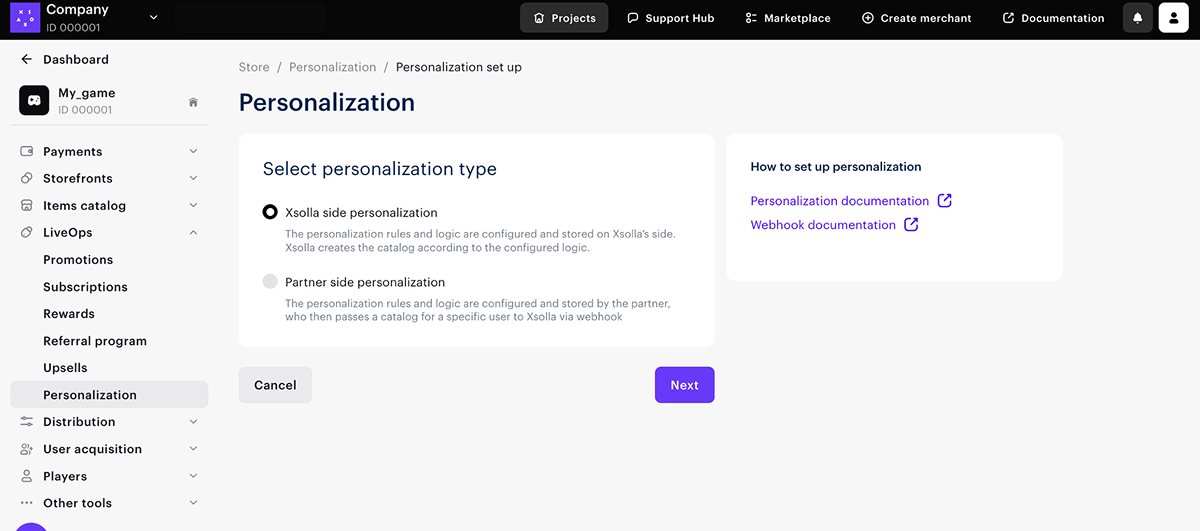
The following personalization types are available:
- Xsolla side personalization. The personalization rules and logic are configured and stored on Xsolla’s side. The partner sends user attributes to Xsolla, and then Xsolla creates the catalog according to the configured logic.
- Partner side personalization. The personalization rules and logic are configured and stored by the partner, who then passes a catalog for a specific user to Xsolla.
Before personalizing the item catalog, set up the sale of in-game items or game keys.
- You can use only one personalization type. If you want to change it, follow these instructions.
- To set up a personalized reward chain, follow the instructions.
Xsolla side personalization
User flow

- Unauthorized user goes to the item catalog. Depending on the Show items to unauthorized users toggle position, the user sees:
- items that do not have personalization rules applied
- all items, including ones with personalization rules applied
- The user clicks Log in and authorizes through Xsolla Login.

- Xsolla requests user attributes from Xsolla Login.
- Xsolla displays a personalized catalog based on item availability rules, promotions set on the Xsolla side, and user attributes obtained from Xsolla Login.
- The user selects an item from the personalized catalog and clicks Buy now.
- At the time of purchase, Xsolla requests the user's attributes again and checks them against the personalization rules:
- If an item is no longer available for purchase, the user receives a message that the item cannot be purchased.
- If the item is available for purchase, the user proceeds to payment.
Setting up a personalized item catalog
- Set up user attributes.
- Enable personalization.
- Set catalog display rules. You can do this either when enabling personalization or in a project in Publisher Account in the LiveOps > Personalization > Catalog display rules section.
- Open your project in Publisher Account and go to the LiveOps > Personalization section.
- If personalization is not configured, click Set up personalization.
- Select the Xsolla side personalization type.
- Click Next.
- Create a catalog display rule:
- If there are no catalog display rules yet, the window to create rules opens automatically.
- If catalog display rules already exist, in the Catalog display rules section, click Create rule.
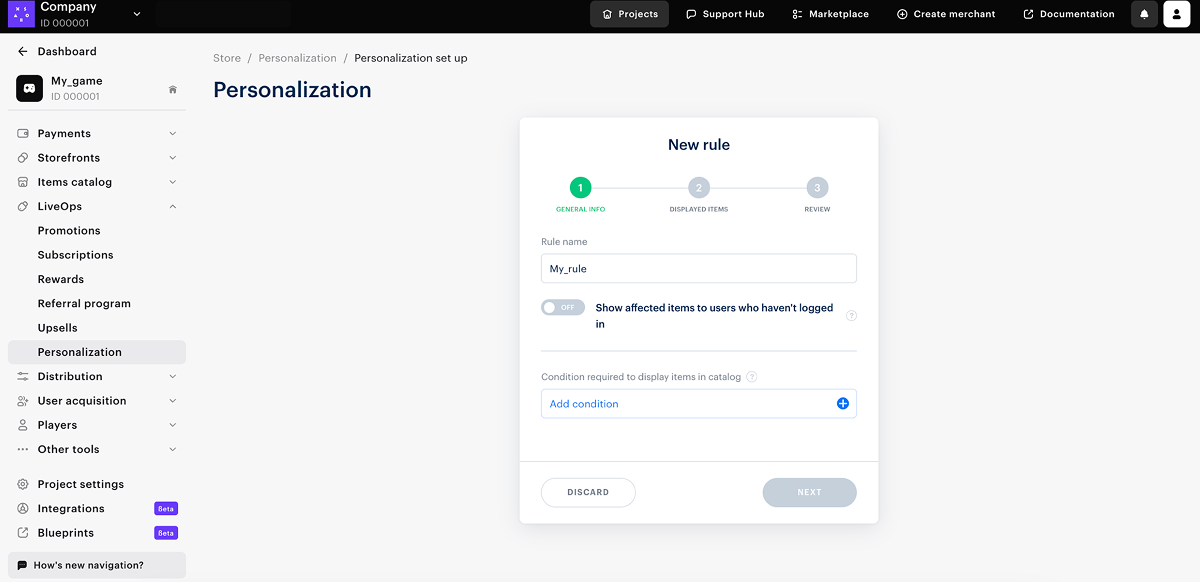
- Specify the rule name and define the conditions for displaying items in the catalog.
More about catalog display rules
Catalog display rules allow you to customize the display of the catalog based on user attributes.
A rule can contain an unlimited number of items of the following types:
- item
- bundle
- package of currencies
- game keys
You can create multiple conditions with the same user attribute in one rule.
Multiple rules may be applied to the same item. If no rules apply to an item, it will be available to all users.
- To make items with applied rules visible to unauthorized users, set the Show affected items to users who haven’t logged in toggle to On.

- Click Next.
- Select the items to which the rule will apply.
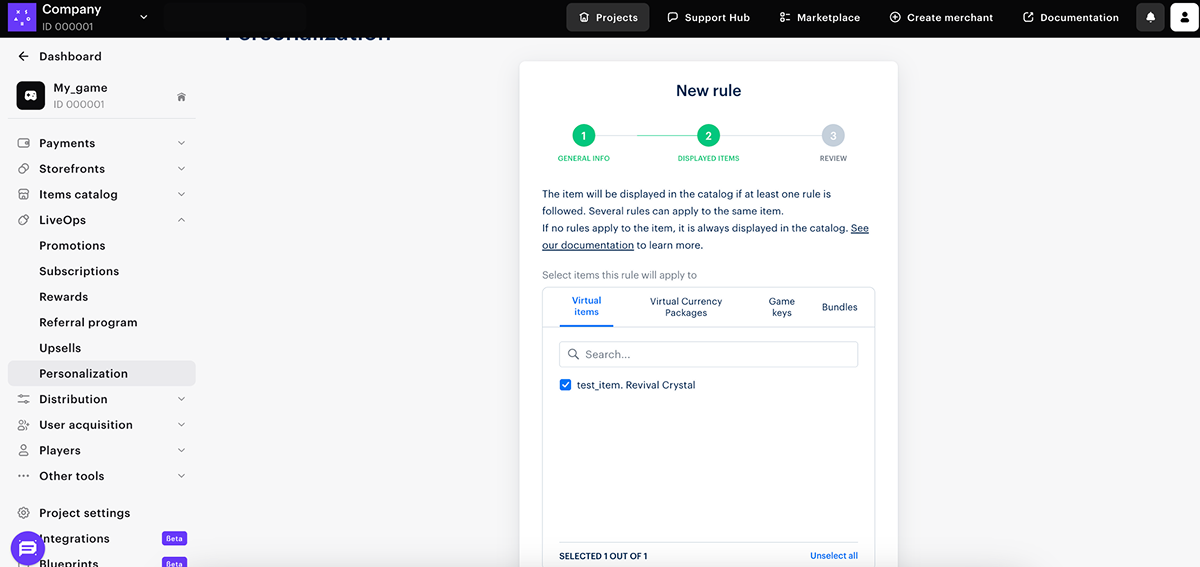
- Click Next.
- Check the settings. If necessary, click the Edit button to make changes.

- Click Save and exit.

To edit or delete rules, go to the Catalog display rules page, click the ••• icon in the rule’s row, and select the desired menu option. To activate or deactivate a rule, change its status.
Setting up personalized promotions
You can set up personalized promotions, such as giving discounts on purchases of virtual items to users who are at least a certain level in the game.
You can set one or more conditions. Please note that while the promotion is active, you cannot change it. Read Set up promotional campaigns for more information about promotion types and settings.
To set up personalized promotions:
- Set up user attributes in the Login product.
- Set up a promotional campaign with bonuses or campaign with discounts. Set the Trigger promotion only for specific users switch to On and specify the conditions.
Setting up attributes
Set up user attributes in the Login product and keep attribute values updated: Update attribute values in Xsolla when they change for the user in the game.
The attribute update sequence depends on how the user is authenticated: by user ID (available when using Web Shop) or via Xsolla Login.
Partner side personalization
Choose this type if you use advanced personalization logic implemented on your side and do not want to set rules or specify attributes on the Xsolla side.
- Create an item catalog on the Xsolla side and synchronize it with your catalog.
- For each item in your system, you must create a corresponding item in Xsolla. This item will be displayed to users in the catalog.
- The item in your system must be linked to the item on the Xsolla side using either item_id or sku, which should be included in the response to the webhook at step 3.
- Enable personalization in Publisher Account.
- Set up the processing of the
partner_side_catalog(Catalog personalization on partner side) webhook.
User flow

- Unauthorized user goes to the item catalog. Depending on the Show relevant items to users who haven’t logged in toggle position, the user sees:
- all items in the catalog
- items that you return in response to the Catalog personalization on partner side webhook
- The order in which items are displayed to the user depends on the Get sku order via webhook response toggle setting.
- The user clicks Log in and authorizes.
- Xsolla sends a webhook that requests items by user ID.
- The response from the partner returns a list of item SKUs available to this user.
- The user selects an item from the personalized catalog and clicks Buy now.
- On the Xsolla side, step 3 and 4 of this flow are executed to check the availability of items at the time of purchase:
- If an item is no longer available for purchase, the user receives a message that the item cannot be purchased.
- If the item is available, the user proceeds to payment.
Setting up a personalized item catalog
To enable personalization:
- Open your project in Publisher Account and go to the LiveOps > Personalization section.
- If personalization is not configured, click Set up personalization.
- Select the Partner side personalization type.
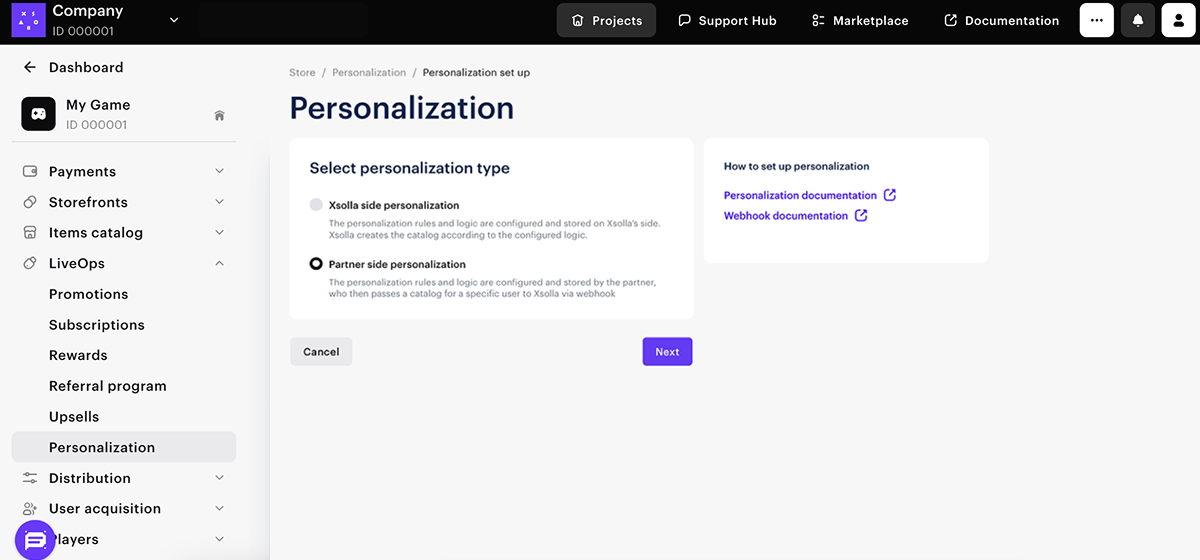
- Click Next.
- Set up item display. To do this, set the corresponding toggles to active:
- Show relevant items to users who haven’t logged in — to display to unauthorized users only the items returned in response to the Catalog personalization on partner side webhook. If the toggle is inactive, unauthorized users see all items in the catalog.
- Get SKUs order via webhook response — to display items to the user in the order you pass in response to the Catalog personalization on partner side webhook. If the toggle is inactive, items are displayed to the user in the order set on the Xsolla side. To set or retrieve the item display order on the Xsolla side, use the order parameter in the Admin subsection from the Virtual items and currency group.
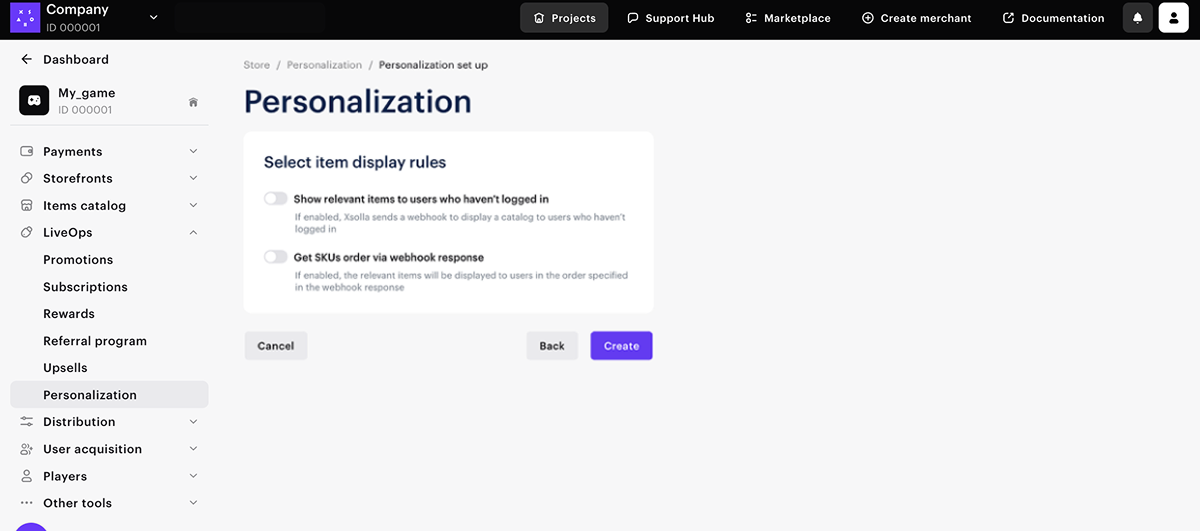
- Click Save changes.
Setting up webhook processing
Xsolla will send a Catalog personalization on partner side webhook that contains the user and project parameters to the webhook URL when a user interacts with the item catalog. Set up webhook processing:
- In your project in the Publisher Account, go to Project settings > Webhooks and enter the URL to send webhooks. This step is optional if you have already set up webhooks.
- You should return a list of item SKUs available to the user in response. In this case, you can also include information that a user can purchase a specific item a limited number of times or only within a certain availability period. This feature allows you to control the number and type of items available to the user.
If item settings include limitations on the display period in the store or the number of items available for purchase, it is important to consider the priority of these settings in relation to the parameters provided in the webhook.
- The purchase limit set in the item settings takes priority over the quantity parameter in the webhook response.
- Exception:
- If the item is available to the user based on the settings, but the webhook response contains
"quantity": 0, the user cannot purchase it.- The display period set in the webhook response, defined by the date_from and date_untill parameters, takes priority over the display period configured in the item settings.
Each request to Xsolla to retrieve the catalog generates a new request from Xsolla to the game server. Xsolla uses data caching to reduce the number of requests to the game server and sends the partner_side_catalog webhook upon the expiration of the cache’s lifespan.
If the cache is not yet complete, the partner_side_catalog webhook is sent with each request to Xsolla. For example, Xsolla receives multiple catalog requests simultaneously and the game server responds with a delay.
Dynamic catalog update
In the response to the Catalog personalization on partner side webhook, you must return item_id or sku of the items created in Xsolla and displayed to the user in the catalog.
By default, a corresponding item in Xsolla must be created for each item in your system. However, you can dynamically update existing items in Xsolla without creating new ones.
With dynamic catalog update, you can:
- Send updated item information instead of the data stored in Xsolla. You only need to create items in Xsolla with minimal configuration — a name, SKU, and price. The item display (such as name, image, description, etc.) is generated on your server at the time of each catalog request. This means you can use a single item SKU in Xsolla for multiple items on your side that have the same price.
- Create an empty bundle in Xsolla and provide the bundle contents from your server at the time of the catalog request.
- You can update item details and/or bundle contents with each catalog request based on in-game events, seasonal offers, or user profile data.
- You can reduce the number of item SKUs stored in Xsolla and lower catalog maintenance costs.
- You can configure local prices for a given SKU and adapt item cost for users in different countries. As a result, the SKU becomes a source of pricing, while the item data and/or bundle contents can vary dynamically if the item is a bundle.
- This approach aligns with Apple/Google platform logic, where content personalization is fully managed by the partner, while pricing and checkout remain consistent across all platforms.
Change personalization type

Found a typo or other text error? Select the text and press Ctrl+Enter.
