
Set up UE4 project
- Open your UE4 project in Unreal Editor.
- For Blueprint projects only:
- Compile your UE4 project.
- Go to the
Content Browser and add aNew C++ Class with theNone parent node.
- Go to
Settings > Plugins > Installed > Xsolla Login SDK . Check theEnabled box and click theRestart Now button to save settings and reload the Unreal Editor.
- Go to
Settings > Project Settings > Plugins > Xsolla Login and specify the following parameters:
- In the
Login ID andDemo Login ID fields, specify the Login ID from Publisher Account. - In the
Project ID andDemo Project ID fields, specify the Project ID from Publisher Account. - Enable
Use OAuth 2.0 option. - In the
Client ID field, specify Client ID received when setting up OAuth 2.0 in Publisher Account.
- In the
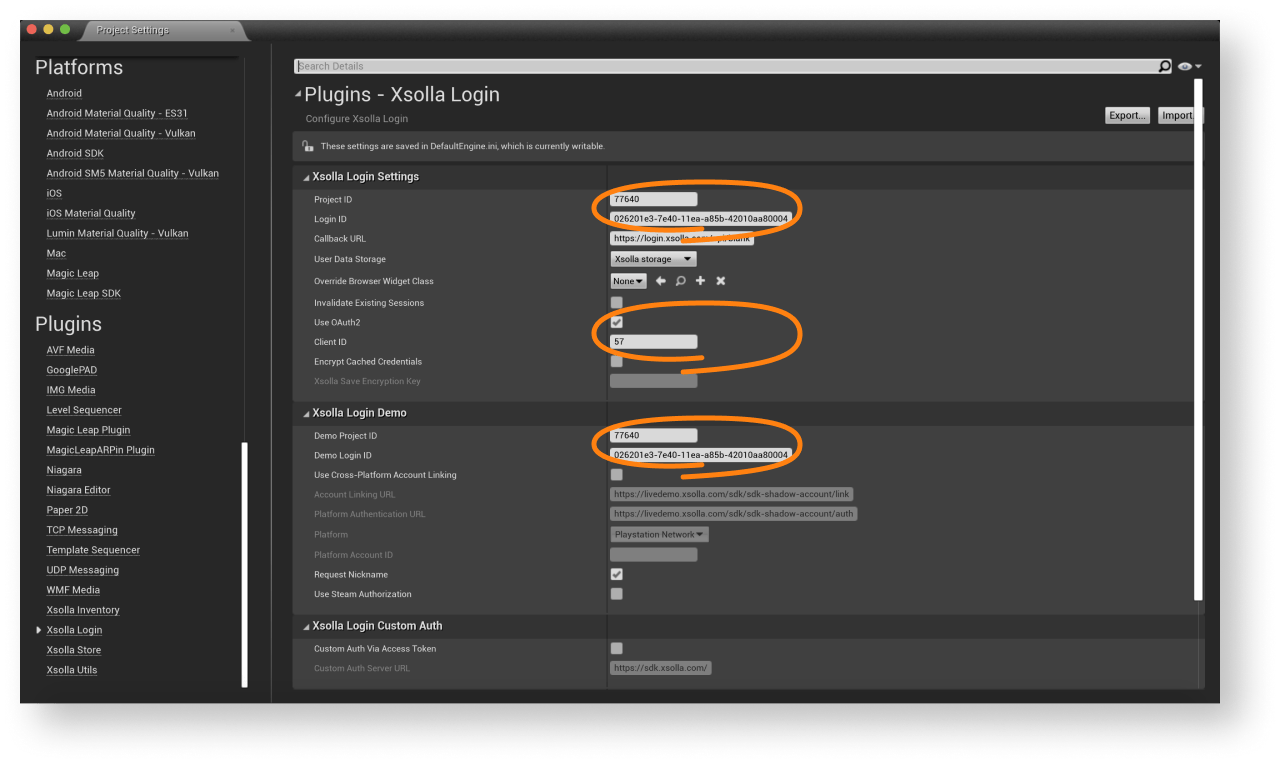
As a result, your project in Publisher Account will be connected to demo maps.
- Go to
Content Browser > View Options and check the boxes forShow Engine Content andShow Plugin Content .
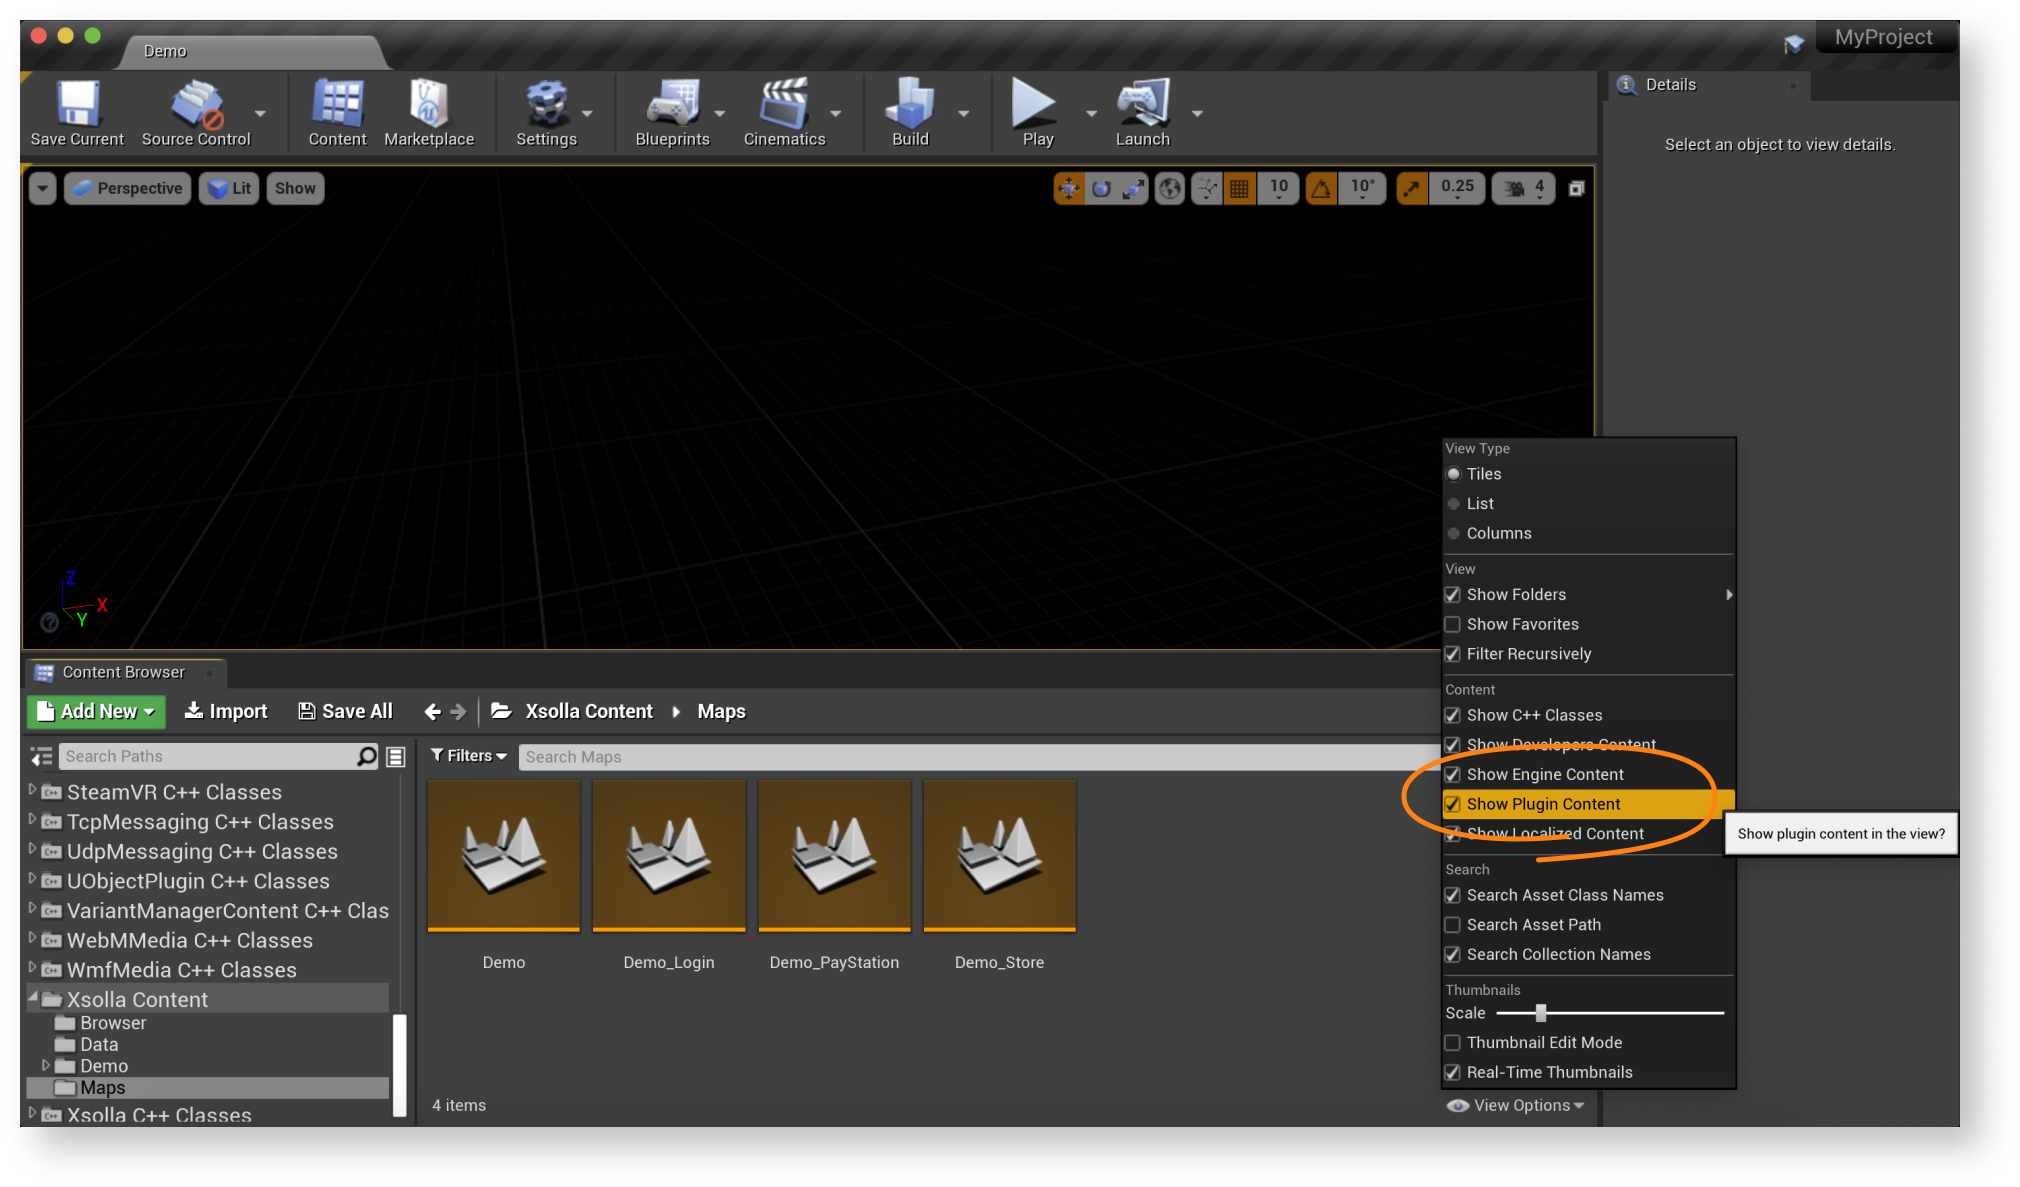
- Go to
Content Browser > Xsolla Content > Maps and launch theDemo_Store map of the game. Make sure that the authorization and other functions are working correctly. - Design an interface for the login system and other pages for your application.
Note
You can create your own solution by following UMG UI documentation, or use the demo scene as a template. To adapt the demo scene interface to your application, use the UI builder.
- Set up event handling according to your application logic using SDK methods. Follow the step-by-step tutorials to get started with basic SDK features.
Note
To modify the SDK for your application specifics, follow the SDK modification instruction.
Was this article helpful?
Thank you for your feedback!
We’ll review your message and use it to help us improve your experience.Continue reading
Last updated:
July 8, 2022
Found a typo or other text error? Select the text and press Ctrl+Enter.
