
Install asset
- Download Unity.
- Pick a personal or professional Unity license based on your preferences.
- Create a new Unity project.
- Download the asset.
- Unzip the package.
- In the Unity editor, go to
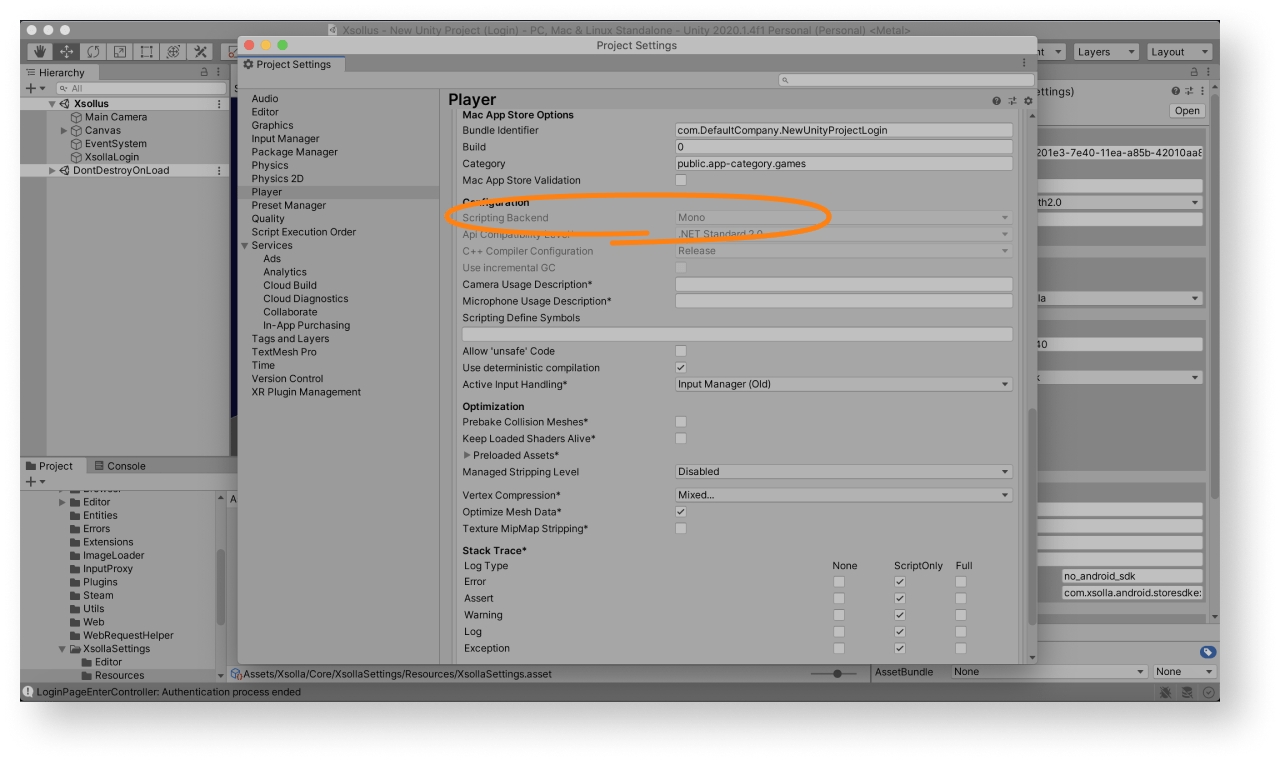
Assets > Import Package > Custom Package in the main menu and select the asset. - Make sure that the Mono compiler is used for creating a game build (for standalone builds only). To do this:
- Click
Edit > Project Settings in the main menu. - Go to the
Other Settings > Configuration section. - Make sure that
Mono is chosen in theScripting Backend field.
- Click
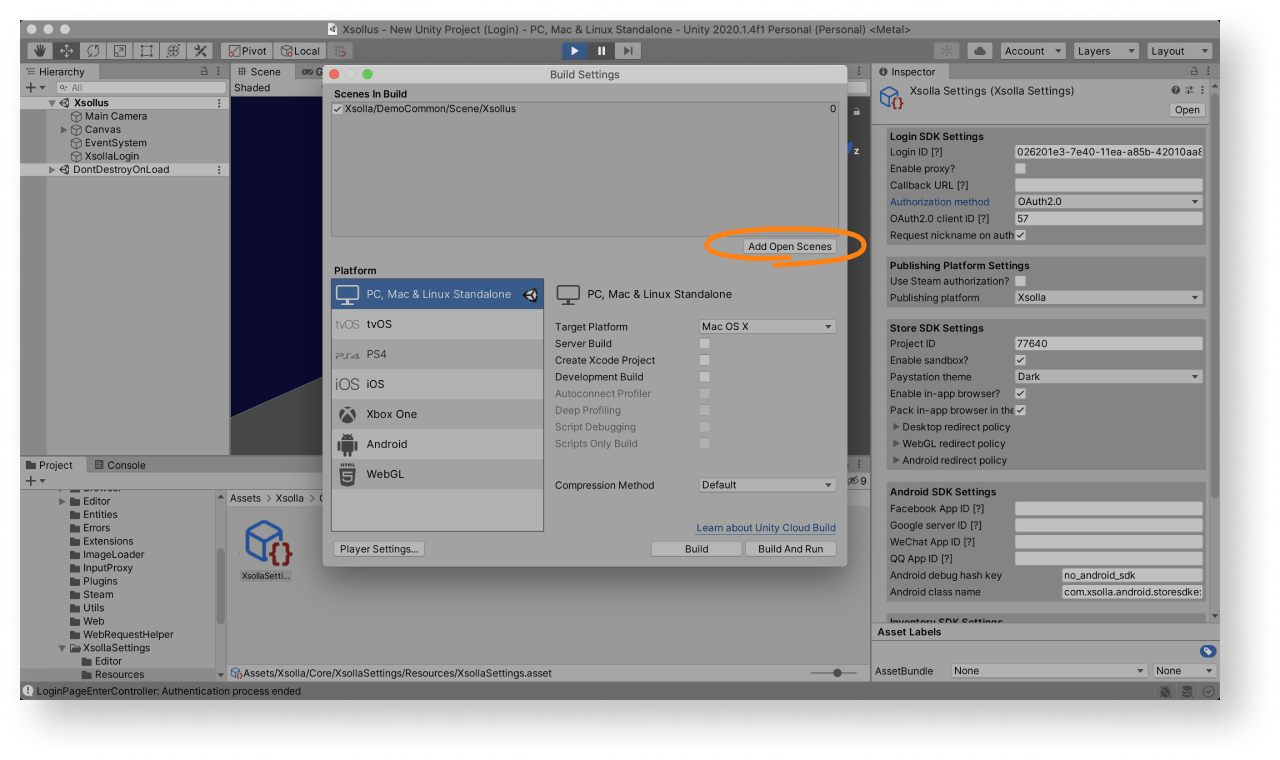
After installing the asset, launch the
For the demo scene, a project in Publisher Account is preset and an in-game store is fully configured.
Default values for the
| Key | Value |
|---|---|
| Login ID | 026201e3-7e40-11ea-a85b-42010aa80004 |
| Project ID | 77640 |
You can use the demo scene in two ways:
- as an example
- as an initial version of the login system, inventory, and in-game store in order to get a quick result and expand its capabilities if necessary
To use the demo scene or its parts in your application, add it in build settings:
- Go to
Assets > Xsolla > DemoCommon > Scene and launch theXsollus scene. - Open
File > Build settings and clickAdd Open Scenes .
Was this article helpful?
Thank you for your feedback!
We’ll review your message and use it to help us improve your experience.Continue reading
Last updated:
March 29, 2023
Found a typo or other text error? Select the text and press Ctrl+Enter.
